
27 May Ultimate Guide To White Background Product Photography
The success of your eCommerce business significantly depends on the images you use for showcasing your products. This is a key factor that can make your sales skyrocket or fail to gain the interest of your target audience.
You need to choose the right background to enhance the visual impact of your products. But how do you know which one will be the best one for your product?
You can use white background, the most popular and trending background in eCommerce platforms. This versatile and classic background goes with any type of product. It provides a clean and organized appearance, making your products look more appealing to potential customers. Moreover, you can meet industry standards too.
Let’s explore product photography technique on white background!
Why is White Background Product Photography Important?
White background product photography is considered the gold standard in eCommerce industry. Whether it is a small or large company, everyone prefers this photography style to showcase their product. Moreover, larger platforms, such as Amazon’s product image guidelines recommend using a white background for the main product image.
So, why should you use white background for product photography?
- Products on white backgrounds look professional.
- Distractionless white background makes the product the center of attraction and highlights the fine details.
- White background helps to bring out the original color of the product by preventing color cast.
- Lights get reflected properly in a white background setup. For this reason, you can get bright and clear images.
- White background makes it easy to edit the photographs or remove the background.
- This image style can be used on a variety of marketing platforms, such as social media, websites, newspapers, banners, magazines and other print media.
- You can maintain a consistent brand image by using white backgrounds for all your products.
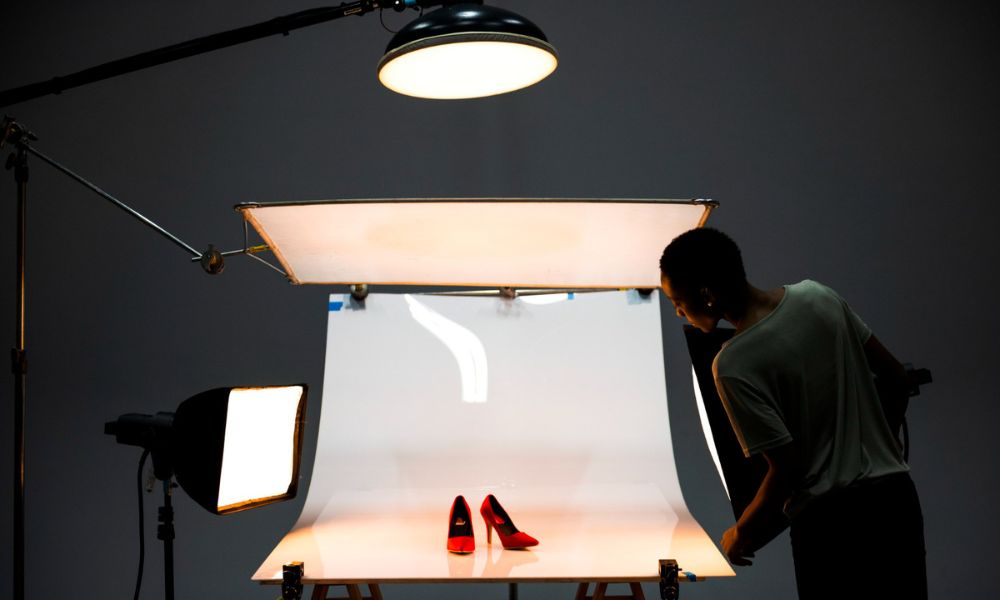
Equipments Needed for Shooting Product Photography on White Background
Do you want to take professional-quality photos? Then you will need the following equipment for capturing high-quality product images that represent your product accurately.
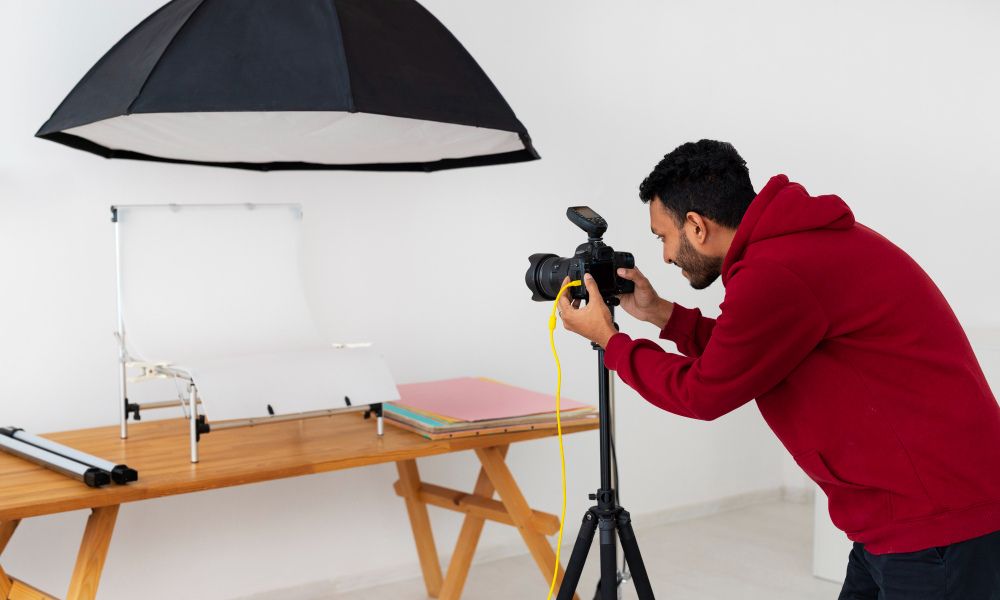
Camera
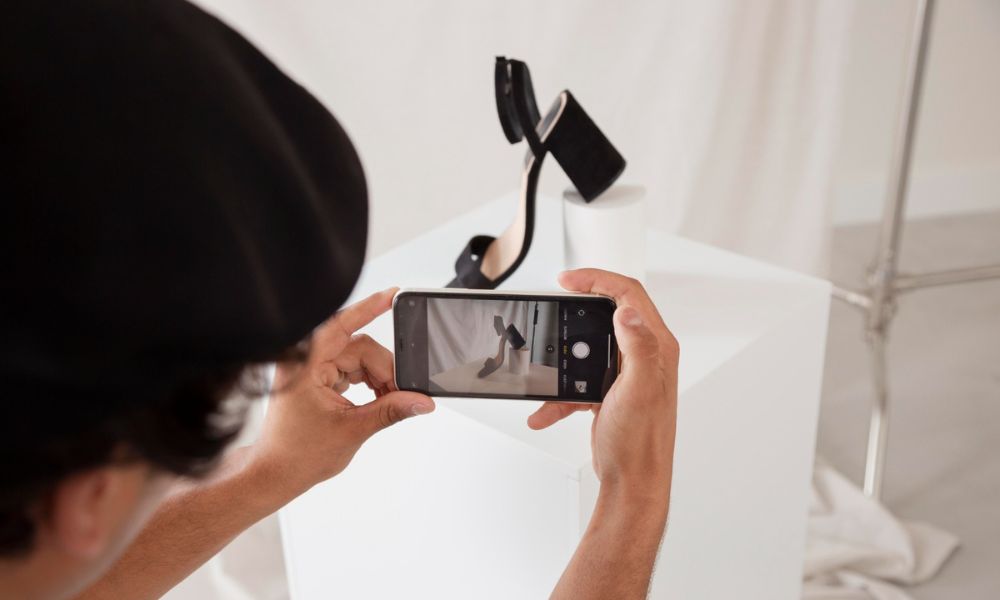
You need to use a high-quality camera to capture the best white background product photos. Usually, professional-quality product photography for commercial purposes is shot using a DSLR or mirrorless camera. Their high-resolution and large sensors are the best at capturing the fine details, accurate colors and textures of the products.
Some of the best cameras for product photography are the Sony A7 IV, Canon EOS R10 and Panasonic Lumix G85. You can also use smartphones with high-resolution cameras if you are on a tight budget.
Tripod
You may need to use different photography techniques to capture clear and sharp images. For that, you need a stable camera. Unfortunately, you cannot ensure the stability of your camera if you operate it handheld. A subtle movement because of breathing or shaking hands can change your focus or make the images blurry. Hence, you must set your camera on a tripod to reduce the risk of any movement.
However, make sure the tripod you use is strong enough to bear the weight of your camera and lens.
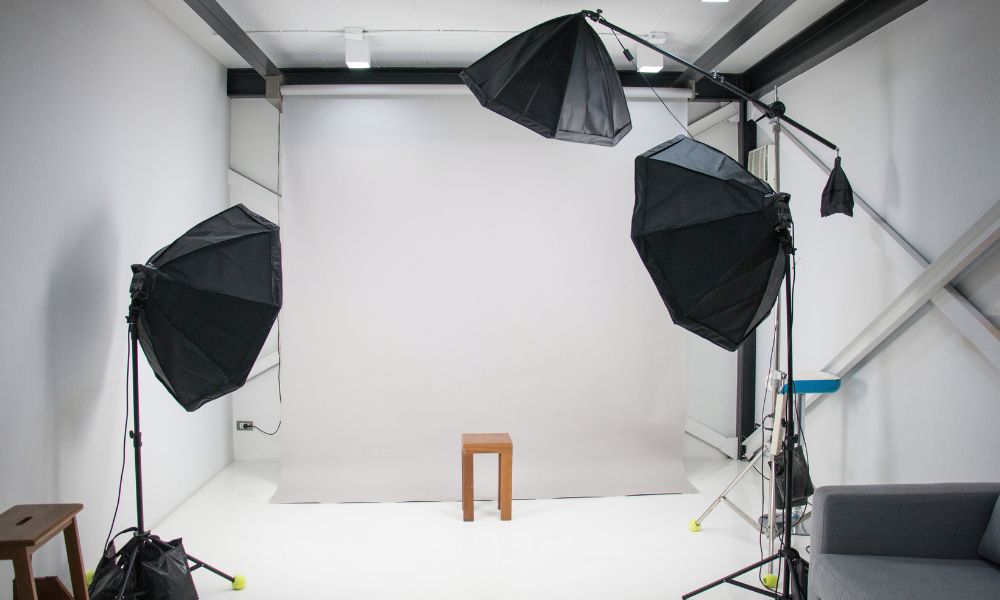
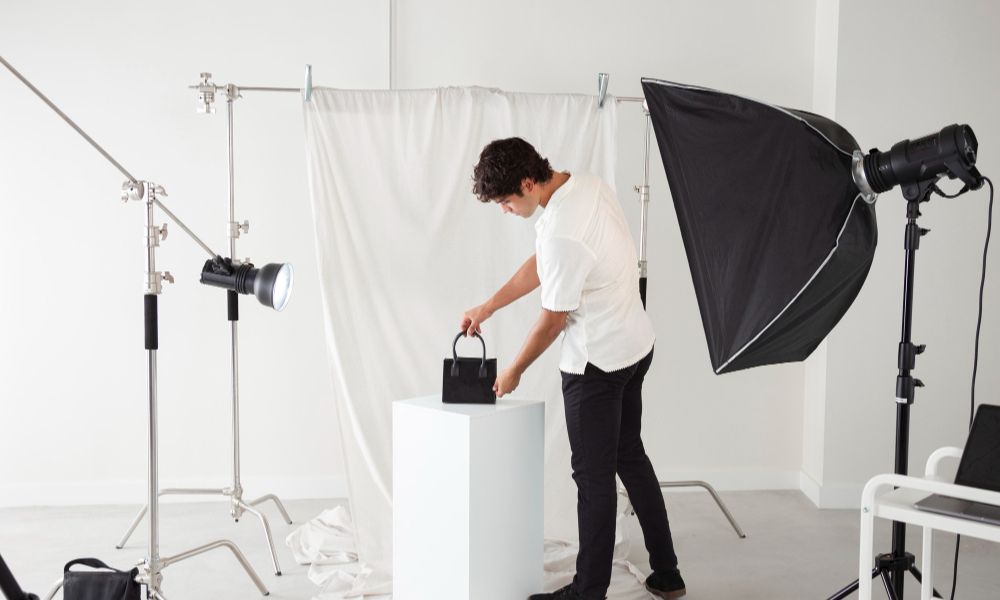
Lighting Equipment
The main lighting equipment you need is a light source. You can use natural light or artificial light, such as bulb, LED, strobe and so on. Although natural light is great for its soft and diffused look, artificial light gives you complete control over your lighting setup.
You need some common equipment, such as reflectors and diffusers as well. Reflectors can bounce back light to make the whole setting properly illuminated. In addition, diffusers soften the light and reduce the harsh shadows. You can use umbrella diffusers and professional-quality reflectors from Amazon to give your setup a studio-like appearance. Besides, foam boards and sheer white clothes are great DIY alternatives.
White Background
The most essential element you need for white background product photography is a white backdrop. The right background for the shoot depends on the size of your product and photography techniques.
For a flat-lay shoot, you can set your product on a white backdrop. On the other hand, for three-dimensional products such as shoes, handbags or electronic devices, you will need a white backdrop as well as a white base. There are various background options available.
Let us move on to our next section to find out more about them.
Different Types of White Background
White background product photography is one of the most hassle-free photography techniques. You don’t need a professional photo studio for the shoot. Instead, you can do it at home or in the office if you have the background and other photography equipment with you.
The following are the different white background options you can use depending on your product size and shooting budget.
Seamless White Paper
Seamless white papers are mostly used in a studio setup. You need a backdrop stand to hang this big roll of paper. This backdrop is ideal for shooting both small and large size products. The long roll of the backdrop provides a seamless appearance when you extend and set it on the floor. Moreover, it is a cost-effective option if you consider its size and quality.
The smooth and non-reflective surface of this background can distribute light evenly. You can also use them multiple times. All you need to do is tear off the damaged portion and roll out the fresh portion of the backdrop.
However, its biggest drawback is that you can use it to shoot only dry products and have to store them cautiously. Since it is just paper, humidity or a water spill can damage it. Also, walking on it can create spots and creases, especially when you use it for model product photography.
White Fabric
You can use white fabric as an alternative to seamless white paper. A white curtain will be an ideal one for its length. You can extend it to the base to create a seamless background. Its setting process is exactly the same. You can hang it on a stand and secure it to the floor with double-sided tape. This will keep the backdrop in place. Keep in mind that fabric wrinkles easily. So, make sure to iron them before the shoot.
Since light can pass through sheer fabric, make sure you choose a thick and opaque curtain. This will prevent light from passing and ensure a bright background. Moreover, you can use it for a long time repeatedly without worrying about wear and tear. If it gets dirty or stained, you can wash it to make it look new again.
Foam Board
A foam board is one of the most common DIY white backgrounds for product photography. This foam board is covered by paper on both sides. For this reason, white paper sheets remain in place. You can use it to shoot small products such as jewelry, watches or food items. This is available in stationery shops in different sizes. You can easily set this as a backdrop against a wall or on a table.
This one is the most cost-effective option among the white backdrops. You can carry these lightweight foam boards anywhere. Although they are less durable compared to thick curtains or seamless paper, you can reuse them multiple times if handled with care.
V flats
There are also foam boards that can be used as a backdrop for larger products. These foam boards are known as V flats and are mostly used in professional photo studios. V-flats are stronger compared to regular foam boards. You can place them in a V shape.
Hence, to create a seamless backdrop, you can use it as both a backdrop and a base. However, these large foam boards are difficult to carry and also not available in local craft stores. You have to order them online.
White Wall
Do you want a white background free of cost? A white wall can be a good option for you. This is common in every house and office. You can use an empty white wall as your backdrop. But it is not the most ideal one, as walls may have various issues like texture, stains and many more.
You may need to repaint the wall to remove visible imperfections. Also, you need to ensure the colors are evenly painted on the wall. This is necessary for the lighting setup. Your background will not look completely white if some of the areas have problems with the painting. So, if you have a perfect white wall, you can use it. Otherwise, consider other options.
Lighting Set Up for White Background Photography
You need a proper lighting setup for capturing bright, clear and sharp images. Lighting setup is a bit tricky for a white background, as an improper position of light can create shadows. Also, using excess light can make the images too bright, resulting in washing away product details.
Here are a few lighting setup techniques you can use for white background product photography.
Single Light Source
You can use one light source for capturing small products in a small photography setup. LED or high-intensity bulbs can be used for this setup. Position the light source in such a way that the light falls on the product, not directly on the backdrop. Make sure to set up a diffuser in front of your light to make the rays soft and diffused. This will prevent the casting of harsh shadows.
When you use one light source, chances are that it will not be able to create a uniform brightness. For this reason, you have to set reflectors in the opposite direction of your light source. So, when light falls on the reflector, it will reflect the light to make the whole setup evenly filled with light.
Multiple Light Source
You can use two or three light sources as well. For a two-light source setup, you have to position two light sources on the two sides of the product. This will make the product appear clear from both sides. And for the three-light source setup, you can use the third light as the background light.
Sometimes, the background might not appear evenly bright. This happens due to a lack of light or the casting of shadows. Background light can solve this issue and make the background well-lit. Make sure you keep a few inches of distance between the backdrop and the product, and place the third light in that gap. This will prevent shadows and make the background look bright and white.
Effective Tips for Stunning White Background Product Photography
Do you want to know the secret to jaw-dropping product images on a white background?
Here are a few white background product photography tips to master this photography technique.
Keep Your Audience in Mind
You should consider your target audience before capturing the photographs. Product engagement and conversion rate depend on your audience’s preferences. Mature audiences prefer minimalistic and simple product images. On the other hand, younger potential customers love to see creative product shots.
Research your target customers to gather information such as their age, gender, location and education level to understand their preferences. This will help you to tell a story with your product images that they can relate to themselves.
Ensure Clean Backdrop
You must keep your white backdrop clean, as even small spots, marks, or dust particles will be clearly visible in your photographs. These subtle flaws will act as unwanted elements that can take away the focus from your product as well as create questions on the quality of your product.
Another advantage of having a clean backdrop is that you won’t have to waste time and effort fixing these minor issues during post-production.
Use a Good Quality Camera
Image quality is one of the most important factors customers consider while purchasing products online. A high-resolution camera can be a great investment for your photography career. Although you can take the shots with your smartphone, the image quality will not be comparable to a professional DSLR or mirrorless camera.
Hence, use a high-quality DSLR or mirrorless camera to capture clear product images highlighting the fine details.
Maintain Color Accuracy
Mismatched color is one of the common reasons for product returns. For this reason, you need to maintain color accuracy to gain the trust of your target customers and satisfy them.
You should set a proper white balance to match your light source. Moreover, you need to make sure your background and props do not create color cast onto your product. It’s recommended to remove shiny and reflective elements from the photoshoot setup.
Take Shot from Unique Perspectives
Every product has some unique details that look the best from specific perspectives. Trying out various perspectives is a great technique for capturing creative product images. You should experiment with angles and perspectives to highlight the best features.
For example, photographing a pair of shoes from a low angle can emphasize their design and detail. However, a top-down view can showcase the overall shape and color.
Be Careful of Overexposed Background
Excessive light on your backdrop can make your images look overexposed. This can give your images a washed-out effect and make the fine details invisible. For this reason, you need to ensure a balanced backlighting to avoid making the background appear either too bright or too dark.
How to Create a White Background in Photoshop?
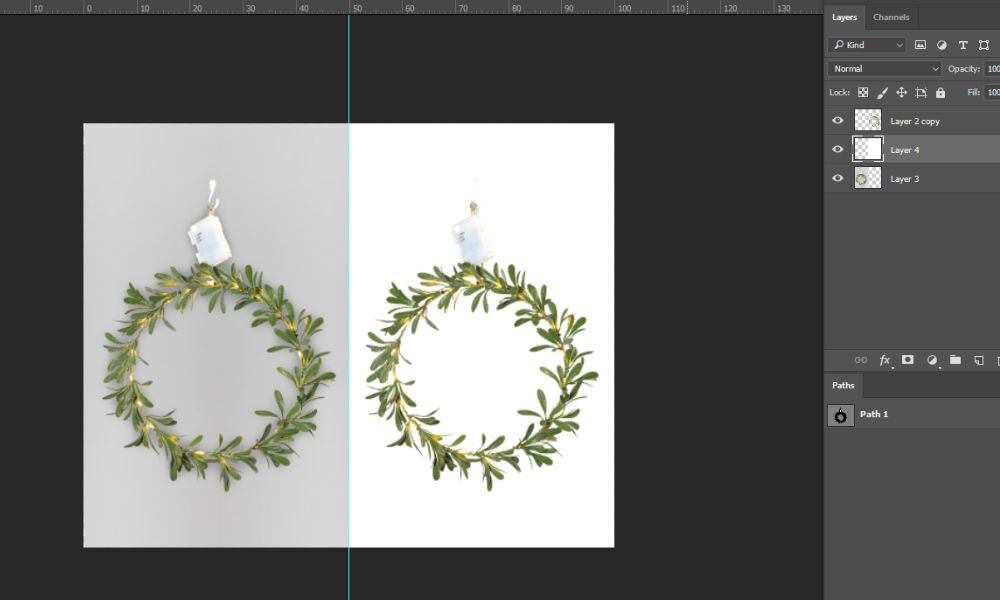
You don’t need a white background photoshoot setup for white background product photography. Yes, you heard that right! You can achieve a perfect white background with Photoshop. However, you would need some basic photo editing skills.
First, you must capture the shot properly. You can take the shots on any background. But make sure your product is clear and bright in the photos. Now that you have the photo, follow these guidelines step-by-step to create a white background.
Step 1: Open the image in Photoshop
First, open the image file in the ‘Document window’. Go to the menu bar. Click ‘File’, and then select ‘Open’. You will get the option to choose the image from your device. Browse through your image files and select the image you want to create a white background.
Step 2: Create Duplicate Layer
You can create a duplicate layer in multiple ways. The easiest way is to click on the ‘Background’ layer and drag and drop it onto the new layer icon. You can also do it by right clicking on the ‘Background’ layer and selecting ‘duplicate Layer’.
Step 3: Select Your Product
For auto selection, you can click on ‘Select’ from the top menu bar and then select ‘Subject’. You may not get a precise selection in this process. So, it’s best to use selection tools like the selection tool, magic wand tool, lasso tool or pen tool for the perfect selection.
Step 4: Create Layer Mask
Then select your duplicate background layer and click on the mask icon below to create a layer mask.
Step 5: Change Background Color
Now, select your original background layer and click on the ‘Adjustment’ icon. Choose the ‘Solid color’ option and select white color. This will create a new layer in between the original and duplicate background layers. This process will replace your original background with a white one.
Step 6: Save the Image
Go to ‘file’ to save your final white background image.
Post-Production Tips for White Background Product Photography
Your raw images will always have issues with color, brightness, sharpness and other elements that need adjustment to meet professional standards. The following are a few white background image editing tips to make your product photographs look professional and high-quality.
Do the Basic Adjustments
White background product images may have some basic issues with the contrast, exposure, saturation, highlights or shadows. You can fix these issues from the adjustment panel in Photoshop. Increase or decrease the values of these settings to make the products look true to life and enhance the overall appearance of the images.
Eliminate Distractions with Precision
You should zoom in on the photographs during editing to identify the distracting elements precisely. These elements, such as spots, scratches, pet hair, dust particles or reflections can be on the backdrop as well as on the product’s body. You can use healing brush, clone stamp or content-aware fill tool to fix these imperfections and make your images flawless.
Improve Clarity
Customers checkout the sharp details before purchasing products online. For making these fine details more prominent, you can use the ‘Sharpen’ filter in Photoshop. This tool can adjust the sharpness of your images and enhance the clarity. However, make sure not to overdo it. Otherwise, the images may become grainy due to the increase in noise.
Create Backups
You should never do editing on the original image file. Make sure to create duplicate copies for editing. Oftentimes, you may delete image data during editing or feel like re-editing the photos. You can do the editing again from scratch if you keep the original image files as backups.
Incorporate Shadow
Shadows are a natural feature that makes products look more realistic in images. Product images without any shadow lack depth, context and a sense of dimension. For this reason, such types of images look artificial and unattractive. You can use the ‘Drop Shadow’ tool in Photoshop to create shadows.
However, natural shadow creation required advanced level photo editing skills. It’s best to use shadow making services for professional-quality realistic shadows.
Common Challenges and Their Solutions
Every photography technique has some unique challenges and white background product photography is no exception. Don’t worry. We are here with solutions to all the common challenges. Let’s explore them.
Challenge 1: Uneven Lighting
Your white background may look dark or have shadows if your lighting isn’t evenly distributed.
How can you solve this issue?
You can use softboxes, diffusers, or umbrellas to spread light evenly. Moreover, you can position your multiple light sources at equal distances to create a balanced exposure.
Challenge 2: Color Casts
Reflection from your colorful products or things near the shooting setup can create color casts on your white backdrop.
How do you solve this problem?
Make sure to remove reflective color items from your shooting setup. You can use a white or gray card to adjust the white balance to match the lighting conditions.
Challenge 3: Background Not Completely White
The background may appear dusty white, faded or gray sometimes. For this reason, you may not get a pure white background.
How can this be resolved?
You can use backlight to add more light in the background. This problem can be fixed during post-production as well.
Challenge 4: Product Blending with the Background
Your product may appear to blend with the backdrop if the product itself is white or a light color. In this case, the details of the product might not be visible.
How can you fix this issue?
You have to create a visual separation between the product and the backdrop. You can place a light source behind the product to create a halo effect. Soft shadows can help the edges of the product appear sharp and defined. You have to adjust your lighting setup position and angles to cast this soft shadow.
Challenge 5: Reflections and Glare
The issues with reflection and glare are common in the case of shooting glass or metal items. Their smooth bodies reflect light and create a harsh glare.
What can you do to resolve this problem?
You can change the angles of your light sources to minimize reflections. Besides, diffusers can be used to make reflections softer. You can also use a polarizing filter on your lens to reduce the effect of glare.
Challenge 6: Wrinkles or Imperfections
Wrinkles, creases or spots in the backdrop can decrease the visual appeal of the image. It can take the focus of the customers away and make the images look unprofessional.
How do you address this issue?
You can use seamless paper, as this has less chances of getting wrinkles. You can also tear off the wrinkled part to make the backdrop fresh and clean. However, for the fabric backdrop, make sure to iron it properly. After all these preparations, if your backdrop still has flaws, you can take help from photo retouching service provider to fix the problems.
Frequently Asked Questions
What is product photography on a white background?
Product photography on a white background is a popular commercial product photography technique. Products are placed on a white base or in front of a white backdrop. This type of product image is considered the standard for eCommerce platforms, such as Amazon, for its simple and clean look.
Which background is best for product photography?
A pure white background is considered the best for product photography. You can use this image on both eCommerce and social media platforms. The white color is considered the symbol of professionalism in the online marketplace. This simple and distraction-free white background keeps the focus on the product and makes it stand out.
Why does my white backdrop look gray?
Your white background may look gray due to several reasons, such as the background not getting enough light, incorrect white balance or shadows. You can fix this issue by using backlight and reflectors to make the backdrop well exposed. This will reduce shadows and make the background appear bright and white. You can also use a gray card to adjust the white balance settings on your camera.
What is the best lighting setup for a white background?
The best lighting setup for a white background is to use multiple light sources, including backlight. You should set two key lights at 45 degrees on two sides of your product. This will make the product look bright and clear from both sides. Set a backlight to ensure your background looks bright white. You should also use diffusers and reflectors for a soft and even lighting setup.
Conclusion
Stunning product photos are the key to converting your potential customers into loyal ones. You can make your products appear high-quality and professional with a white background. This simple backdrop can make your products pop and drive sales.
White background photography may seem challenging at first, but it’s a skill worth mastering. Implement the insights you have received while practicing this technique. With time and effort, you can definitely achieve professional-quality results.