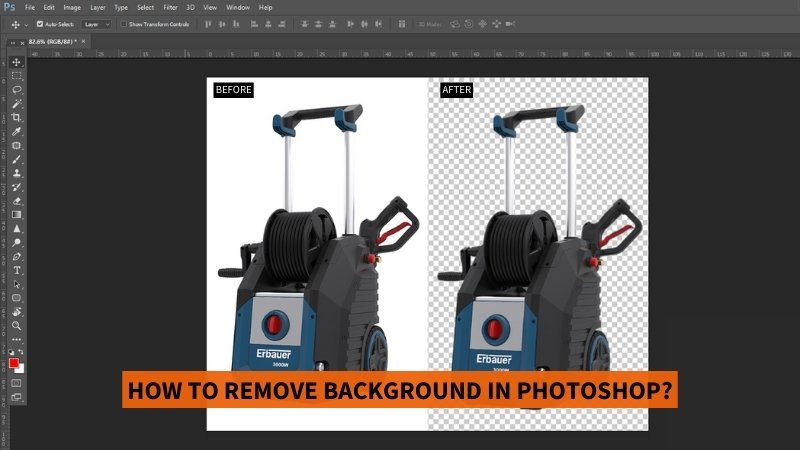
22 May How To Remove Background In Photoshop: 5 Best Options
There are numerous apps and websites available that offer the automatic background removal feature. AI vs Manual which one do you think gives you the best results?
Obviously, the manual one! Whether you want to replace your background with a white one or use the subject for other purposes, removing background has become a necessity these days. Although automated background removal can save you a lot of time, you can get higher-quality images if you edit them yourself in Photoshop. That too in a very short period of time!
Want to know how to remove background in Photoshop? Today, we’ll walk you through 5 easy ways to remove backgrounds in Photoshop with step-by-step guidelines.
Let’s get started.
Different Types Of Tools To Remove Background In Photoshop
There are several background removal techniques in Photoshop. The following are detailed guidelines on how to remove background in Photoshop using 5 popular tools.
Magic Wand Tool
Our first background removal technique is using the magic wand tool. This is a selection tool in Photoshop. When you use this tool to select an area, it will automatically select other areas that have a similar color and tone. This tool works great for simple shapes and backgrounds, especially when there is a strong contrast between the background and foreground. It’s worth mentioning that, this tool is not suitable for removing background where the foreground element has sharp edges.
How to Remove Background in Photoshop Using Magic Wand Tool?
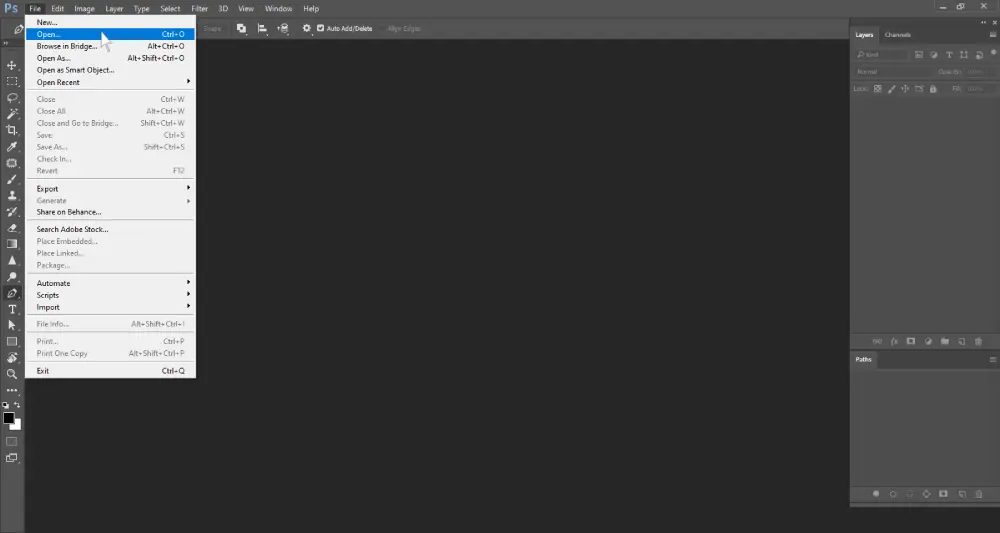
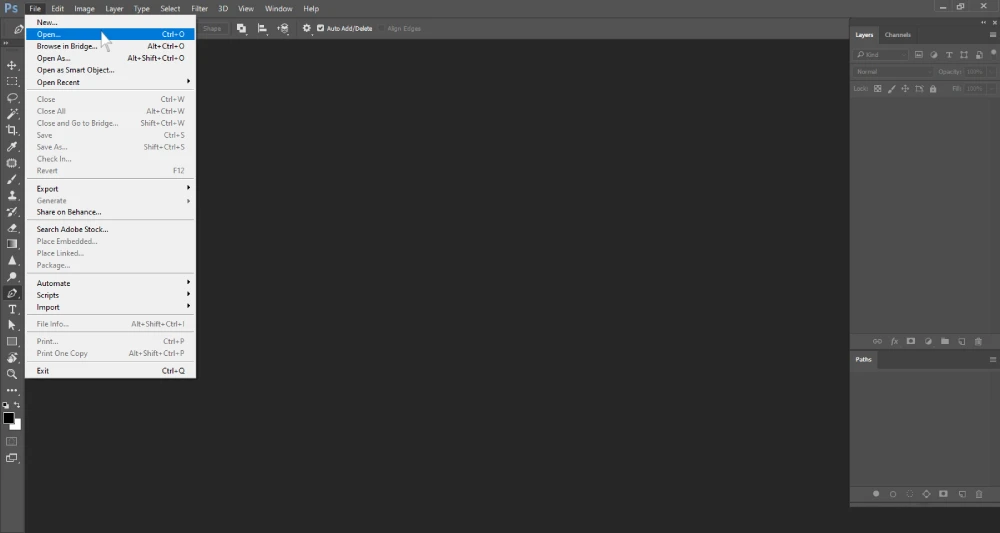
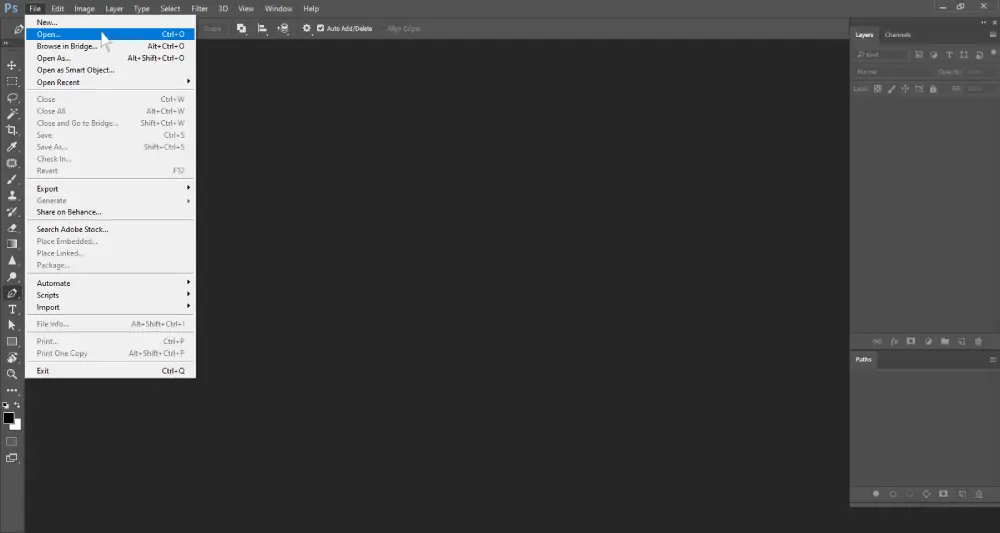
Step 1: Open your image file in Photoshop. Go to ‘File’ in the top menu and select ‘Open’.
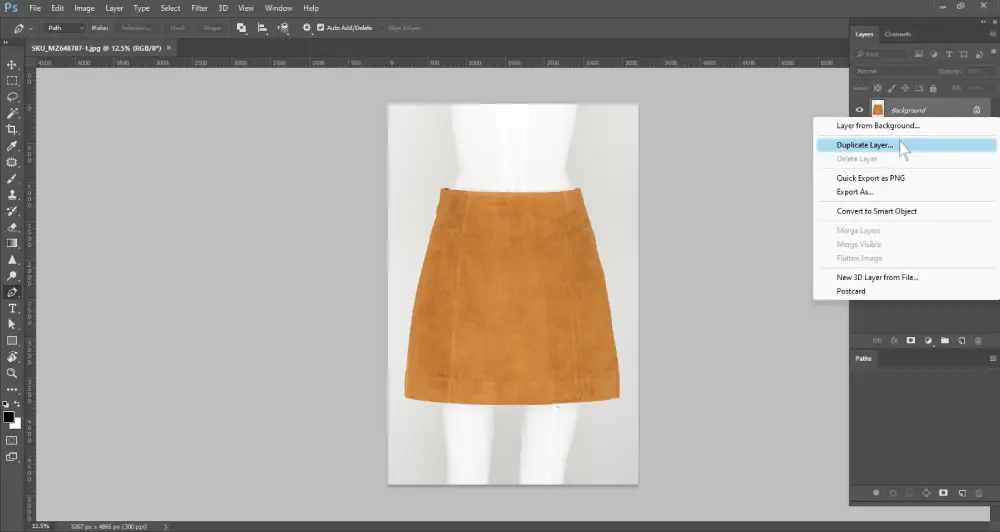
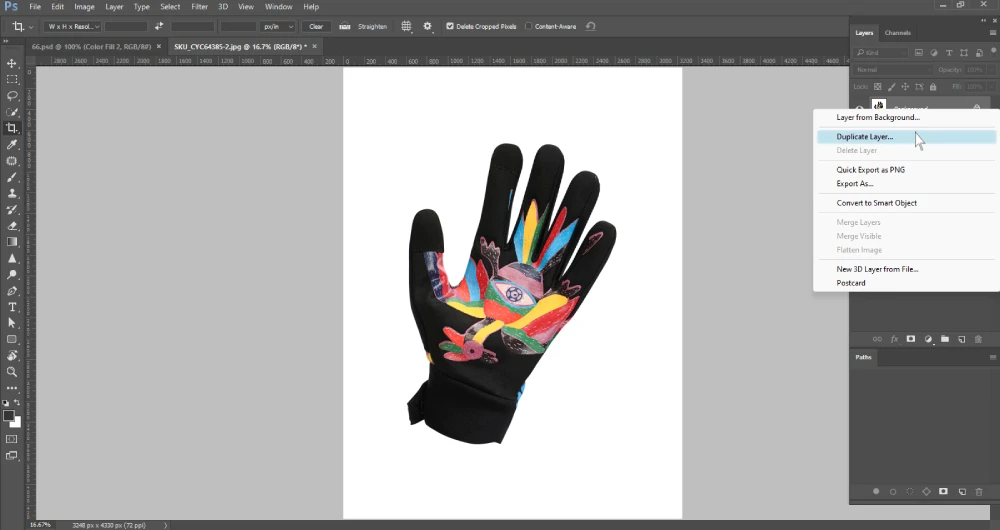
Step 2: Click ‘Background’ layer and drag it to the ‘Create a new layer’ icon. It will create a duplicate version of your image. Click the layer visibility icon of the background layer to make this layer invisible.
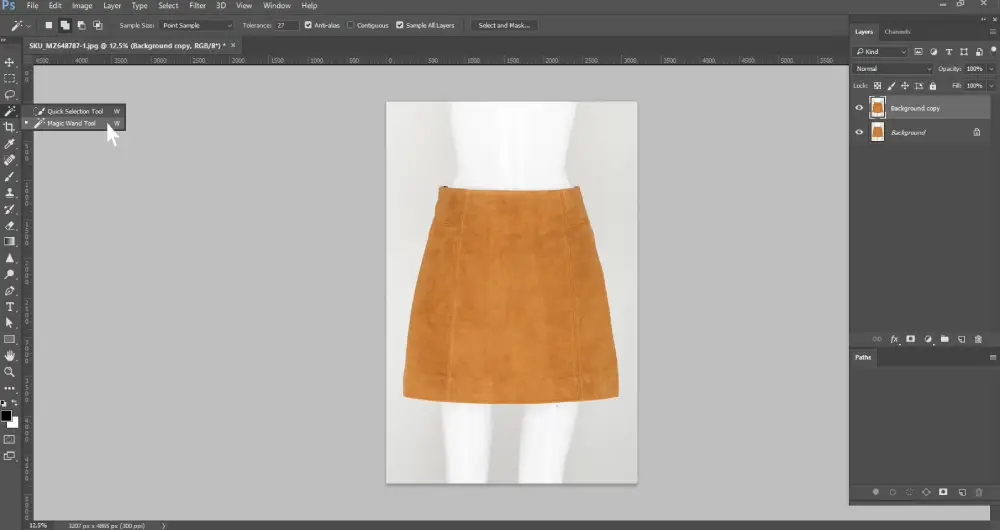
Step 3: Go to the ‘tools panel’ located on the left side (Photoshop default workspace). Right-click on the fourth icon to expand the tool submenu. Then select the ‘Magic Wand Tool’.
Step 4: Now click the background you want to remove. If the tool selected the background partially, go to the top menu and adjust the ‘Tolerance’ setting. Change the tolerance value and select the background. You may have to do it multiple times until the tool selects the entire background.
You can choose an area manually if the tool is unable to select it. Go to the magic wand tool in the top menu and click ‘Add to selection’. Zoom in and click to select the areas precisely.
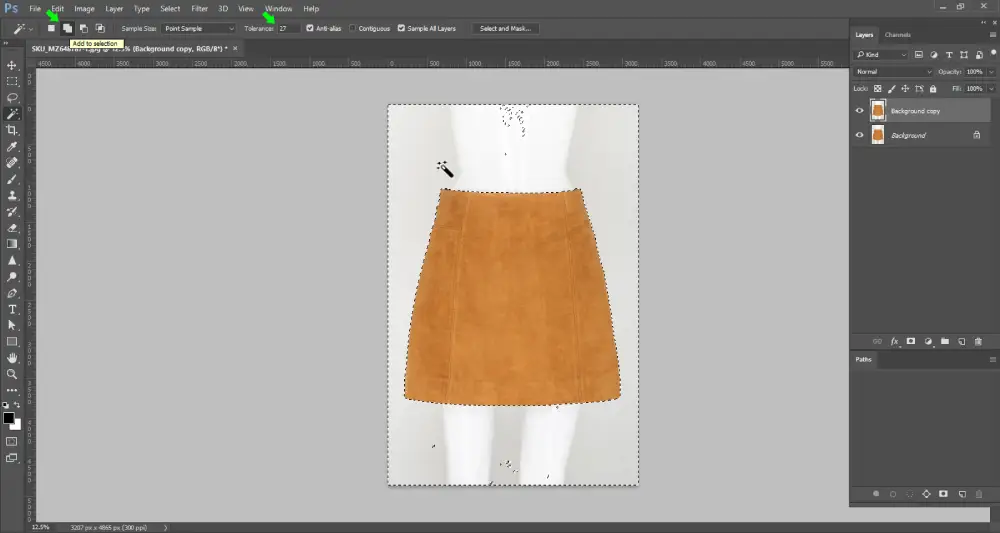
Step 5: From the top menu bar, click on the ‘Select’ drop-down menu. Then click on ‘Select and Mask’. Your image will have two areas. The checkered white portion is the removed portion.
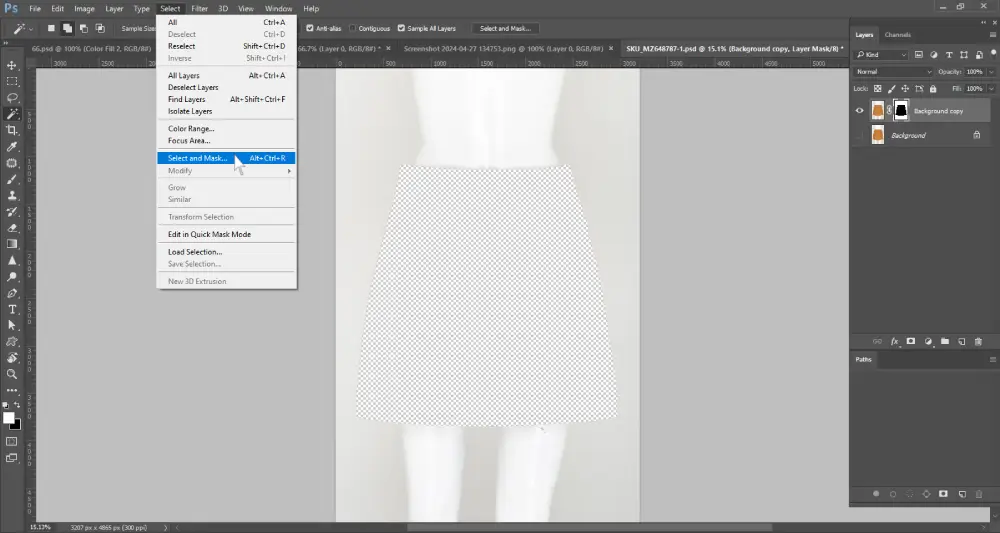
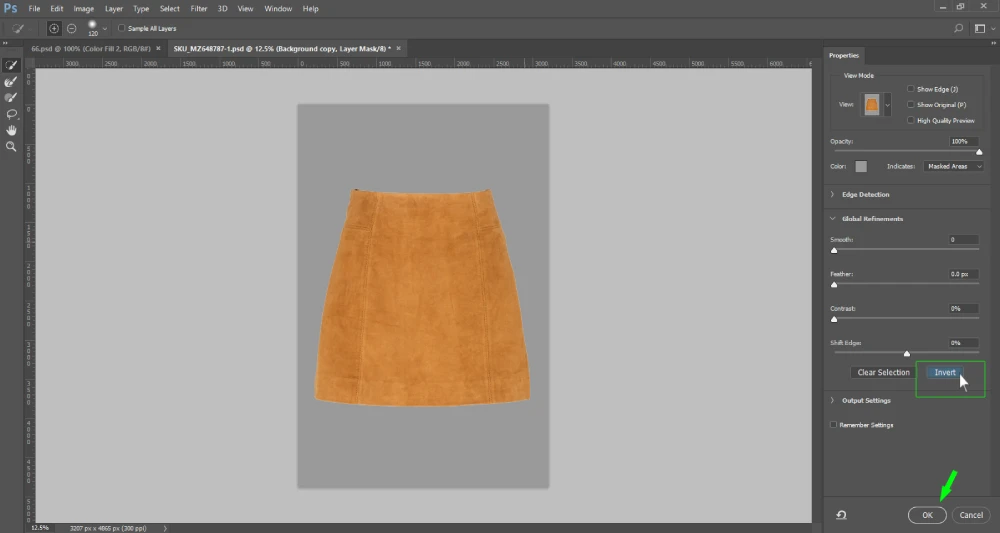
Step 6: If your foreground gets removed or masked because of the selection, go to the right menu. Scroll down and click on ‘Invert’.
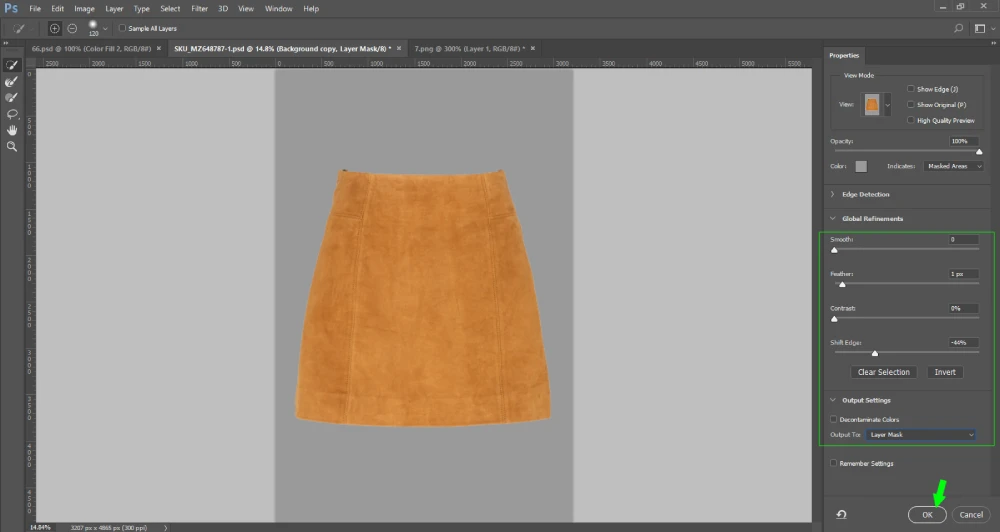
Step 7: If the edges still have the background color, you can fix it. In the right menu, under the ‘Global refinement’ option, adjust the ‘shift edge’ and ‘Feather’ values for a clean edge. Then scroll down, click ‘Output’, select ‘Layer Mask’, and click the ‘ok’ button.
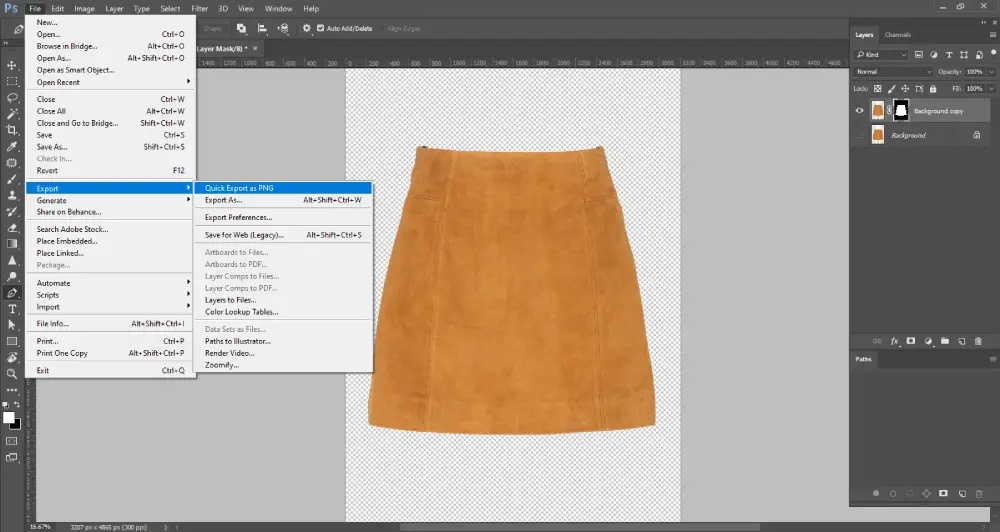
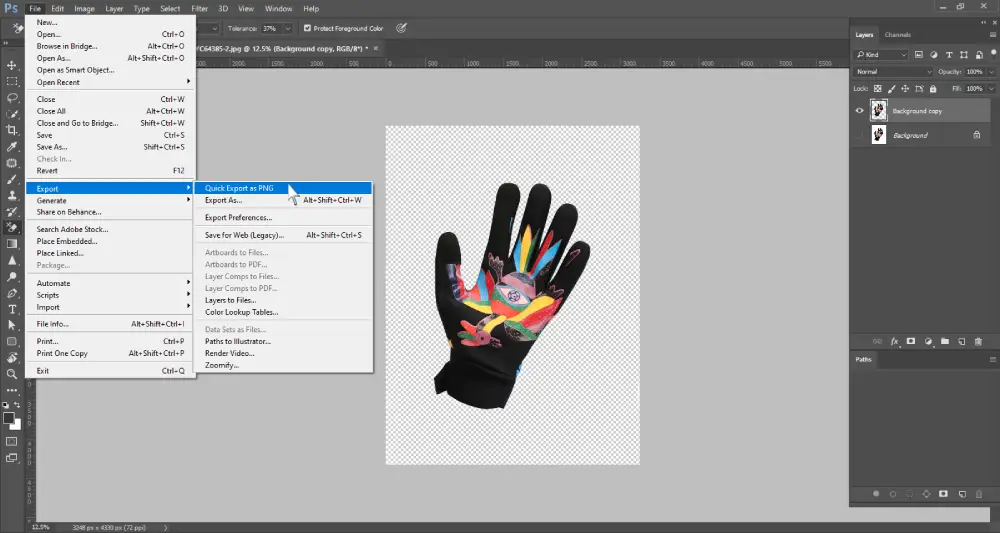
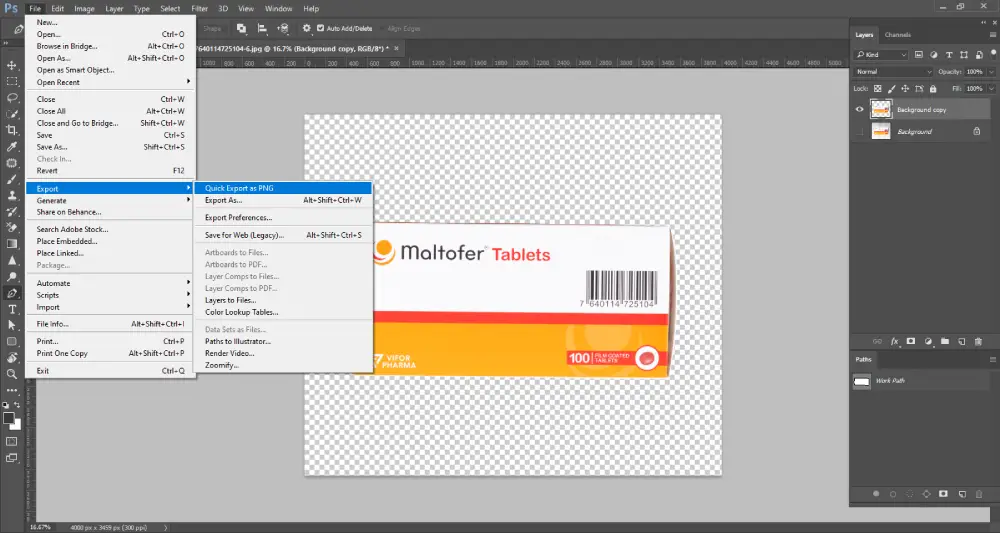
Step 8: Now, to save the image, go to file, click ‘Export’, select ‘Export As’. Set the format and click on ‘Export’ to save it.
Quick Selection Tool
The quick selection tool is another selection tool in Photoshop that can be used to cut out background. This tool can identify pixels containing similar colors. So when you select an area using this tool, it selects the other areas too, like the magic wand tool. This tool is best for removing background from images that have clear edges and high contrast between the subject and background.
How to Remove Background in Photoshop Using Quick Selection Tool?
Step 1: Open the file in Photoshop
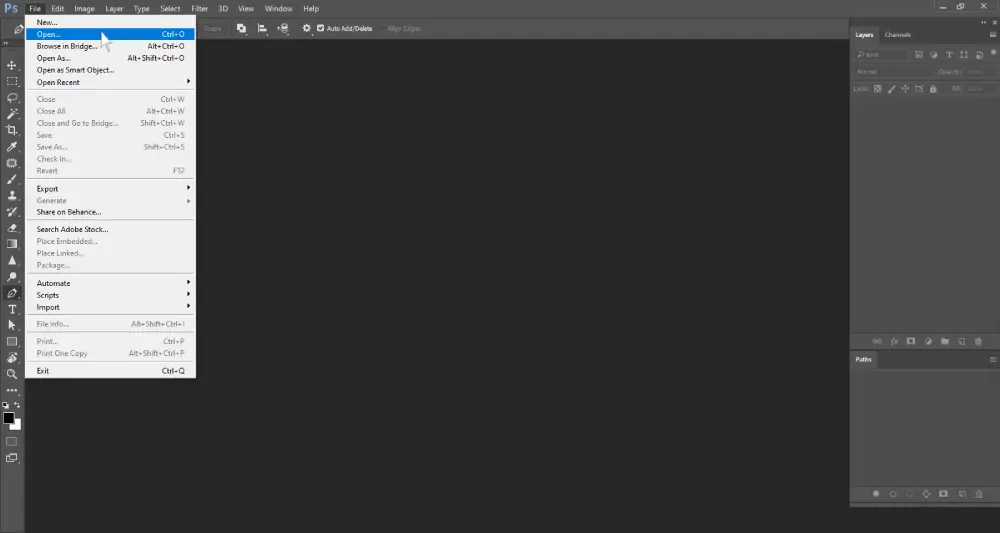
Step 2: Create a duplicate layer as mentioned in the previous technique.
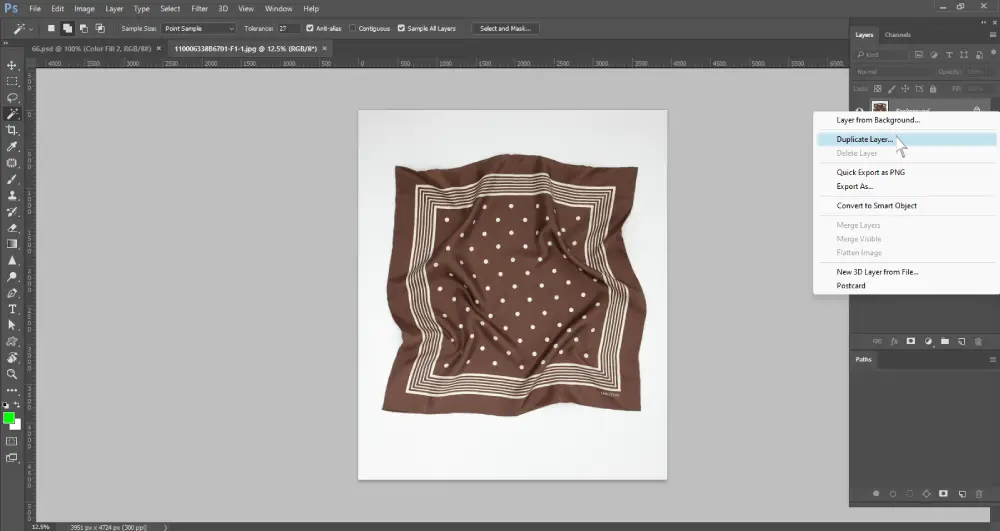
Step 3: Right-click the fourth icon in the ‘tool panel’ and select the quick selection tool.
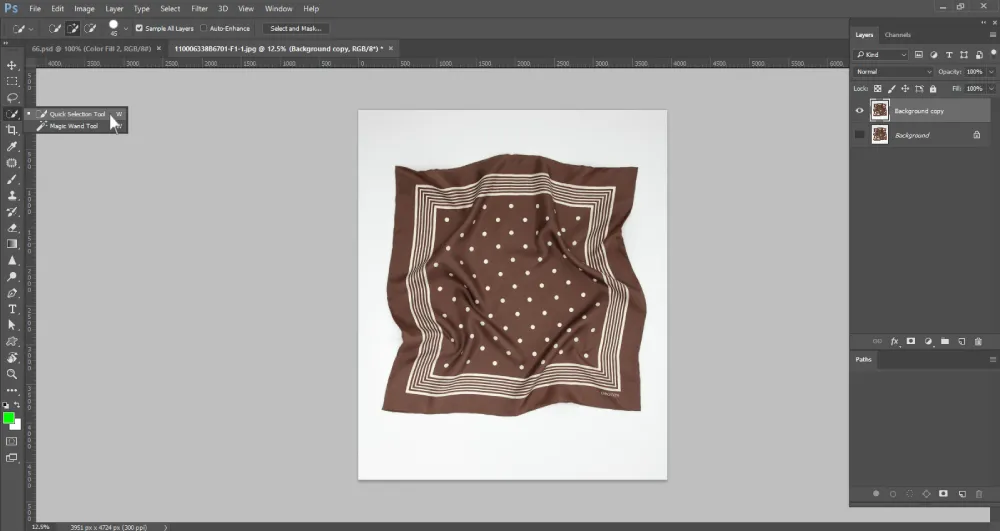
Step 4: Left-click on the background areas you want to remove. Zoom in to select the areas precisely. If the tool has selected areas that you don’t want to remove, then you have to press the Alt key while clicking the areas to deselect them.
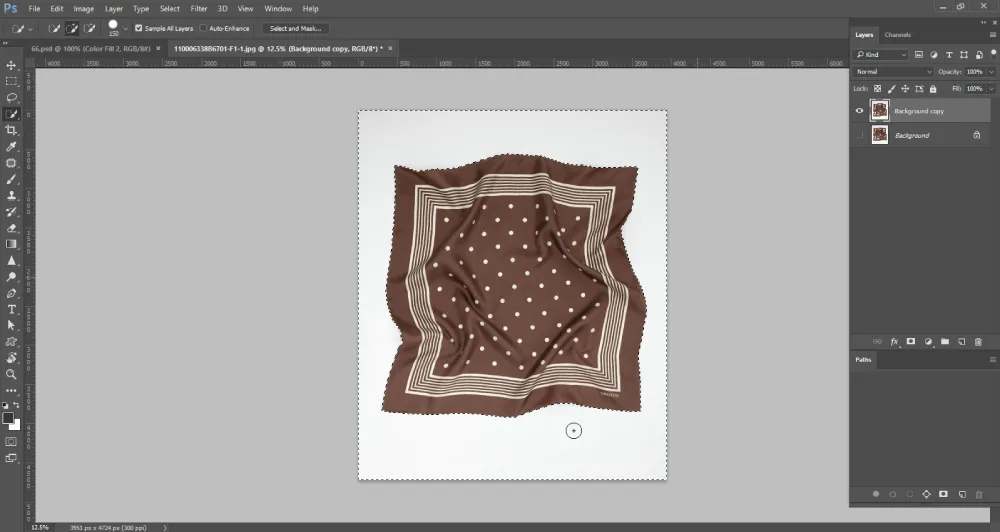
Step 5: To make the edges smooth, go to the top menu and click ‘Select’. Then click on ‘Modify’ and then select the option ‘Smooth’. Adjust the ‘Sample radius; value to see which one works best for your image.
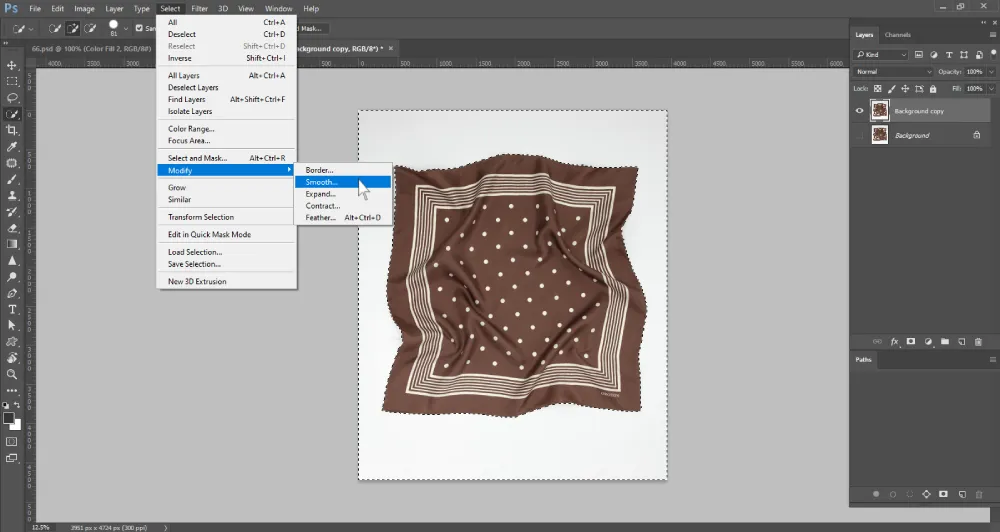
Step 6: After you have softened the edges, press the ‘Delete’ key from your keyboard.
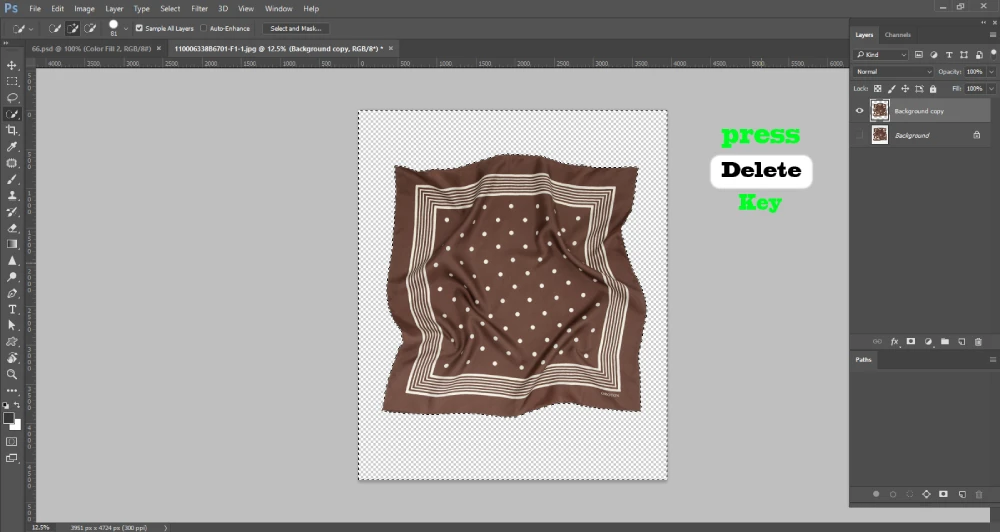
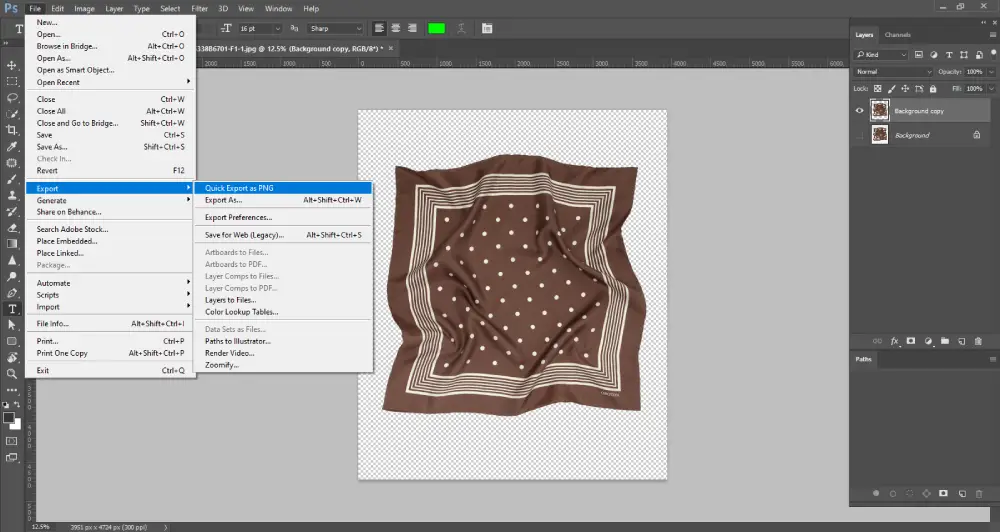
Step 7: Now that your background is removed, go to ‘File’ and click ‘Export’ to save the image.
Lasso Tool
The lasso tool is one of the ideal tools to remove image background having moderate complexity. This tool gives you the option to create a freehand selection. You can drag the mouse pointer to create the outline of your desired selection. Using the lasso tool will give you the feeling of drawing with a pencil or pen.
There are 3 types of lasso tools:
- Lasso Tool: It allows free drawing for selection
- Polygonal Lasso tool: This tool draws the selection in straight lines
- Magnetic lasso tool: It can identify the edges. So selection sticks to the edges automatically
How to Remove Background in Photoshop Using Lasso Tool?
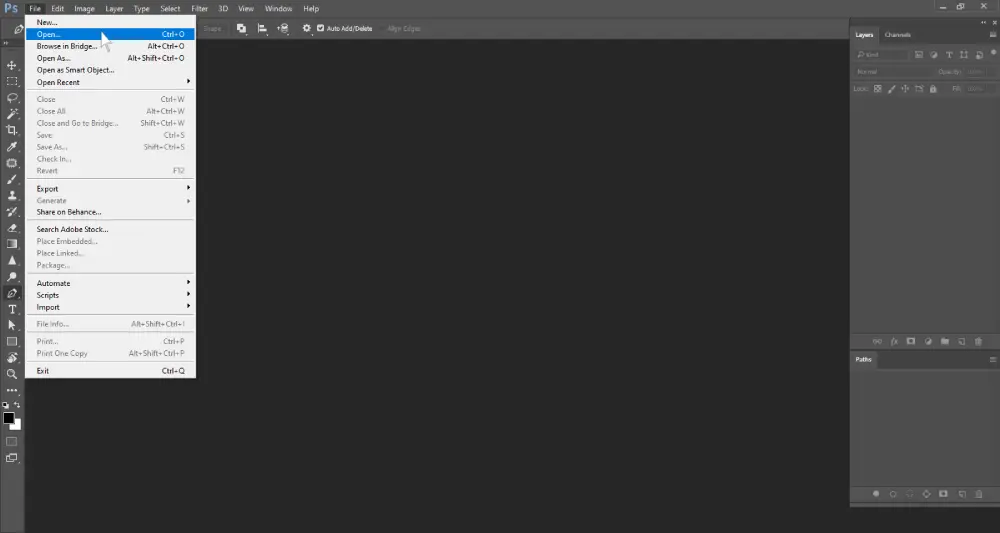
Step 1: Open the image file
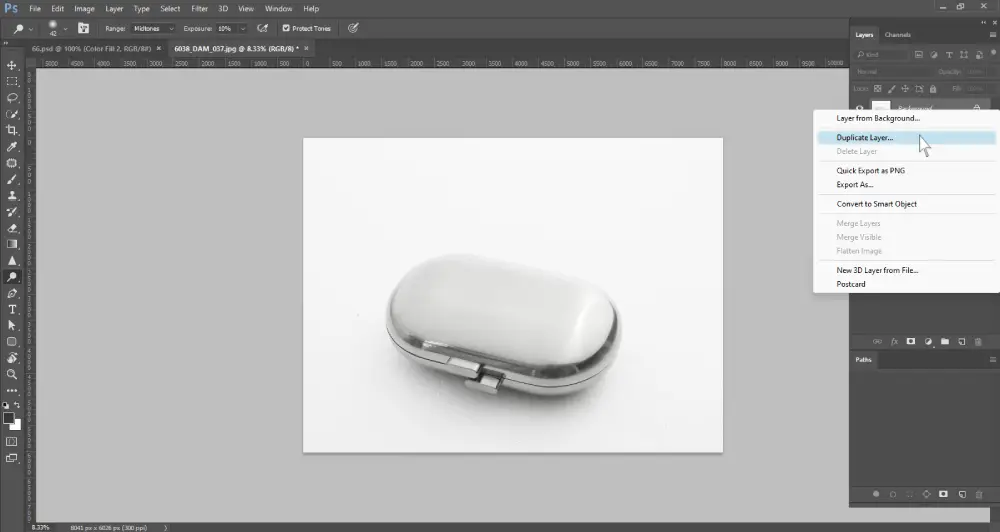
Step 2: Create a duplicate layer
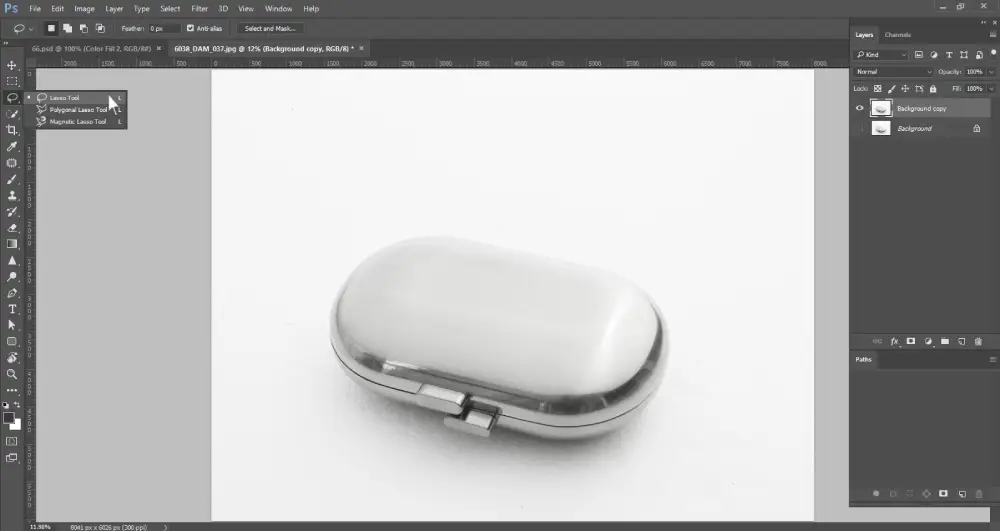
Step 3: Right-click the third icon from the ‘Tool panel’ and select the Lasso tool.
Step 4: Drag the mouse cursor along the edges of your subject to draw the outline. Follow around the edges and zoom in if required.
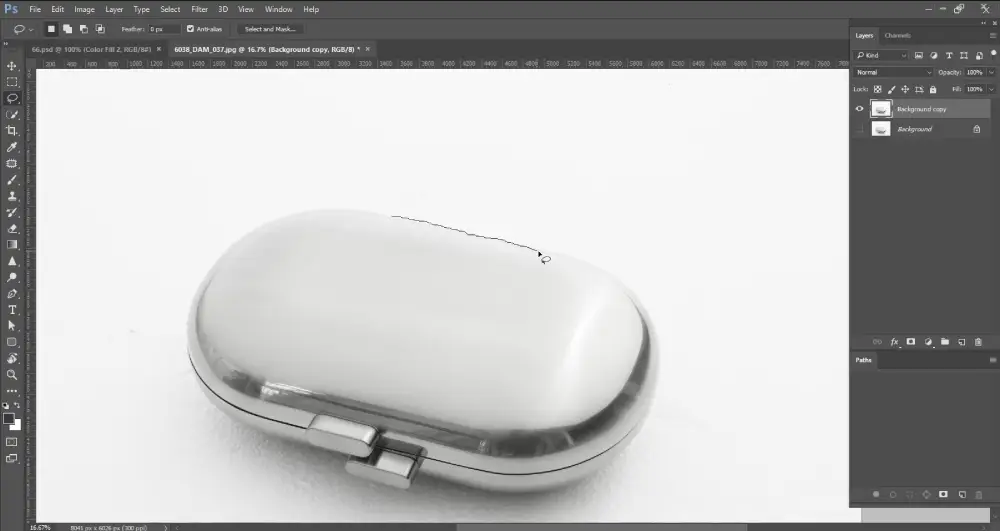
Connect the anchor point to the beginning point to complete the selection.
If your selection contains areas that you don’t want to cut off, press the Atl key and draw a new selection around those edges to cancel out the previous selection.
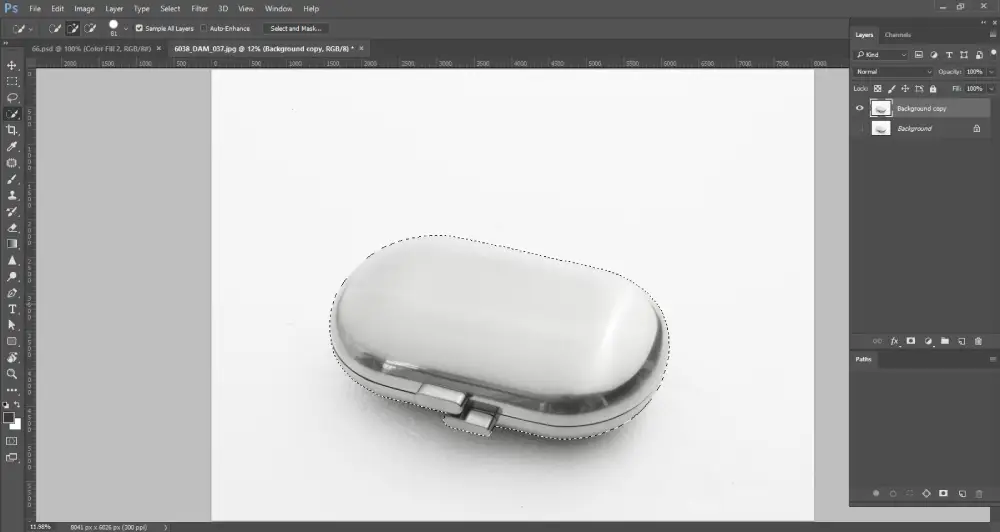
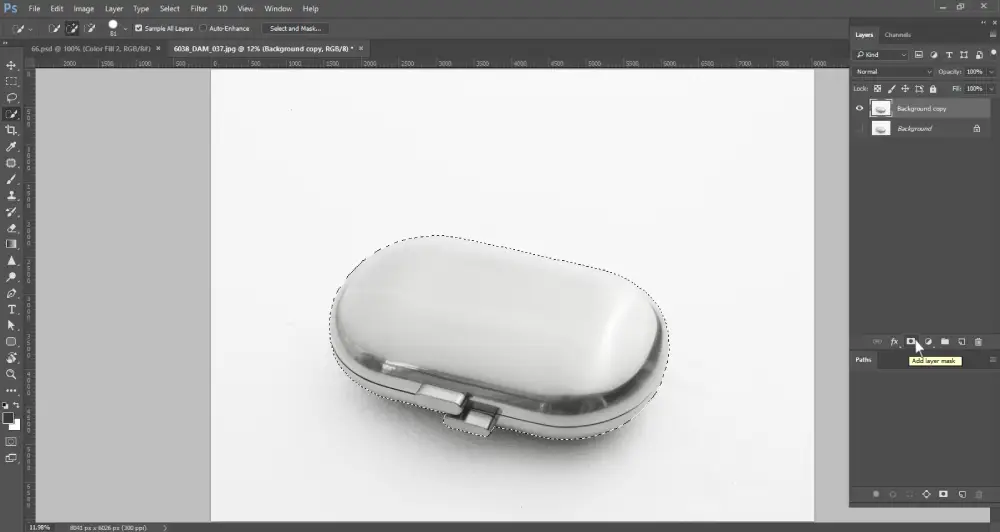
Step 5: Keep your selection active and then click on the ‘Layer Mask’ icon from the right-side panel to cut off the background.
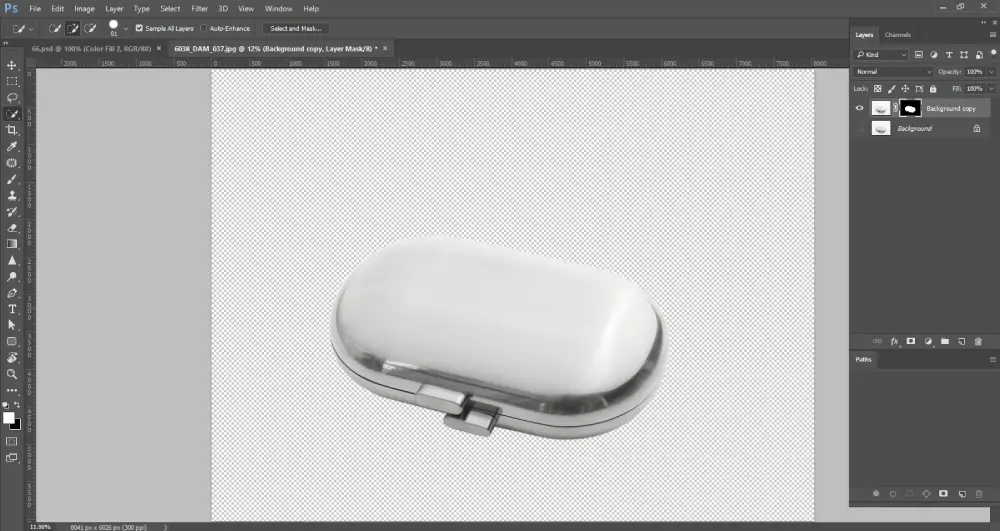
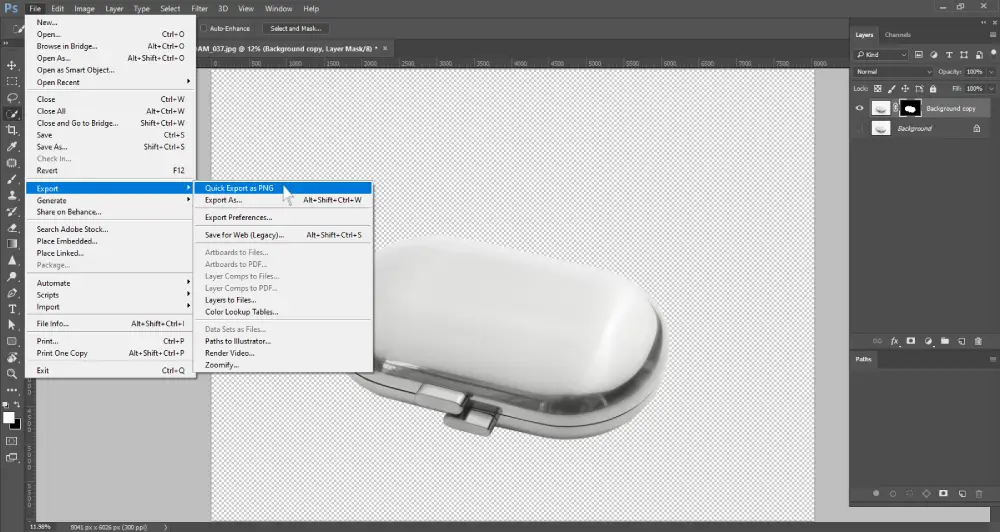
Step 6: Go to ‘File’ and select ‘Export’ to save the image in your preferred file format.
Background Eraser Tool
The background eraser tool is one of the best tools to remove background from picture. You can use this tool to erase the background permanently. Using this tool is easy. All you need to do is paint over the background and it will be gone, just like how we use erasers on paper. Another good side of this tool is that it does a great job when your background contains multiple colors.
How to Erase Background in Photoshop with Background Eraser Tool
Step 1: Open the image in Photoshop
Step 2: Make a duplicate layer
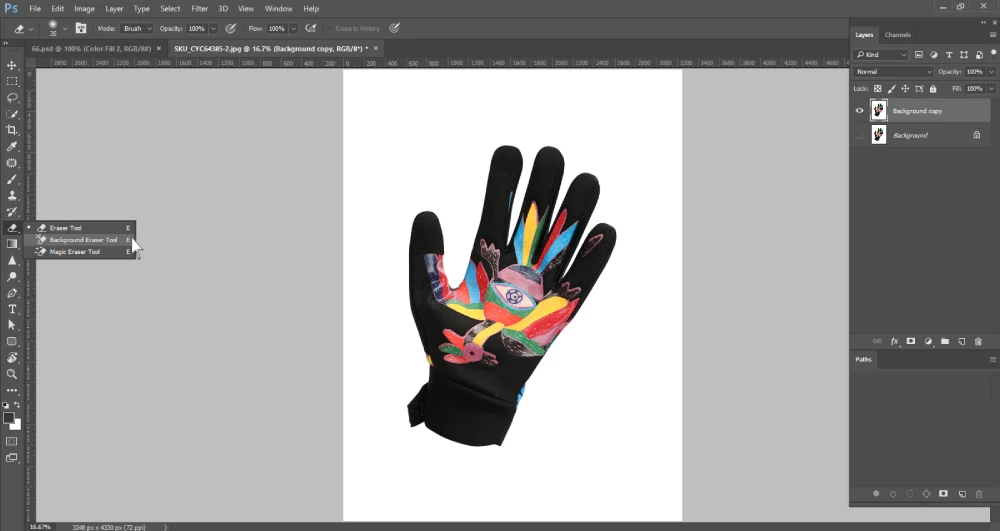
Step 3: Right-click the ‘Eraser’ icon in the ‘Tool panel’ and select the ‘Background Eraser Tool’.
Step 4: Choose the sampling option. Go to the options bar below the top menu bar. Select ‘Continuous’ if your background has multiple colors. Then click and drag over all the colors to include them in the samples. If your background is one specific color select ‘Once’.
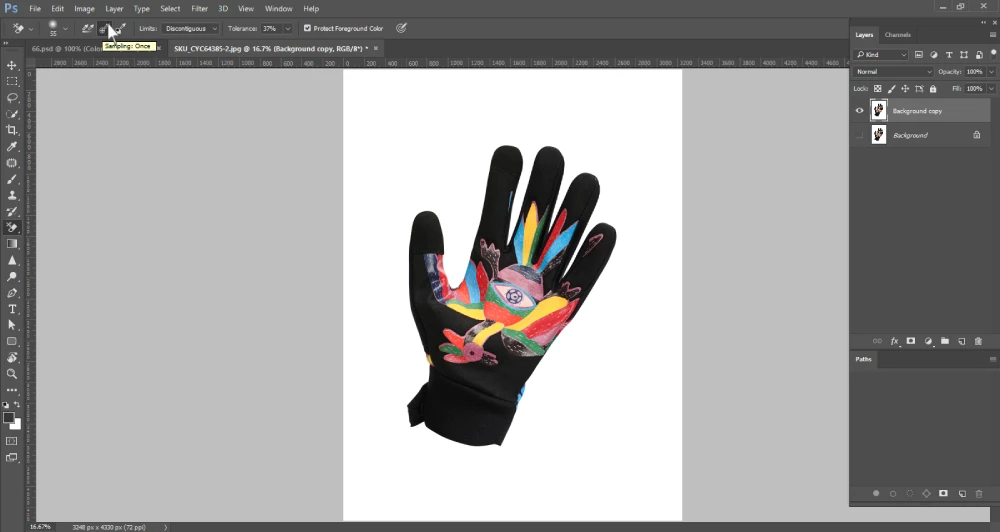
Step 5: Go to the limit settings beside the sampling option. Select ‘Fine edges’ and set the tolerance level. Then adjust the brush size and paint over your background to delete the background pixels.
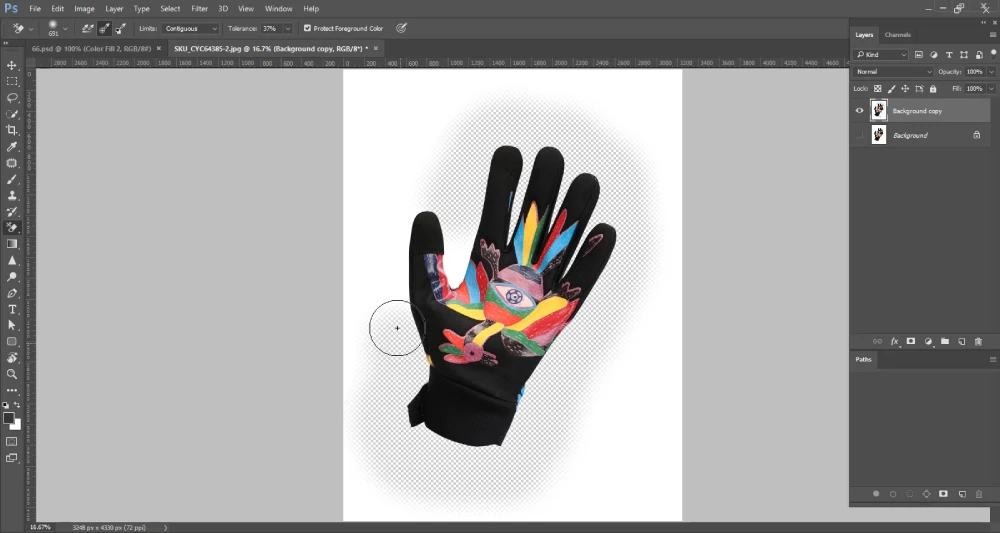
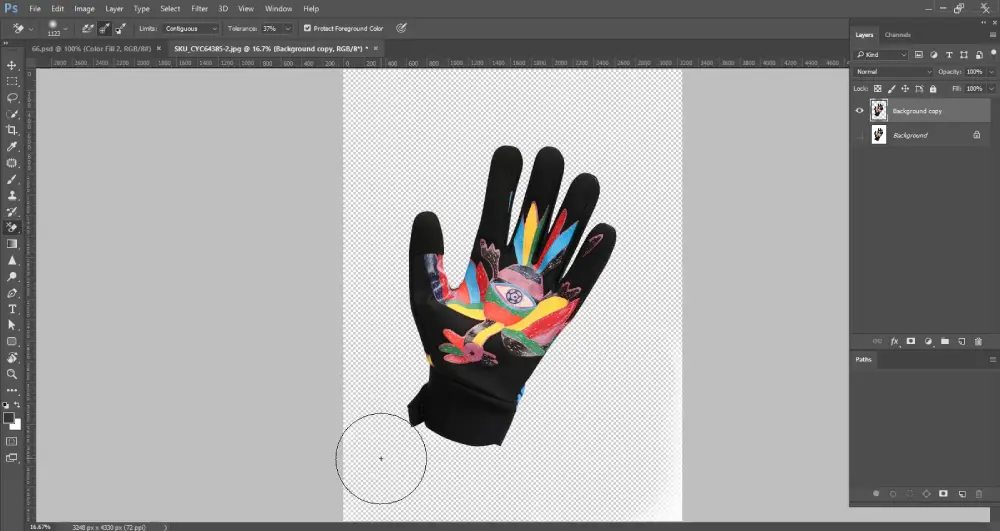
Step 6: Now you can save the photo.
Pen Tool
The pen tool is the most versatile selection tool in Photoshop. You can use this tool to create precise selections, paths, and shapes around the subject to remove the background from an image. Whether your subject has a smooth or complex edge, such as hair, fur, etc., this tool is the best option for high-quality images. Professional graphic designers and outsourcing companies use this tool for background removal services.
How to Remove Background in Photoshop Using The Pen Tool
Step 1: Open the image file
Step 2: Make a duplicate layer
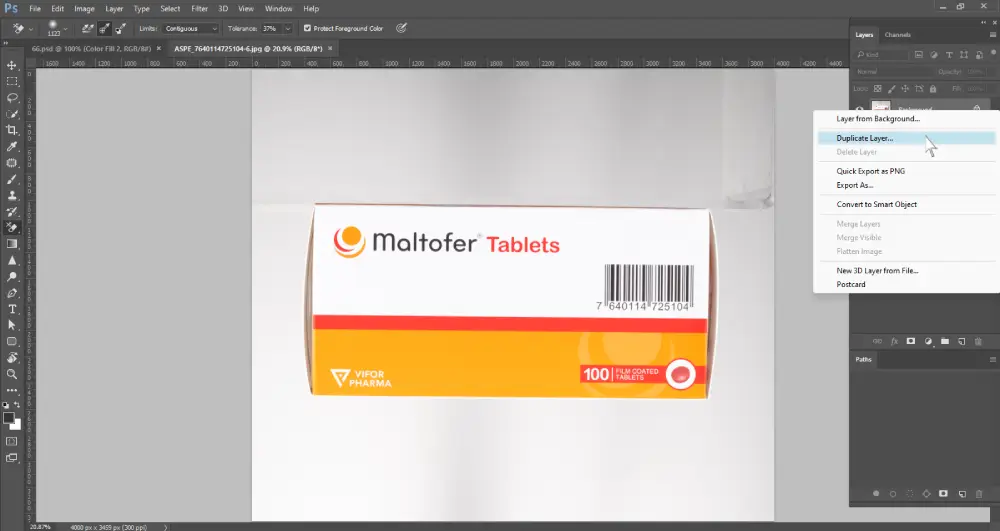
Step 3: Right-click the pen icon in the ‘Tool panel’ and select ‘Pen tool’.
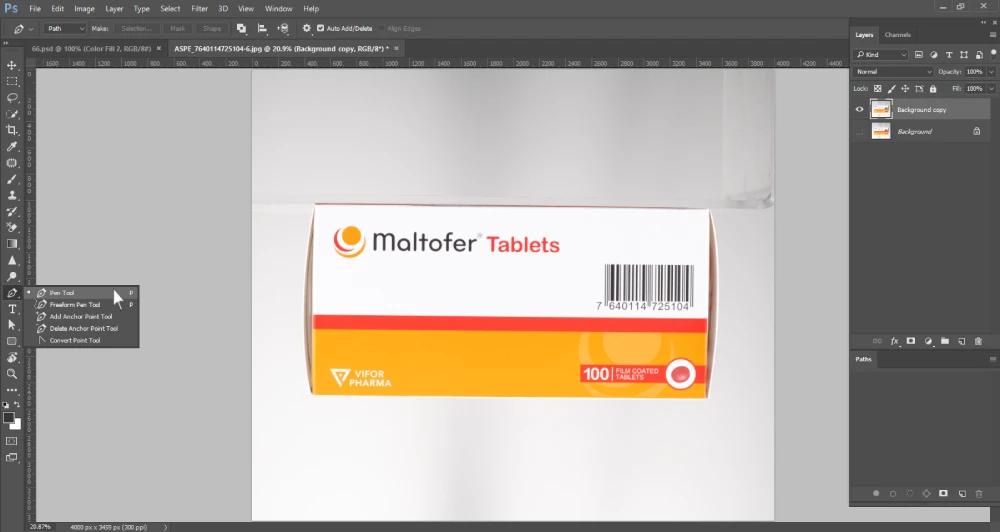
Step 4: Go to the tool mode below the top menu bar and select ‘Path’.
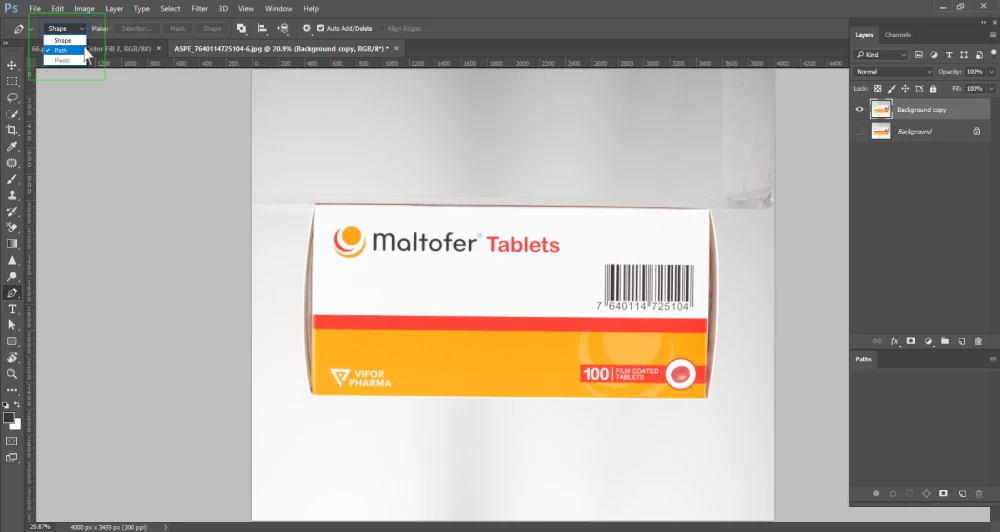
Step 5: Now create anchor points around the edges of your subject. For a straight line, left-click on a point and then again left-click another point. For a curved line, the process is similar. You need to hold down the second left-click and move your cursor.
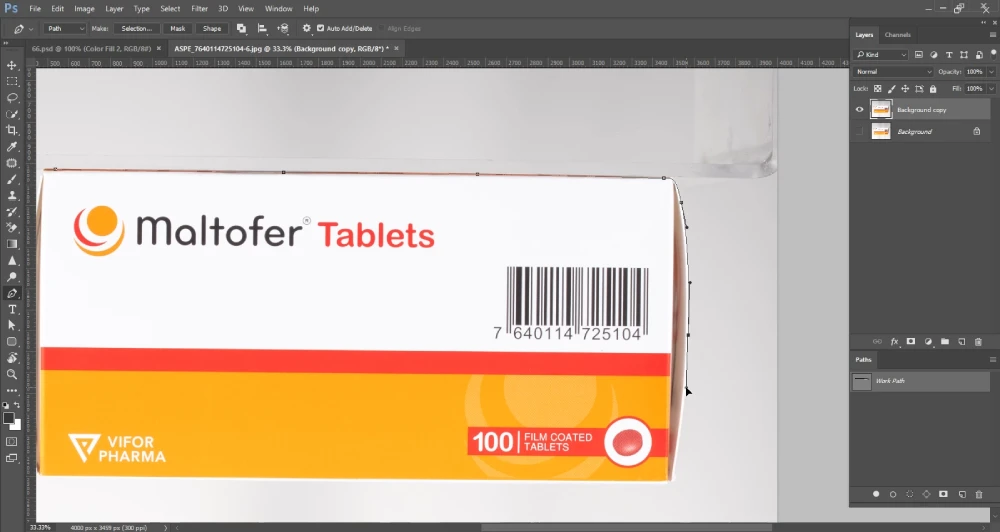
Make sure you click the first anchor point after creating the last anchor point. It will complete your selection process.
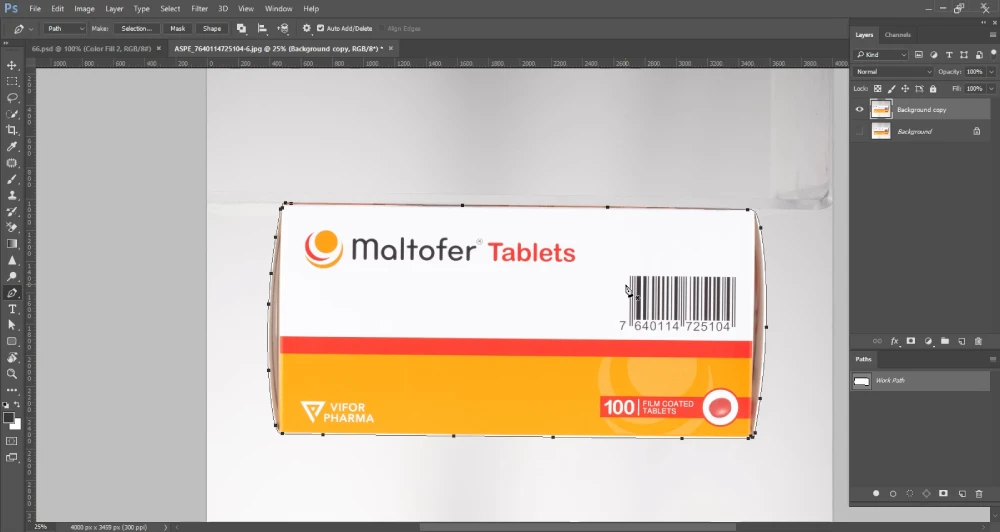
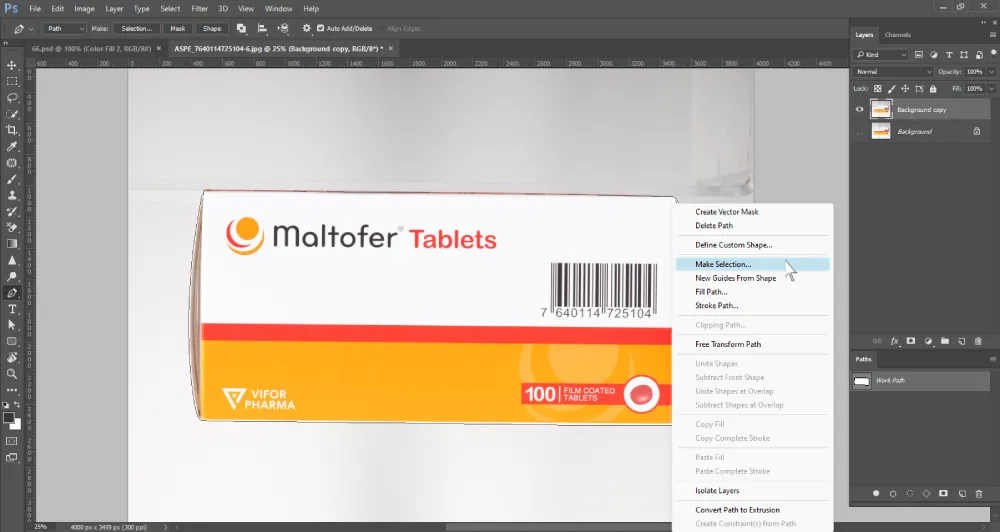
Step 6: ‘Right-click’ on your mouse and click ‘Make Selection’ to create your selection. You can also do it by pressing the keys Ctrl+Enter.
Step 7: You have to reverse the selection, or else your subject will be removed. For that, you have to press Ctrl+Shift+I.
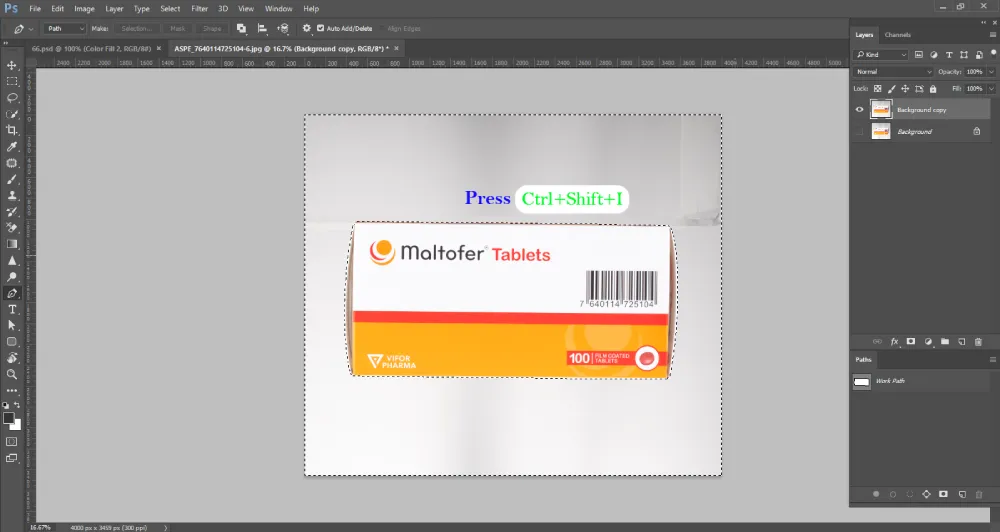
You can see that the selection is visible around the edges of the background. Now, press Ctrl+X to cut out the background.
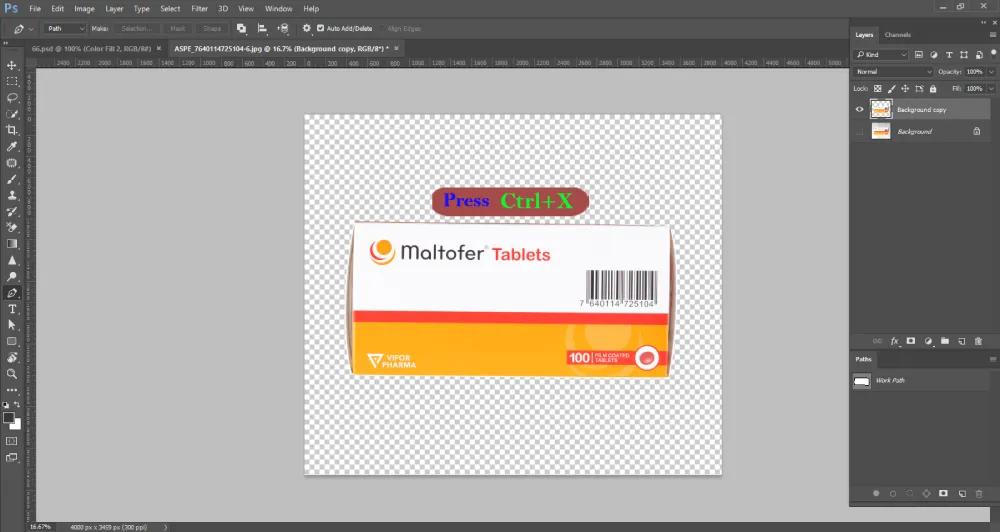
Step 8: Go to ‘Export’ and save the image.
Frequently Asked Questions(FAQ)
What tools can I use to remove the background in Photoshop?
Photoshop offers multiple tools to remove background. For example, magic wand tool, background eraser tool, quick selection tool, lasso tool, pen tool, layer mask, AI-powered automatic background remover, and so on. For smooth edges, you can use any of these tools. However, for precise cut-outs of complex edges, pen tool is the best one.
Which tool is best for removing backgrounds in Photoshop?
The best tool for removing background depends on the complexity of the edges of your subject. If you want to remove background from a building with straight edges, then the polygonal lasso tool or quick selection tool can be your perfect tool. But, if your subject is a dog or human, editing the fur and hair needs precise selections. In this case, a pen tool will be your ideal tool.
Conclusion
We have reached the end of our discussion. Hopefully this guide has helped you learn various background removal techniques. Now that you have an idea about how these methods work, try these tools to see which works best for you.
