26 May Jewelry Photography: A Complete Guide
According to Statista, the jewelry market revenue is projected to reach $310.90bn worldwide. Doesn’t this number highlight its popularity? Necklaces, earrings, bracelets, and other items are sold for several billions of dollars. But how do top jewelry brands boost their sales, and how do they most attract potential online shoppers? The answer is high-quality jewelry photography. Do you want to enhance your jewelry business and earn more revenues by highlighting every item’s elegance and beauty? In this guide, you’ll go through –
- Must-have jewelry photography equipment,
- Best Jewelry photography tips,
- Lighting techniques,
- Creative styling ideas,
- Retouching guides, and more.
So, what are you waiting for? Let’s dive in!
What Is Jewelry Photography?
Jewelry photography is a photoshoot technique whose key goal is to capture the details of jewelry, i.e., stone cut, textures, styles, stone colors, and ornament brilliance. Photography for jewelry is an art that showcases the elegance and allure of precious pieces like bracelets, lockets, rings, bangles, and others.
However, professional jewelry photography’s success lies in utilizing proper lighting, composition, and attention to the smallest elements and enticing the audience to buy. That means it is all about creating visually rich jewelry images to highlight multiple details and true-to-life colors to target consumers.
Do you want to boost your eCommerce business through creative and engaging jewelry photography? You can capture every piece’s uniqueness with the best jewelry photography equipment. For more details on the equipment, check out the next section!
Essential Equipment for Creative Jewelry Photography
You can capture creative jewelry photos depending on your budget and keeping costs minimal. All you need is skill, the right equipment, and a proper setup to bring out the true beauty of jewelry items. Here we’ve highlighted some important jewelry photography equipment below:
Camera
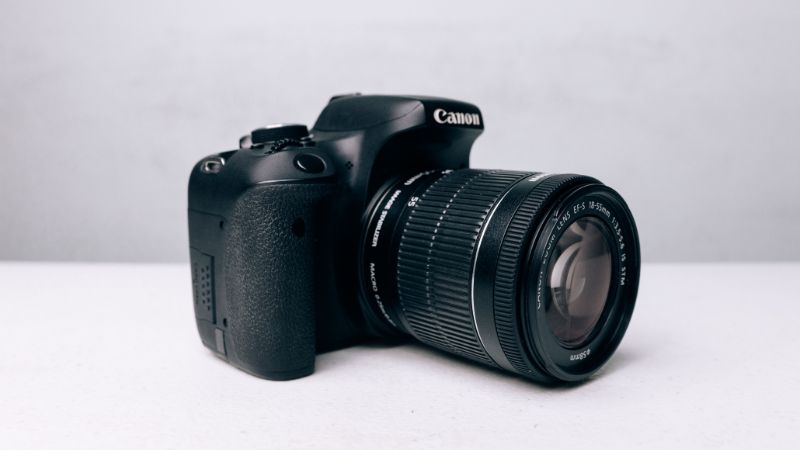
In this digitalization era, investing in expensive DSLRs is optional to capture the beauty of diamonds. As a beginner jewelry photographer, you can try Canon EOS Rebel T5, Nikon D3400, Nikon Coolpix P900, or other best cameras for jewelry photography. But if you want to invest more, you can use a DSLR with full-frame sensors. These cameras give you greater control over ISO, aperture, and focal range.
On the other hand, mirrorless cameras are also popular. However, it may not be suitable for creative jewelry photography because of the lack of extensive lens support. However, as a new jewelry store owner, you can use an iPhone or Android with a better camera resolution.
Lens
Plenty of lenses are available from different brands in the marketplace, i.e., prime, macros, zoom, and tilt-shifts. If you just started your eCommerce business to capture your own, you can try a prime or macro lens for stunning shots. Choose a 90-105mm focal length for the best outcome for a macro lens.
Are you a Canon camera user? If so, you can use a Canon RF 85m f/2 macro lens for excellent image quality and intricate jewelry details. Afterward, you can use the Sigma 105mm f/2.8 EX DG OS HSM macro lens for all the major camera brands.
Tripod
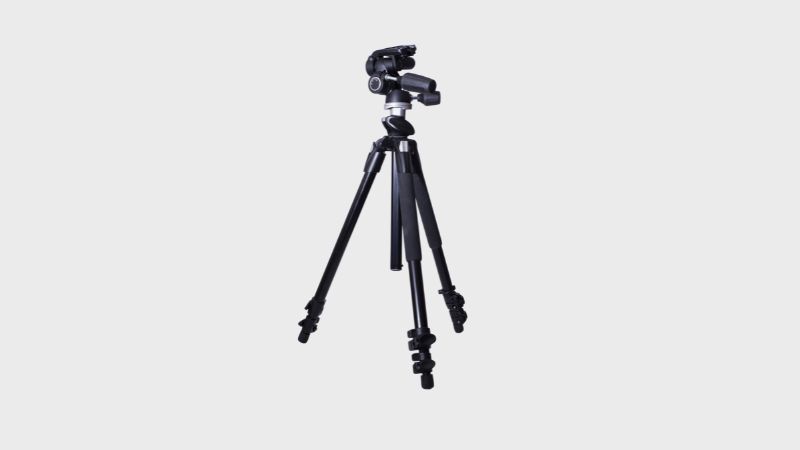
Professional jewelry photographers can take freehand photos of their years of experience. But whatever device you use, camera or smartphone, it is always effective to use a tripod. Tripods help you avoid camera shakes that result in blurry photos.
However, tripods are cost-effective and improve image quality and consistency. They also allow you to use optimal aperture and ISO settings. Ensure to buy a tripod with adjustable legs, ball heads, quick-release plates, and stability features.
Lighting Source
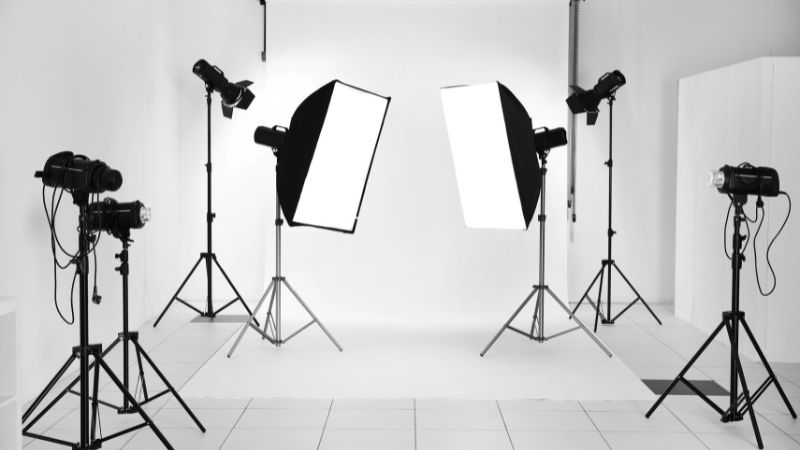
Lighting is key to capturing the essence of a product. A room with windows is a good natural lighting source. But if you don’t have a natural lighting source, you can buy artificial light sources, like Softbox or a light tent. Lightbox or light tent helps you to create a controlled lighting environment for creative jewelry photoshoots.
As you know, jewelry items are shiny and reflective, so take stunning photos and highlight every detail to ensure the light is evenly diffused and reflections are minimized as possible. Also, you can use other lighting tactics, like reflectors and LED lights.
Table
Simplicity is the key to portraying the natural beauty of products that online shoppers love most. Also, it guides the audience to the main product without any distractions. So, try to avoid fancy setups and provide a space to glow on its own. Selecting a standard folding table between 24 and 27 inches is ideal for the best results.
White background
The white background showcases product simplicity and elegance that make a solid first impression. If you plan to sell on Amazon, Shopify, Walmart, or other social media platforms, white backgrounds are seamlessly intricate with all those channels. You can buy white paper sweeps (big rolls) to create a white background.
However, you can try a paper board, a white backdrop, or a white shooting table. But ensure the backdrop is large enough to cover the frame and smooth the transition. Also, you’ll need some masking tape, clips, or clamps to secure the backdrop.
Pro Tip: Set the camera to manual mode to get complete control over the exposure and adjust white balance settings to ensure a proper white background.
Foam boards
Foam boards are essential to brighten lighting and reduce shadows. They can reflect light into shadow areas to create even illuminations. The shiny side of a foam board helps in creating more ambient lighting. That’s why you can place a white foam board to reflect the light into the shadow areas to make it bright.
Props
The last yet creative equipment is props that help you portray a story about your product. You can use props for your jewelry photography, like stands, busts, candles, jewelry holders, flowers, leaves, and others to enhance your creativity.
Are you ready to boost your online store sales and attract more potential audience? Let’s walk through the best jewelry photography tips now!
Best Jewelry Photography Tips for Outstanding Photos
Every product has its unique values and outlook. But when it comes to jewelry photoshoots, you only need to focus on luxury, beauty, and feature details. But for this, you need proper planning, such as –
Finalize lighting sources
Natural lighting setup
Do you use natural or artificial light to capture the essence of your jewelry? To use natural light, place your table near a window and set it 90 degrees to the right or left. Remember, the closer you set the table to the window, the softer the light.
Now, use a white paper sweep or a white backdrop. If you’re next to a wall, use tape to fix the sweep to it. But if you’re not, use a stand or surface to which you can stick it. After that, place a tripod in front of your setup.
Artificial lighting setup
Place a softbox or umbrella at a 45-degree angle to the product and keep the lighting soft and even. Now, place your camera in front of your jewelry piece.
Clean the jewelry item
The most common mistake is overlooking the importance of cleaning the items before the photoshoot. Without cleaning jewelry products, you may end up with poor and imperfect photos that require advanced post-production. Wear gloves to clean the items.
Precautions:
- Boiling water,
- Lemon juice and vinegar,
- Bleach, or any harsh chemicals.
Use a soft bristle brush to remove dust and debris from jewelry items.
Style your jewelry
If you are new to jewelry photography, starting with a white background is ideal. After that, you can add different props, i.e.,
- Simple textured backgrounds,
- Ring holders or stands,
- Flowers, fabrics, models, or others.
Set your camera
- First, set the aperture mode and choose f/11 or higher to ensure a depth of field.
- Second, set a slower shutter speed (1/60th) or slower one to capture all details.
- Third, Keep your ISO low (100) to minimize noise.
- Fourth, use a custom white balance setting to achieve accurate colors.
- Last, manual focus is utilized to ensure precise sharpness.
Retouch your photos and finalize
After taking your product photos, it’s time to take advantage of post-production to make photos more professional and eCommerce-friendly. You can hire photo editing services from reliable agencies or try a free photo editor. But a photo editor can’t provide you with the best results as a Photoshop expert and advanced photo editing services, like color correction, jewelry retouching, background removal, and more.
Jewelry photography hacks for phones
Use a mini tripod to avoid blurred images and keep the phone steady. Also, check out the portrait mode to focus on the jewelry details. Other hacks are:
- Use a rear-facing camera to get high-resolution photos.
- Some smartphones have white balance and exposure settings before capturing an image. Others might be found when you edit the image.
- Don’t forget to lock your camera settings after finalizing all setups.
Bonus Tips: Different types of jewelry photo-capturing tips
- Rings: Rings are shiny enough and must consider composition and lighting to bring out their detail and elegance. Try shallow depth of field and creative angles to draw online shoppers’ attention to its focal points.
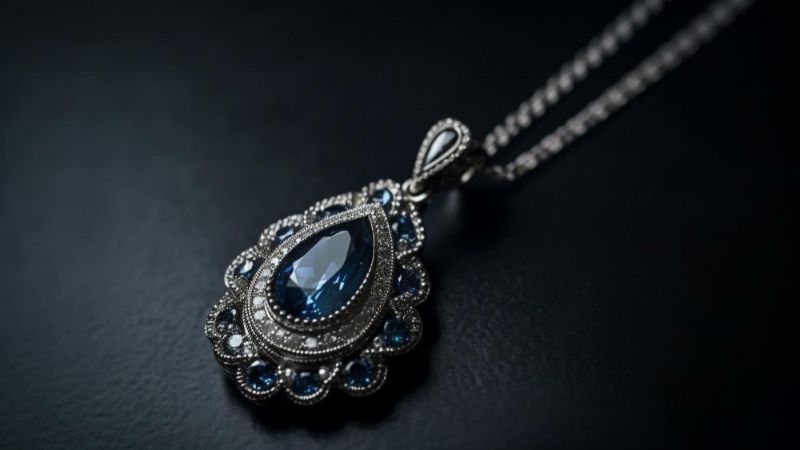
- Necklaces: Intricate pendants and elongated necklace shapes best create dynamic compositions. You can try mannequins or models to add context to those precious items. However, the chains, clasps, and focal elements require to be placed strategically to showcase its craftsmanship and beauty.
- Earrings: These items come with asymmetrical designs that require a keen eye for balance and symmetry. Try to showcase its fine details, gemstones shine, and others.
- Bracelets: You can use different props like fabric or other natural elements to enhance its texture and form.
Sounds motivated? Now that you have a complete guide about taking jewelry photos via phone or camera, you must focus on lighting techniques for more accurate results. Go through the next section now!
Lighting techniques for jewelry photography
Jewelry photography lighting is important in giving the product a new life: brand identity and popularity. Here, we’ve listed two lighting setup ideas that help you bring out the natural charm of every piece.
Natural Lighting
The most popular and most accessible lighting source is natural lighting. First, select a suitable place where you get enough sunlight or create an outdoor setup. After that, position your table by the window to get an even light distribution.
Remember, the best photoshoot is the first hour of light after sunrise and the last hour before sunset. At these times, the sunlight is not so harsh; instead, it creates a diffused light. Also, consider the notion of specific gemstones to make it more appealing and pay attention to weather conditions.
Artificial Lighting
Artificial lighting is the best option when you plan to shoot in a studio. Try different types of lighting or use a lightbox or GemLightbox tent to capture details, fine-cut stones, and more.
However, you can utilize back and side light techniques if you want. Backlighting is the best process for lighting jewelry from behind and is ideal for glass-like ornaments. Afterward, side lighting with a three-dimensional effect also effectively avoids dull images.
Are you ready to capture eye-soothing and breathtaking jewelry photos? If so, try some trendy and creative jewelry photography ideas from our listings!
Creative styling Ideas for jewelry photography
Are you ready to create compelling eCommerce-friendly jewelry product photos that will stand out in the digital marketplace? Let’s explore a few styling ideas that are not just awe-inspiring and mesmerizing but also perfect for online selling.
Add branding elements
Close-up jewelry shots have limited space to add many branding elements, like a highly visible logo or brand name. However, you must find creative ways to include brand elements to build trust and recognition. For this, you can try to –
- Add a tiny logo in the corner of the jewelry photos,
- A larger but out-of-focus logo in the background,
- Use a specific brand color or
- Add a watermark via the post-production.
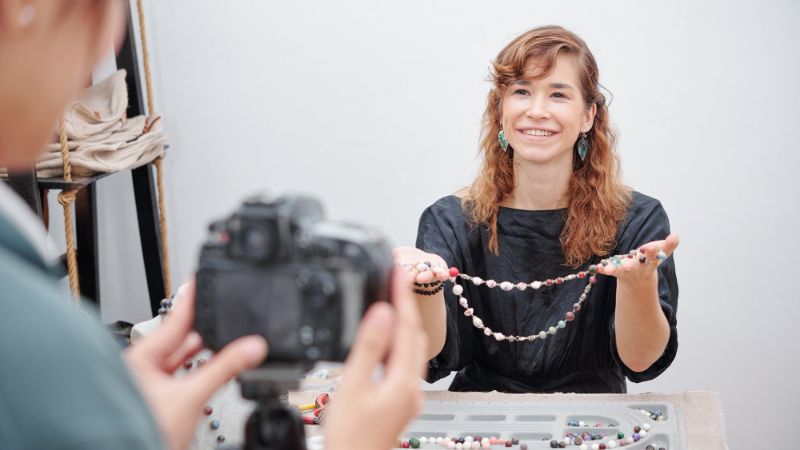
Incorporate with models

Another creative; yet popular way of capturing jewelry photos is a model wearing it. You can try this idea when you want to highlight the context. By doing so, you can provide the viewers with an idea of how the jewelry looks in real life. Also, you can provide a fashion guide and highlight other matching items too.
Try creative themes
Depending on your brand personas, you can use props like silk scarves, luxury watches, etc. But try to create a theme to make your jewelry photos memorable and recognizable. For example, a floral theme –
- Try to add roses when you shoot engagement rings or wedding band sets.
- Bright-colored flowers give a more adventurous and whimsical vibe.
- Dark-colored roses or props make jewelry more refined.
Focus on the jewelry’s primary color
Using colorful and whimsical backgrounds to make your jewelry more stunning might be tempting. But always focus on the jewelry’s primary color to avoid distractions. For example, if you work with blue sapphire, use similar-colored props to bring out its natural glow. Also, to work with gold jewelry, use a few golden props and keep the background monochromatic.
Add reflections
At first glance, reflections can destroy the outcomes and make jewelry look like it has imperfections or scratches. But with reflections, you can add more features and dimensions. For example, by placing a ring over a mirror, you can highlight its details in a single photo.
Pro Tip: Check out Amanda’s jewelry styling ideas and create your own.
How to retouch jewelry photographs?

Tiffany & Co. is the most luxurious jewelry brand worldwide, where every item shines its inner glow and beauty. Want to showcase your jewelry glam and details? There’s no alternative to image editing techniques. You can fulfill eCommerce platform requirements by outsourcing post-production services or editing yourself.
Let’s look at some effective and must-have jewelry photo editing techniques in Photoshop.
- Adjust brightness and exposure to represent every item’s elegance without losing details.
- Use the “spot healing brush tool” or the “clone stamp tool” to remove imperfections like dust or scratches.
- Enhance contrast and clarity to make the jewelry more appealing to the audience.
- Try a white background to build audience trust and loyalty.
- Advanced jewelry retouching provides sharper and more vibrant images.
- Apply the “Smart Sharpen filter” to enhance gemstone details, engravings of jewelry, or textures.
- If needed, try color corrections to highlight jewelry’s natural beauty.
- If you want to add an extra touch of jewelry’s allure, enhance reflections, and highlight a polished look through eCommerce photo editing services.
- Once the editing meets your satisfaction level, save the edited image in a high-resolution format, such as JPEG or PNG.
After going through advanced photo editing techniques, you might be ready to launch your new product line on the online marketplace. But to boost more sales and earn loyalty from your target audience, you must be aware of jewelry photoshoots’ basic mistakes.
What are those? Check out the next section to get the answers!
Common mistakes to avoid in Jewelry Photography
High-resolution and clear jewelry product photography proves it is worth a thousand dollars in sales. The majority of online returns occur due to customers receiving items that do not match the online store’s visuals. So, to avoid the same pitfalls, you’ll need to know all those jewelry photoshoot common mistakes to create a positive appearance.
- Poor lighting: Avoid using a combination of different kinds of lighting, i.e., natural light, fluorescent lighting, and others.
- Depth of field: Inadequate depth of field is the most common mistake in jewelry photography.
- White balance is off: White balance misadjust is the common culprit in destroying jewelry photos that are too “warm,” which means yellowish/reddish or too “cool”.
- Distracting pros and background: Classy or colorful props draw attention away from the product. Try to use a white background like Amazon.
- Adding unnecessary reflections: When you shoot jewelry with more than one light source, a shiny surface can distract the audience. Try to use diffusers with your light source to emit unwanted reflections.
- Blurry images: Out-of-focus or blurry product images happen due to not using a tripod.
- Poor preparation: Ensure the product is clean and free from fingerprints and other stains before photo shooting.
- Few clicks: Try to take more photos and shoot different sides. It’ll be best if you take many photos from different perspectives, such as close-ups and longer shots.
- Lack of consistency: Try to present your products consistently, regardless of aesthetics and environment. Don’t ignore brand consistency, which can lead to poor brand recognition.
- Excessive post-production effects: Tiny imperfections and minor irritants mislead customers. So, to achieve realistic colors, styles, white backdrop, and highlights try post-production.
Frequently Asked Questions(FAQ)
Still have doubts about capturing jewelry photos? Don’t worry, we’ve listed the most asked questions among business owners and photographers, and we’re here to empower you to do your best.
What is the best way to photograph jewelry?
The best way to do jewelry photography is to –
- Ensure every piece is lit evenly and consistently,
- The 45-degree lighting setup is at the jewelry,
- Set the correct aperture, and
- Try to use a mirrorless camera for the best results.
How do you take pictures of jewelry with your phone?
Here is a step-by-step guide to making amazing packshot photos:
- Preparation: Ensure the product is clean and free of any imperfections and then choose a suitable and simple background for your product packshot. A neutral color like white or gray is the best option.
- Set up: Natural light is ideal for producing bright and vibrant images. However, if natural light is insufficient, artificial lighting serves as an excellent alternative. Position your product on a stable surface like a table or photography backdrop stand. Must ensure it’s centered and properly aligned.
- Camera & equipment: Use high-quality DSLRs with a macro lens to capture sharp and detailed images. Must use a tripod.
- Composition & framing: If you’re all set, shoot from different angles, perspectives, and compositions to find the perfect view. Take multiple shots from different angles and orientations.
- Focus & depth of field: Set your camera to manual focus mode and adjust the aperture to control the depth of field. Must keep the entire product in focus and blur the background.
- Editing & post-processing: The last; yet important part to give packshot a professional-looking effect is product photo retouching. For this, you can do it by yourself or outsource photo editing services from a reputable agency.
What lighting should I use for jewelry photography?
Soft, diffused, indirect natural light, a double overhead lighting setup (minimize reflections), or a 45-degree setup are all the best lighting options for jewelry photography.
Which camera is the best for jewelry photography?
Some suggest Canon EOS R6 is the best camera for jewelry photography. Here we’ve listed top cameras for jewelry photography.
- Nikon Z50
- Canon EOS Rebel T7
- Sony Alpha A7R III
- Canon EOS 70D
- Nikon D800, and others.
Conclusion
When you check out the best online jewelry stores, you will see plenty of gorgeous, clear, and enticing photos. You can create high-quality and compelling images that boost sales and brand value by going through our jewelry photography guide.
As you’ve gained experience with essential equipment, creative image-capturing hacks, lighting details, and more, you can unleash your creativity in the fascinating world of jewelry photography.
Happy clicking!