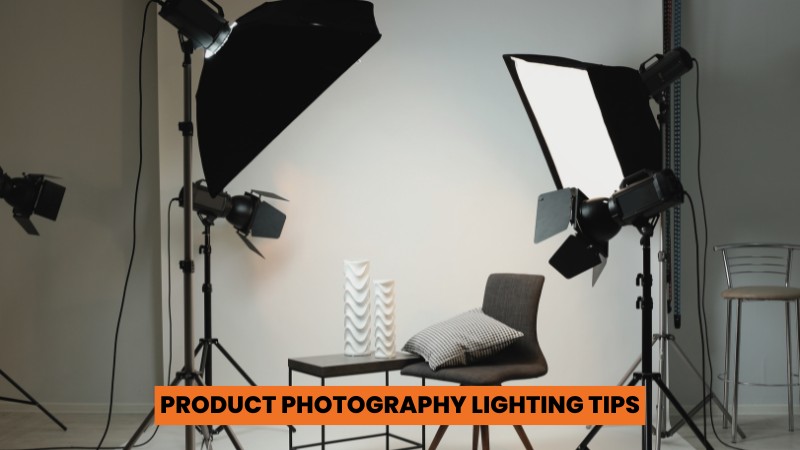
26 May Product Photography Lighting Tips For Your Next Photoshoot
Imagine you are scrolling through an eCommerce site and came across two similar products. One has vibrant color with sharp details and the other looks dull and the details are lost in shadows. Which one would you be more likely to checkout?
Of Course the bright and clear one. This is the ability of lighting that can make or break the impression of your product. Whether you are an experienced photographer or just starting out, you need to master the lighting techniques to make your products stand out.
In this blog, we’ll share 7 product photography lighting tips to improve your image quality. You will also learn about the basics of lighting and equipment you will need during your photoshoot.
Let’s start learning!
How Great Studio Lighting Impacts in Sales?

Studio lighting can have a significant impact on your sales. You can see the difference in the overall quality of your product images if you compare studio lighting to normal lighting. You need professional quality images to stay ahead of your competitors as well as attract potential customers.
Let’s explore how great studio lighting can lead to better sales results
Boost Conversion Rates
High quality images captured with studio lighting can lead to higher conversion rates. You can make your product more attractive to your potential customers by highlighting its features, colors and textures. As a result, customers become interested in buying things when they see clear product images with intricate details.
Lower Return Rates
Studio lighting ensures your photography setup is well lit. You can capture the actual color of your product along with the intricate details. Your high quality product images help your customers set clear expectations. When customers get what they expect, they become satisfied with it. Satisfied customers remain loyal to your brand, leading to a stronger brand reputation and a decrease in return rates.
Improve Customer Engagement
Well exposed professional photos can capture attention and encourage customers to spend more time exploring the product image. When the details of the products are clearly visible, customers click, zoom, and look into the product from different angles. Customers who engage deeply with products have a higher chance of purchasing them.
Develop Trust Within Customers
Trust of your customers in your brand is the most essential thing you need to survive on the eCommerce platforms. Since customers cannot physically check out products before making their purchase, they rely on the product images. Good lighting highlights the product’s features and details clearly. It helps to build confidence in both the product and the brand. Customers are more likely to trust and feel positive about products that are clear and look reliable.
Increased Social Media Shareability
Customers tend to like, share and comment on visually appealing content on social media. Great studio lighting can make ordinary product photos appear extraordinary. You can increase the visibility and reach of your brand if you use high quality images for social media marketing. This organic promotion can lead to increased traffic, engagement and sales.
Understanding Basic Lighting Concepts
Before discussing product photography lighting tips, you must understand the basic factors related to lighting. The following are the key elements you should know to capture high quality product images:
Direction of Light
The direction of the light creates depth and dimension in your images through shadows and highlights. You can enhance the texture, shape and overall appearance of your product by adjusting the position and angle of your light sources.
For example, direct front lighting reduces shadows and makes your subject look polished. On the other hand, side lighting creates shadows and enhances the shape of your product. If you want to highlight the edges of your subject, then you can use backlight. Hence, you can change the direction of your light source to emphasize different aspects of your product.
Color Temperature
Color temperature creates the overall tone and mood of your photographs. It is measured in Kelvin (K). You need to maintain color balance to ensure the color of your product looks exactly the same as it appears in real life. Usually, it ranges from warm tone to cool tone.
If the color temperature of your image is within 2,000-4,000 K, the photos will appear orangish or yellowish. In contrast, if you use a color temperature of 7,000 K or above, your images will look bluish. For this reason, you should set your color temperature at around 5,500 K. At this temperature, the color remains neutral and you can capture the accurate color of your product.
Light Intensity
The intensity of your light determines the brightness or darkness of your image. Bright light is necessary to highlight the details of your products. However, excessively high intensity light can make the images overexposed. On the other hand, low intensity light will result in underexposed images. For this reason, you have to maintain a balance in the light intensity to ensure your images are perfectly exposed.
Light Source
Your choice of light source can have a significant impact on the overall appearance and feel of your photographs. There are different sources of light and each of them has specific features. You can choose the best light source if you understand how different light sources affect your photos.
Here are the different light sources you can consider for your photoshoot:
Natural Light Source
Product photography using sunlight gives your product a soft and natural look. But working with natural sunlight is quite tricky. The intensity of the light keeps changing continuously. It can be because of the time of day, weather and other factors.
Natural light in the morning and evening remains soft and warm. This light is ideal for creating a gentle and flattering effect on the product. On the other hand, midday sun rays are harsh. Your images will have strong shadows and high contrast.
So, the best way to use natural light is to set your photography setup beside a large window with shades. You can also shoot outside on overcast days to avoid harsh shadows.
Artificial Light Source
Artificial light sources are the best option for commercial product photoshoots. You have complete control over this type of light source, including the ability to set the position and angles, adjust the intensity and keep the brightness consistent. You can use the following for your artificial light source:
Continuous Lights
You can use LED lights or ring light as your continuous light sources. These lights are usually used in studio setups for achieving professional-quality images. You can see the impact of the light in real time while capturing the images.
Flash Light
Speedlights and strobe lights are high intensity light sources. You can carry these portable light sources for outdoor photoshoots as well. However, you will need diffusers to reduce harsh shadows and get the best results.
Essential Equipment for Product Photography Lighting

Proper lighting is essential for bringing the features and details of your product into the spotlight. However, you need to use the right equipment to create your lighting setup.
Let’s learn about the essential equipment you need for product photography lighting setup:
Light
Are you planning on using studio lighting for product photography? You can use high power LED lights for bright images. LED lights are generally less intense compared to strobe lights. If you do not have strobes, you may need to set up multiple LED lights.
These days, you can find LED lights with color adjusting features. You can select the color temperature considering your photography theme. You can also use a ring light for professional quality product photos. This light source is ideal for photographing small items from a close distance.
Reflector
You need to create an evenly lit setting to highlight the texture, color and details of your product. You can do that with the help of reflectors. This lighting accessory bounces light back onto your product. The indirect diffused light fills in dark areas and reduces harsh shadows.
Reflectors are available in various colors. You can use a white reflector to get neutral light or a golden one to make the light warm. However, the silver one can be used to enhance the brightness of your setup.
Diffuser
Direct light from the sun as well as artificial light sources create harsh shadows. You have to use diffusers to modify the intensity of your light. You can use a softbox, umbrella or other forms of diffusers. The sheer white fabric of the diffuser makes the light rays soft and helps to spread the light evenly.
Lighting Tent
A light tent, also known as lightbox is a box made of translucent material. It has built-in lighting to ensure your products remain illuminated from all sides. This tool is ideal for small products, such as fashion accessories, cosmetics or jewelry photography. The sides of this lightbox work as diffusers as well as the background.
C-Stand
A C-stand is similar to a tripod. However, a tripod is used for setting up the camera, while a C-stand is used for mounting light sources, diffusers, reflectors or other lighting accessories. It has adjustable legs. For this reason, you can adjust its height and position based on your needs and preferences.
Product Photography Lighting Tips
Do you want to capture professional quality photographs?
Here are 7 product photography lighting tips to enhance your images and make your products stand out:
Plan Your Setup
You don’t need a photography studio to create studio lighting. You can use DIY product photography lighting to create a home studio. However, first you need to visualize your product photos. You can do that in your mind or use a mood board. Depending on your budget and space, you have to select your lighting equipment. You can use a studio light if you have one. You can use LED panels, desk lamp or bulbs if you are on budget.
Choose the Right Light Size
The size of your light sources has an impact on the quality of shadows and overall lighting in your product photography. Smaller light sources cast harsher shadows. These shadows are more visible and make the products appear unflattering. On the other hand, large light casts soft shadows. These diffused shadows can add depth to your photos. Moreover, you need to consider the size of your products when choosing your light.
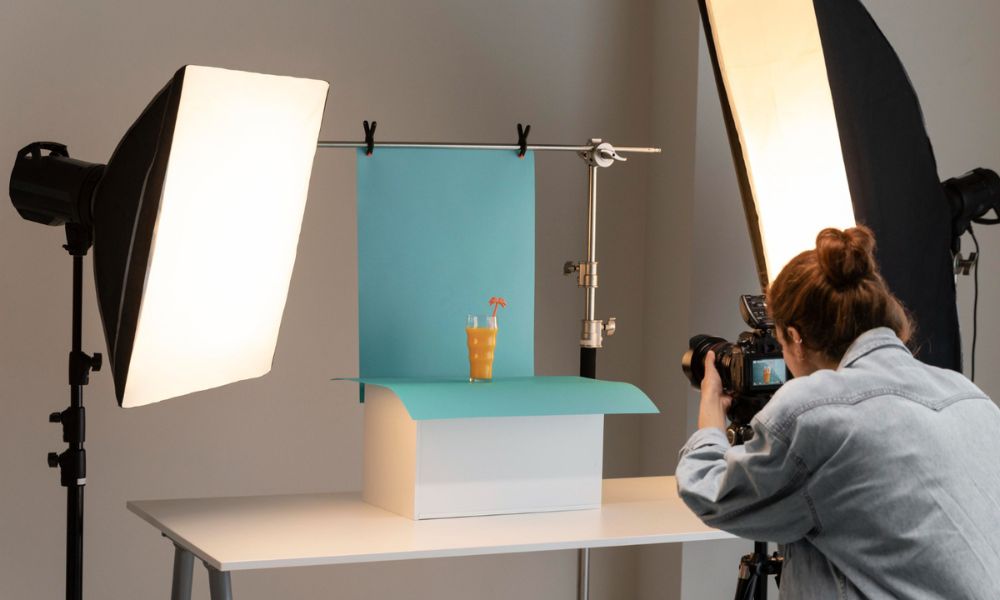
Set Up Your Lighting Arrangement
You need to position your light sources properly to ensure a well-lit studio like effect. You can use one or more light sources, depending on your photography needs. You can follow these guidelines below for setting up lighting for product photography.
One Light
When you use only one light source, it is your key light. You can set it directly in front of your product or position it on one side. You have to adjust the distance and angle depending on the effect you want to achieve. It’s worth mentioning that light falling at 45 degrees casts shadows and highlights textures. This adds dimension and interest to your image.
Two Lights
In a two light setup, one is your main light, and the other is the fill light. You can set the light sources opposite one another at a 45 degree angle. This angle will create the effect of natural lighting. Among these light sources, the intensity of your fill light should be low compared to your key light. This is because its job is to reduce the harshness of shadows and balance the overall exposure.
Three Lights
You can also use three light sources, placing them in a triangular position. In this setup, one is the key light, the other is the fill light and the third is the background light. This setup can be considered ideal for large items, such as clothing photography. Light falling from all three sides will give you complete control over lighting and shadow effects.
Use Light Modifiers
You should always use light modifiers to enhance the quality of your lighting and achieve professional quality results. This lighting tool helps to control the intensity and direction of the light. You can use umbrella diffusers or attach softboxes to your lights. You can also use translucent materials, such as sheer fabric. It will spread the light to create even illumination and reduce the impact of harsh shadows.
Do Not Overlook Reflectors
Whether you use one light or three lights, you should always use reflectors. Reflectors are essential tools for creating a well-lit photoshoot environment. Direct light casts shadows, and even if you use a diffuser, some areas of your product may remain dark. You can solve this problem by using reflectors.
You have to set reflectors opposite to your light sources. When light falls on these reflectors, it spreads evenly throughout your entire setup. As these scattered lights fall as indirect light, they don’t cast any shadows. If you are shooting at home and do not have a reflector, you can use white foam boards.
Use Bright Background light
A bright background light is necessary, especially if you use a two-light photography lighting setup. When you place two light sources on either side of the product, only the sides and front are illuminated. And the background remains a bit dark. So, you should use one light as your background light to make your background bright.
Take Test Shots
You should take some test shots before you begin your actual photo shoot. Test shots will help you to identify the flaws in your setup. You can see whether the distance and angle of the lights are perfectly highlighting your product. Based on your test images, you can make adjustments and achieve the best possible lighting for your product photography.
Common Lighting Mistakes and Ways to Avoid Them
Improper lighting setups can create various issues in your product photos, such as harsh shadows, overexposure, underexposure, and many more. These problems will make your photo editing process complex. Although editing can enhance certain aspects of your photos, it cannot completely transform bad quality images into outstanding ones.
You should avoid the following lighting mistakes to capture good quality images in the first place:
- Using too much light can wash out your product and create harsh shadows.
- Insufficient lighting usually results in underexposed or dark images.
- Not carrying extra light sources for outdoor shoots can result in underexposed images with harsh shadows.
- Using excessive ISO to make images appear bright can make your images appear grainy.
- Not focusing on color cast can cause unnatural hues in your photos.
- Improper color balance can make your images look unrealistic and unappealing. You can use a white or gray card to set the proper color balance.
- Do not use shiny backdrops. It creates unwanted reflections which is bad for photography.
Frequently Asked Questions(FAQ)
What is the best lighting for product photography?
The best lighting for product photography are continuous LED light, ring light and strobes. Usually, photography studios use LEDs and strobes together. The strong intensity of strobes can highlight product details and make the setup well exposed. However, a ring light might be the best option for up close photos of small products.
What are the lighting requirements for product photography?
Lighting requirements for product photography include a good light source and accessories like reflectors and diffusers for evenly scattered soft lighting. Your light should also maintain a consistent color temperature to ensure accurate product color.
Can I use LED lights for product photography?
Yes. LED lights are one of the best light sources for product photography. These lights use less power but produce a bright light. Some of the latest LED lights have a brightness adjustable feature. You can adjust the intensity and color temperature based on your preferences. Moreover, LEDs are the ideal choice for long time shooting because of their low heat generation ability.
How many watts are required for product photography?
Watt requirements for product photography depend on your photography setup and needs. Usually 200-300 watts are enough for capturing small products. But you may need more than 500 watts to capture professional quality large products.
Conclusion
Lighting in product photography can be the key to the success or failure of your marketing efforts. Mastering lighting skills is challenging. However, you can overcome this difficulty with time and practice. Apply the lighting knowledge you have gained from this blog to polish your photography skills. Your dedication, passion and hard work will help you capture professional quality product images.