23 May How To Create Clipping Path In Photoshop?
Whether you want to replace your background or use a specific portion of an image in any graphic design, you need image clippings. Although many photo editing apps can automatically generate cutouts, the results are not professional.
Do you want to master the technique of creating image clippings?
Here is a detailed step-by-step guideline on how to create clipping path in Photoshop. To know the complete process, stay tuned until the end. You will learn a few other insights related to clipping paths too.
So, without further ado, let’s dive in.
What Does Clipping Path Mean?
Clipping Path is a photo editing technique that separates subjects from the background. Photo editing tools have numerous selection tools. You can use these tools to create closed vector paths around the subjects in an image. You can make cutouts of the desired areas and separate them from the background.
These cutouts are called image clippings. You can use these image clippings independently on any background or design. This technique is commonly used in eCommerce, fashion photography, advertising and other industries.
The Steps on How to create a clipping path in Photoshop
Creating a clipping path means drawing vector paths along the edges of a subject in an image. These paths are used to isolate the selected subject from the background.
Let us walk you through the detailed process of creating clipping paths using proper visual representations.
Follow these step-by-step guidelines to create professional quality image clippings. The tutorial provided below is created in Adobe Photoshop using the pen tool.
Step 1: Open The Image File In Photoshop
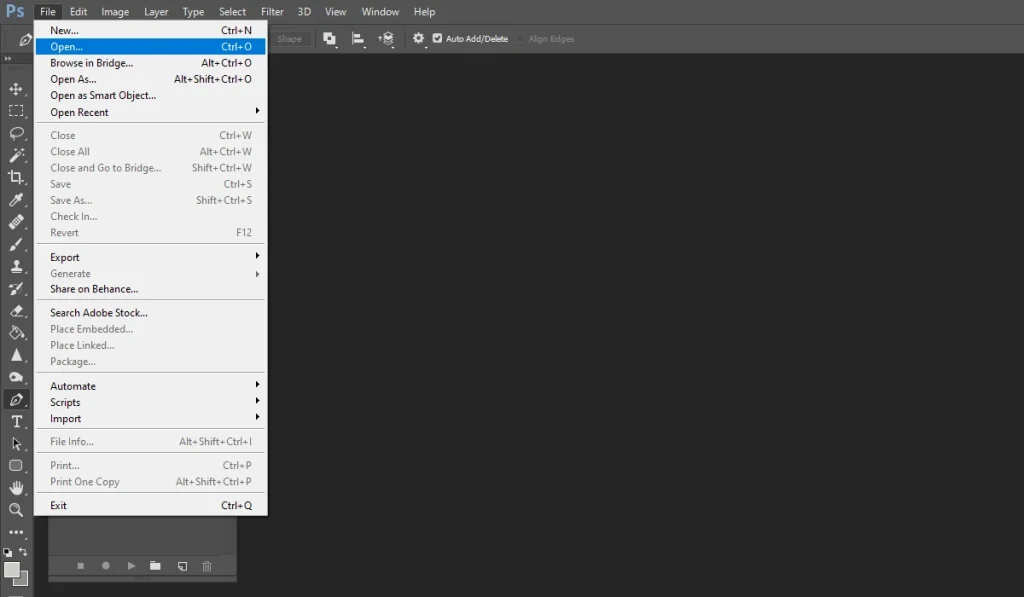
First, open the image file in Photoshop’s ‘Document window’. Go to the menu bar. Select ‘File’, and then click ‘Open’. This will give you the option to select your image from your device. Browse through your image files and select the image you want to create the image clipping.
Step 2: Make a Duplicate layer
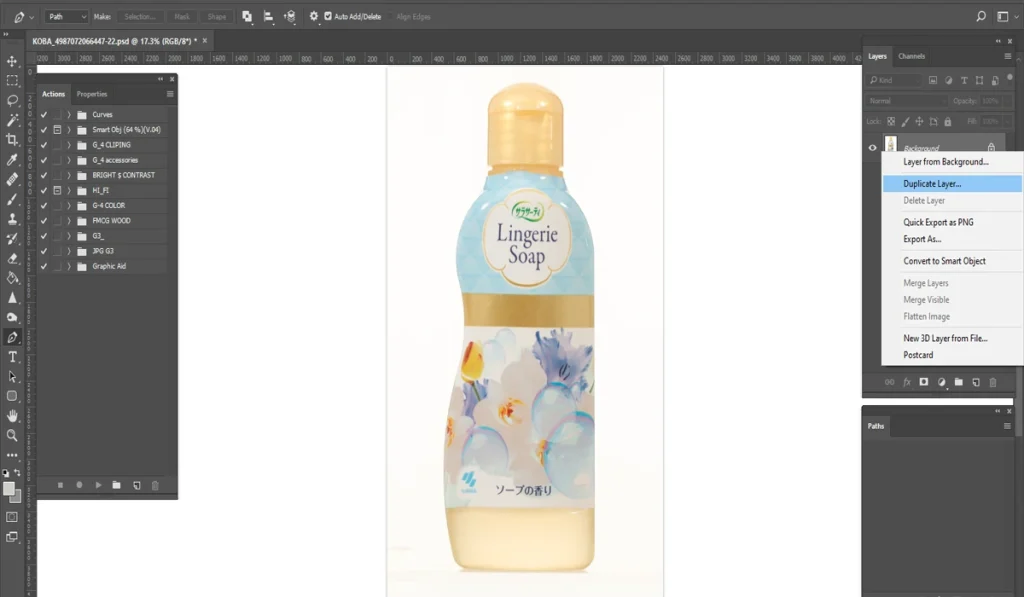
Now right-click on the ‘Background’ layer. A pop-up menu will appear. Select the ‘Duplicate Layer’ option to create a duplicate version of your photo. Make the background layer invisible by clicking its visibility icon.
Step 3: Select Pen Tool

In Photoshop’s default workspace, the tool panel is located on the left side. Right-click the pen icon in the ‘Tool panel’ and select ‘Pen tool’.
Step 4: Zoom in the Photo
You have to zoom in on the photo to create precise outlines.
You can zoom in on your photo in 3 ways:
- Press the Ctrl and ‘+’ keys together.
- Use the Zoom tool from the tool panel. But switching between the Zoom tool and the Pen tool can be a hassle for you.
- This is the most useful way. Press the Ctrl and ‘K’ keys together. A pop-up menu will appear. Check the option ‘Zoom With Scroll Wheel’ and click ‘Ok’. Now you can easily zoom in and zoom out your images with your mouse.
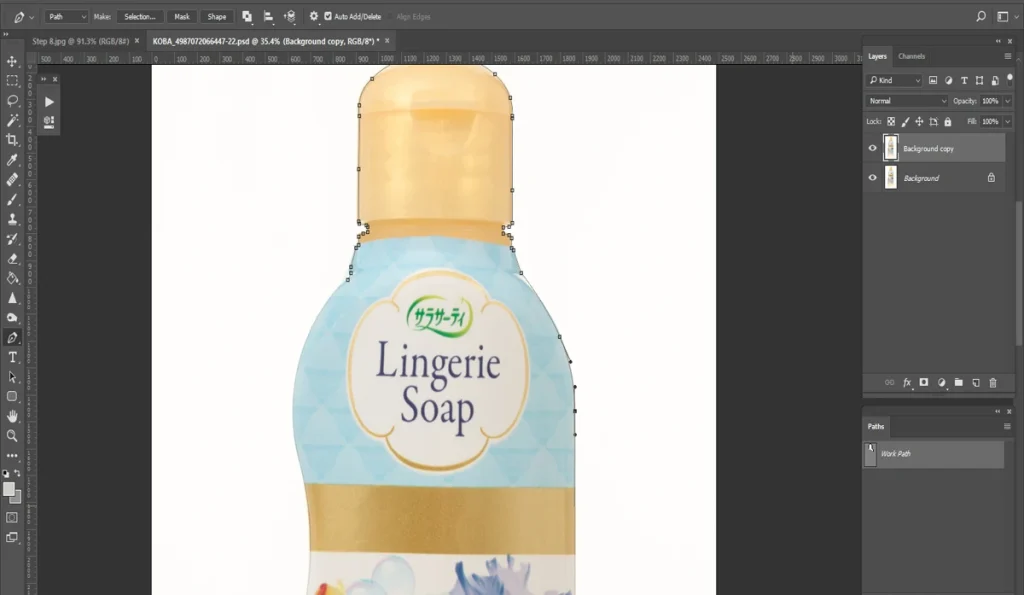
Step 5: Start Creating Clipping Paths
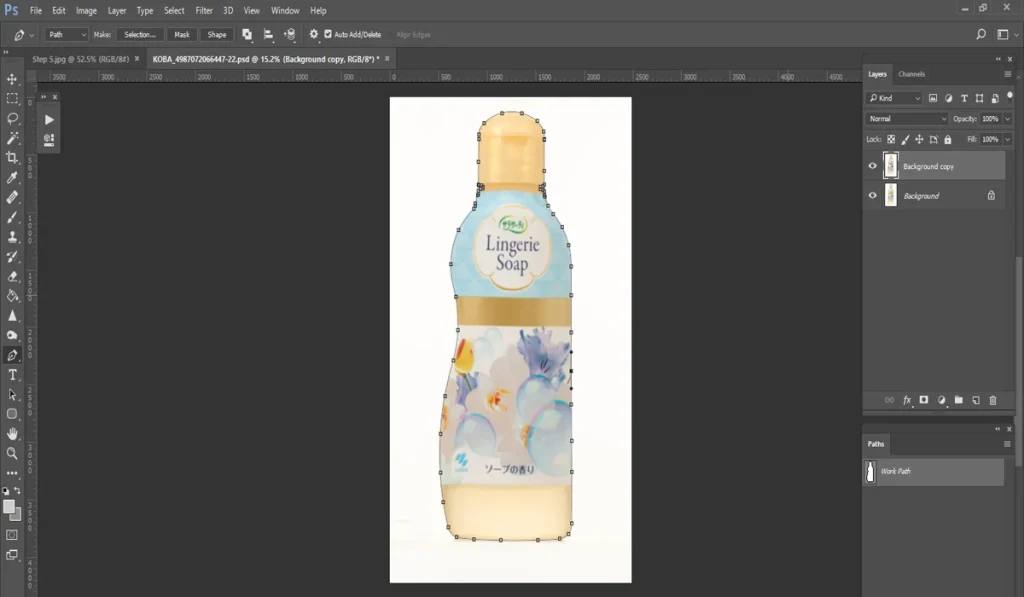
Now start drawing the outlines. Click on one point of the edge to start your anchor points. Then create anchors along the edge of the subject. For curved edges, click and hold the left mouse button on the anchor point handles and drag it to adjust the curves. Create clipping paths precisely and close the anchor point by connecting the last anchor to the first.
Step 6: Save Path
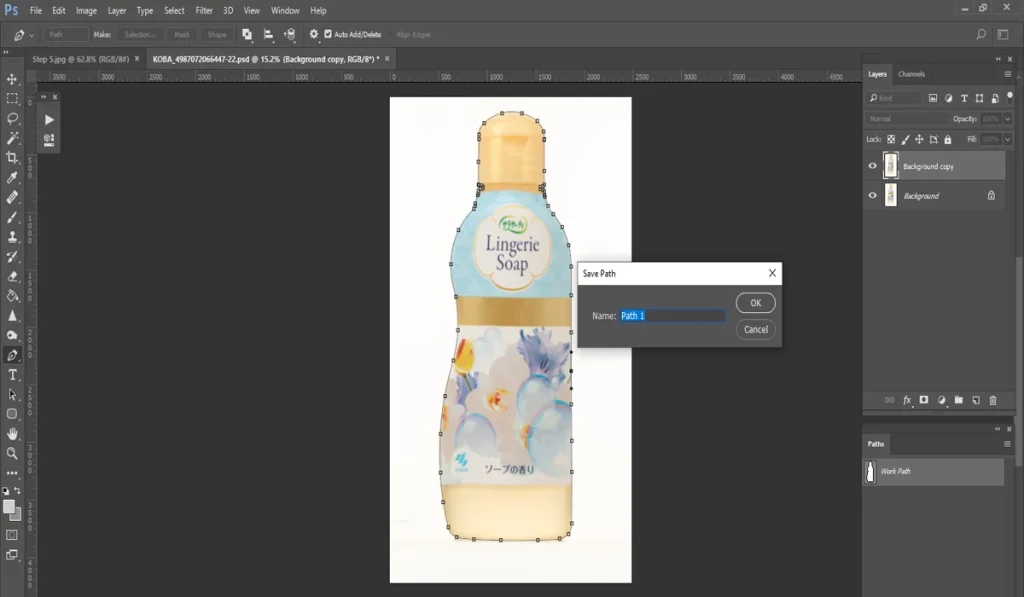
Click on ‘Paths’ from the panel on the right side. Then select your path and click on the small arrow beside it. Click on ‘Save path’ from the pop-up menu. Give your path a name and hit the ‘Ok’ button.
Step 7: Remove Background
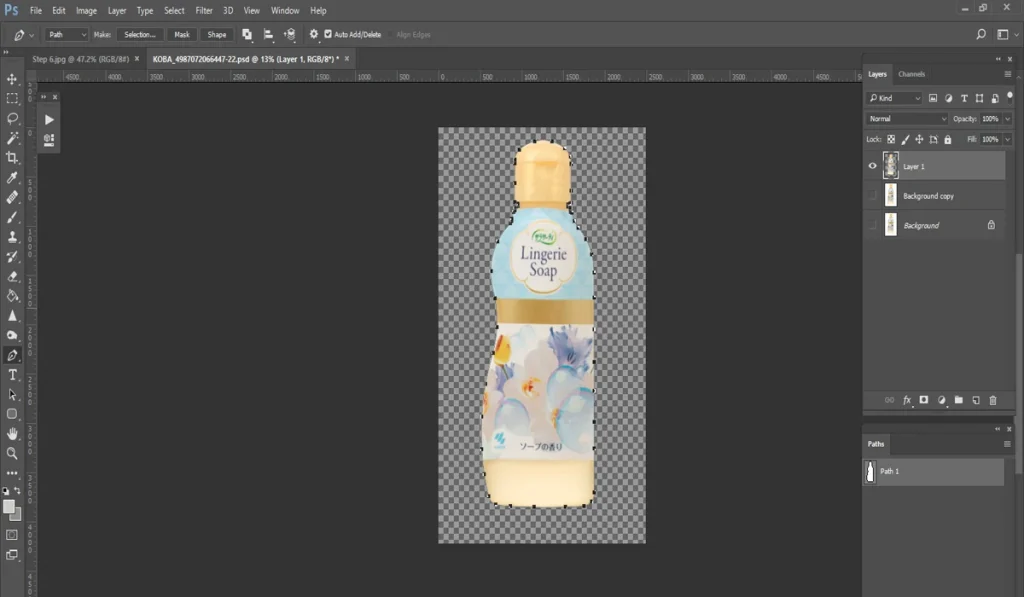
Click on the path that you have saved just now. This will keep your selection active. Now press the Ctrl and ‘J’ keys together. It will delete all the surrounding areas except the area inside your selection.
Step 8: Make Edges Smooth
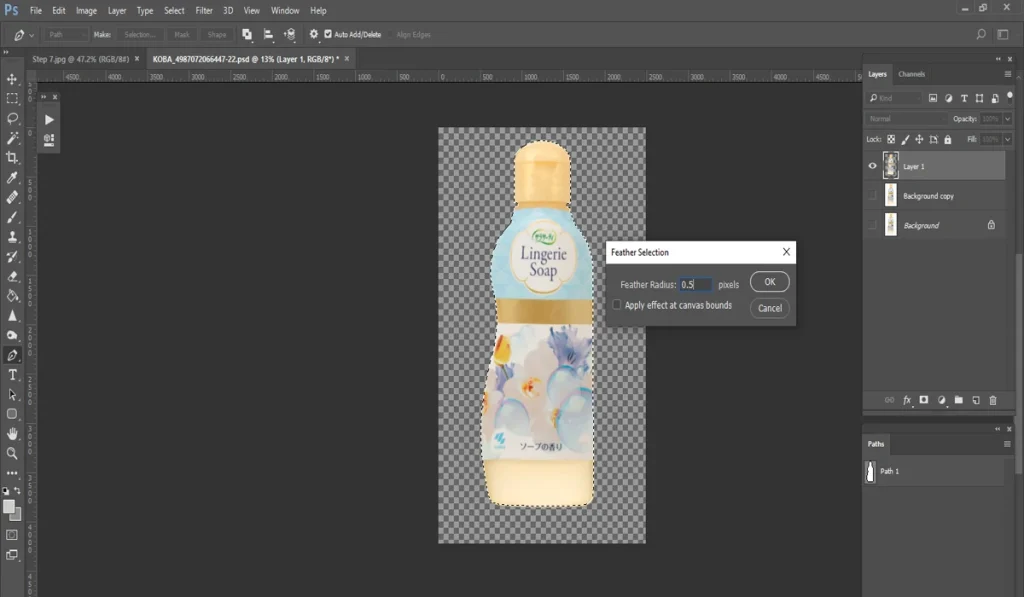
Again, click on the path and then right-click on your selected subject. Select the ‘Make Selection’ option from the pop-up menu and set the feather value to (0.5). This will give a subtle smoothness to your cutouts.
Tips On Creating Clipping Path
Follow these tips to make your clipping paths flawless:
Use the Pen Tool Efficiently
There are multiple selection tools in Adobe Photoshop. Almost all of them have some flaws in them. So, it is best for you to master the pen tool. This is the only tool that can give you flawless cutouts of both simple and complex objects.
Zoom In for Detail
When drawing the outlines or anchor points, make sure you zoom in on the images. This will help you select the intricate details precisely.
Work on a Duplicate Layer
Always create a duplicate layer of the original image before you begin creating the clipping path. This will keep the original image data intact. In case you make mistakes, you can revert the changes and start again from scratch.
Save Your Path
Do you want to reuse or re-edit your clipping path? Then you must save them properly.
Feather the Edges
The harsh edges of the cutouts look unnatural. Feather the edges of your clipping path to give it a more natural finish. When you place the smooth-edged image clippings over other backgrounds, they will easily blend in with the surroundings.
Common Mistakes to Avoid
Here are some of the common mistakes you must avoid to create professional-quality clipping paths:
Not Using Anchor Points Properly
Many graphic designers use fewer anchor points on subjects with complex curves. For this reason, the curves do not look professional. Create as many anchor points as possible to ensure that the outlines are perfectly drawn on the curves.
Handle Mismanagement
The anchor point handles give you control over the path’s direction and curvature. You must properly adjust the handles so that your curves appear uniform and natural.
Rely on Automatic Tools
Automatic tools cannot select areas precisely, just like you can do manually with a pen tool. That is why you should avoid relying solely on automated tools. You can use these tools to select areas, but make sure you zoom in on the photos to check the unselected or misselected areas.
Skipping the Feathering Step
Many amateur image editors forget to feather the edges. For this reason, the edges of the cutouts look harsh and unnatural. So, always make sure you slightly feather the edges of your cutouts.
Stray Anchor Points
Oftentimes path remain open because of stray anchor points. So double-check to look for stray anchor points and disable them to properly close the paths.
Using Low-Resolution Images
Creating paths on blurry images results in inaccurate paths. When you zoom in on the image to draw the outlines precisely, you will notice that the lines on the edges are scattered. So it’s best to use high-resolution images.
Forgetting to Save Work
Image editing software can crash at any time due to heavy image files or bugs. So make sure you always save your work.
How To Choose Best Clipping Path Company?
Choosing the right clipping path company can be daunting when you have to select only one from hundreds and thousands of options. So, how do you choose the best clipping path company?
Here are some key considerations to help you select the clipping path service provider that will ensure you high-quality, reliable, and cost-effective services.
- Work Quality: Check the company’s portfolio and work samples to evaluate their quality of work. Precise cutouts, smooth edges and intricate details prove their ability to provide you with high-quality results.
- Experience: A company with a long track record proves that it is an expert in the photo editing industry. So select the one who has been providing its service for a long time.
- Customer Reviews: Check customer reviews and testimonials before you hire a service provider. Evaluating the experience of previous clients is important to put your trust in the company.
- Turnaround time: Choose the service provider that can ensure you fast delivery.
- Cost: Select a service provider that offers high quality service at a reasonable price. Also, make sure the pricing structure is transparent.
- Security & Confidentiality: You must choose a company that can ensure your data security. Moreover, signing the non-disclosure agreement (NDA) is important to ensure the confidentiality of your project information.
- Free Trial: Companies that are confident in their service offer a free trial option. Give some of your photos for free trial. It will help you identify whether the company can meet your standards or not.
Yeah, we know it’s a long & complex process. That’s why we have the perfect solution for you.
Masking Aid is a globally reputed and trusted clipping path service provider. This company has been providing professional-quality photo editing services for over 11 years. Till today they delivered 1.5M projects. They have a large team of Photoshop experts who provide 100% hand drawn clipping paths with guaranteed satisfaction.
You will get a wide range of photo editing services apart from clipping paths. The services include background removal, photo retouch, image masking, ghost mannequin, color correction, shadow making, E-commerce photo editing and many more. The best part of their service is their transparent and competitive pricing structure.
Moreover, they deliver within 24 hours with a money back guarantee. You can try out their free trial option to assess their work quality.
Frequently Asked Questions(FAQ)
What is the purpose of clipping path?
The purpose of clipping path is to isolate foreground elements of images from the background. You can use the cutouts of the subject or specific elements on another background for image editing or manipulation. The edges of the image clippings remain smooth and clean to give you a seamless effect when used on other backgrounds.
Why clipping path is important?
Clipping path is important because it allows you to isolate objects from their backgrounds precisely. This gives you professional images with a clean appearance. This technique is essential for high-quality product photography, detailed image editing, and seamless integration into various design layouts. It helps to maintain consistency across visual presentations in e-commerce, advertising, and graphic design.
Which software & tools are popular for creating clipping path?
There are numerous paid and free software options available for creating clipping paths such as Adobe Photoshop, Adobe Illustrator, GIMP, Inkscape and so on. These software offer multiple selection tools like the pen tool, magic wand, quick selection tool, etc. You can use these tools to create image clippings.
Conclusion
We are at the end of our discussion. So far we have discussed clipping path, detailed tutorial on how to create clipping path, some tips and common mistakes. Use the insights you have received from this article to master clipping path techniques as well as when you look for the right clipping path partner.
Thank you for staying till the end.