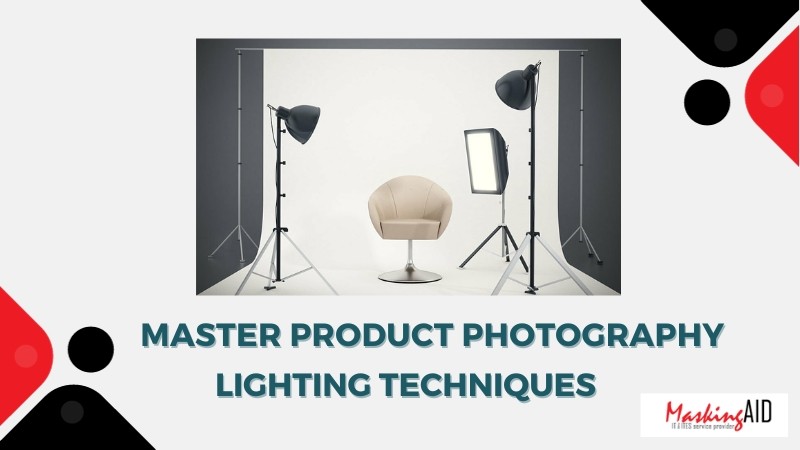
17 May Master Product Photography Lighting Techniques: The Essential Guide
What drew your attention when you clicked “Add to Cart” last time?
Chances are, it was the visual allure of the product! So, the image of the product plays the most important role.
However, beyond cameras and lenses, the key to unlocking captivating images lies in your product photography lighting technique. For instance, these days, product photography lighting for e-commerce has become a hot topic.
So, it’s not hard to guess right lighting makes all the difference. And you must capture in the best possible light for stunning shots.
Go through the following discussion to learn product photography. By the end of this guide, you’ll be able to illuminate your products to perfection so that every glint and shadow tells a story.
4 Steps to Perfect Product Photography Lighting Setup
Let’s say you want to learn about lighting for clothing Photography. In that case, clothing, with its textures and folds, demands strategic lighting to bring out fabric details, and define contours.
Whether it’s the subtle glow for a high-end silk blouse or dramatic lighting for textured denim, the interplay of light shapes the visual identity of the product. You see, different products demand different lighting arrangements.
Below, you will get a comprehensive view of how you should set the lighting for a product. Besides, you desire a lighting setup that minimizes flaws, reducing the need for extensive product photo retouching.
Time to learn the lighting techniques!
Step 1: Planning and Visualizing Your Shoot
Effective product photography requires clear pre-production planning. Because guesswork won’t take you far when it comes to perfect product photographs.
A plan should help you define the:
- Product photography idea
- Shooting locations
- Backdrops
- And most importantly lighting strategies
Moreover, you can analyze the material, shape, color, and size of your product. And in turn make the right decisions on lighting, props, and backgrounds.
Next, imagine the shot mentally, considering various combinations of lighting, props, and backgrounds.
Also, you are aware that different types of products require specific lighting setups. Therefore, commercial photographers adapt lighting for food, skincare, furnishings, etc., considering the impact of natural light. So, choosing lights specific to each product ensures a lasting impression on clients.
Step 2: Find the Best Light for Product Photography
In the next step of your perfect product shot, we’ll explore different lighting options. Basically, there are 2 forms of lighting sources: natural and artificial.
Learn how to handle light sources.
With Natural Light
Capturing product photos with natural light offers a range of perks, such as: enhancing the visual appeal and authenticity of your images. Also, it’s a low budget product photography lighting arrangement.
How to Take Product Photos Indoors?
- Position products near windows to benefit from soft, indirect sunlight.
- Experiment with different angles to find the most flattering natural light for your product.
- Use white or reflective surfaces to bounce natural light onto the product.
- Enhance brightness and minimize shadows by strategically placing reflective materials.
- If natural light is limited, supplement it with artificial light.
- Softbox for product photography or any DIY alternative can mimic natural light.
How to Take Product Photos Outdoors?
- Utilize the sun as a powerful backlight, creating a natural glow around your product.
- Position the product between the camera and the sun, emphasizing contours.
- Seek areas with diffused light, such as under a tree or in the shadow of a building.
- Soft, even lighting reduces harsh shadows, providing a balanced and pleasing look.
With Artificial Lights
Selecting the right artificial lights and understanding their nuances empower you to craft visually stunning and impactful images.
Here are some popular artificial lighting arrangements:
Flashguns
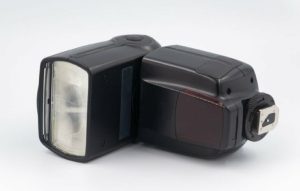
- Flashguns provide powerful, brief bursts of light. And they are ideal for freezing fast-paced scenes or capturing intricate details.
- Their compact size makes flashguns portable and versatile, enabling creative lighting setups both indoors and outdoors.
Strobes
- Strobes are studio-grade lights that emit intense light. They provide brief flashes of light, illuminating products with consistent and powerful bursts.
- With adjustable power settings and various modifiers, strobes offer precise control over the intensity and direction of light.

Continuous Lights
- Continuous lighting for product photography offers a steady, uninterrupted light source.
- Their stability makes continuous lights suitable for video recording and portrait photography, minimizing flicker.
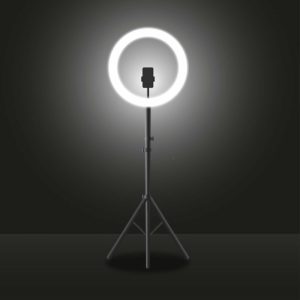
Ring Lights
- A ring light for product photography produces a circular, even illumination, reducing shadows and creating a unique catchlight in the eyes.
- Particularly effective for close-up shots, ring lights are favored in beauty and fashion photography for their soft glow.
Overhead Lights
- Overhead lights cast light downward, emphasizing textures and creating defined shadows.
- Ideal for showcasing products on surfaces, overhead lights can simulate natural lighting conditions.

Step 3: Setting the Scene
This is a crucial stage that shapes the ambiance and impact of your photographs. Here’s how you can do it in simple steps:
1. Find Good Light
- Check where the natural light is coming from. It could be sunlight through windows, skylights, or even doors.
- If possible, put your product where it gets soft and gentle natural light. It makes your product look better, and you won’t need too many artificial lights.
2. Pick the Right Background
- Choose a background that fits your product’s style. If your product is simple, a plain background works great. If it has a vibe, go for a background that matches it.
- Make sure the product stands out by having enough difference between it and the background. A good background adds to the story without taking attention away from your product.
3. Keep it Simple
- Check if there’s anything extra in the scene that’s not needed. Get rid of things that might take attention away from your product.
- A clean and simple setting makes your product look better and catches the viewer’s eye.
Step 4: Selecting Your Lighting Arrangement
Let’s explore different lighting setups to make your product pop in photos.
a. 1-Light Setup
You don’t always need multiple lights for stunning product photos. A single light, if used skillfully, can produce professional-looking results.
Lighting Options
In a one-light setup, you can choose from various sources like LED lights, strobes, ring lights, or overhead lights.
Direct Front Light
Front lighting is a popular choice among product photographers for its simplicity and effective results.
- Position the light source (flashgun, LED, or strobe) in front of the product at eye level.
- Adjust exposure if the light is too bright, and be mindful of background proximity to avoid hard shadows.
Ring Light Magic
Ring lights, known for their popularity in portrait photography, shine even brighter in product photography.
- They isolate the product from the background, drawing attention effectively.
- Manage brightness with distance or use a diffuser for a softer glow.
- These lights are ideal for capturing small-sized products but be cautious with brightly colored items to prevent blown-out highlights.
Overhead Lights for Drama
When aiming for a dramatic look in product shots, overhead lights deliver a “David Fincher-esque” style.
- These lights contain adjustable heads that allow experimentation with angles, adding creative flexibility.
- Control ambient light for consistency and be mindful of reflections, especially with reflective surfaces.
- Overhead lights work best when seeking a distinctive and moody atmosphere in your product photography.
Considerations and Limitations
For reflective surfaces, a single light setup may not suffice, requiring additional lights or post-processing to manage reflections effectively.
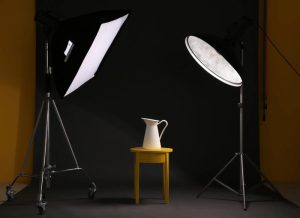
b. 2-Light Setup
A standard 2-light setup involves one light serving as the main light and the other as the fill light, collectively illuminating the subject.
The main light is usually positioned opposite the camera to provide bright subject illumination. The fill light, placed above or below the subject, helps eliminate shadows on the subject’s face.
Three Amazing 2-Light Setups
- Rim Lighting: Rim lighting is excellent for shooting products with reflective surfaces, such as bottles.
Placement: Position lights on both sides, preferably back-right and back-left, for optimal results.
Front Light Solution: If only two lights are available, use a softbox with a marked center to serve as a makeshift front light.
- Lighting from Below: Lighting from below produces a dramatic effect, creating shadows and highlights on the product’s surface.
Best Angle: Achieve excellent results with light falling on the subject at a 90-degree angle.
Setup: Place a light beneath a glass surface to illuminate the product from below, using diffusers or dimmers for desired brightness and softness.
- Gradient Lighting: Gradient lighting delivers professional and visually striking product photos.
Methods: Achieve a gradient look using lights with different color temperatures, colored gels, or creative placements.
Angles and Effects: Lights at 45-degree or 90-degree angles, coupled with shooting through an umbrella, can create captivating gradient effects.
C. 3-Light Setup
The 3-light setup is widely favored among photographers for its versatility and ability to create dynamic and contrasting images.
Components of the Setup
Frontal Light: Positioned in the front, this main light provides even illumination on both sides of the product, resulting in a flat and balanced look.
Side Light: Illuminates one side of the product, creating shadows on the opposite side for depth and dimension.
Backlight: A secondary light source that illuminates one side or edge of the product, contributing to a dramatic effect.
Light Source Consistency
- Use uniform light sources, such as LEDs, light bulbs, strobes, or flashguns, to maintain color temperature consistency and enable precise lighting control.
- Consistent output ensures that one unit does not outperform the others.
Arrangement and Placement
- Position the three lights at approximately 45-degree angles from each other, forming a triangular arrangement on the set.
- This configuration provides even illumination across the entire scene, both vertically and horizontally.
However, you can always experiment with the placement angles of the lights to achieve different looks. Also, keep in mind the creative goal determines the arrangement and brightness of the three lights. Moreover, explore ISO settings, f-stops and accessories like diffusers, umbrellas, and reflectors for diverse effects.
FAQ: Get More Information on Product Photography Lighting
What is the best lighting for clothing photography?
Soft, diffused natural light or studio lights with softboxes are ideal for clothing photography. This minimizes harsh shadows and highlights, showcasing textures and colors effectively.
What are some low budget product photography lighting arrangements?
Affordable options include using natural light near a window, DIY diffusers to soften light, or inexpensive continuous LED lights. Reflectors made from household items can also enhance lighting without breaking the budget.
What are some professional photography lights?
Professional-grade lighting options include studio strobes, powerful flashguns, and continuous LED lights with color temperature control. Brands like Profoto, Godox, and Elinchrom are known for their quality professional lighting equipment.
What is the best light for product photography?
The best light for product photography depends on the specific requirements, but soft and diffused lighting is generally preferred. Softboxes, ring lights, and diffused natural light provide even illumination, highlighting product details.
How to do product photography lighting for e-commerce?
For e-commerce product photography, utilize consistent and diffused lighting to ensure accurate representation. Set up a well-lit, clutter-free environment using natural light or artificial lights. Employ techniques like the 3-light setup for versatile and professional results.
Final Thoughts: Light Is Not Just a Technical Necessity
Lighting during photography transforms a lifeless object into a vibrant, and marketable creation.
As consumer interest in visual narratives continues to surge, the ability to capture professional and eye-catching shots becomes a critical skill.
Mastering this art involves a journey through various lighting techniques, equipment choices, and continuous learning. Each step in this exploration contributes to the evolution of a product photographer.
And this guide stands as a comprehensive resource, brimming with in-depth insights and expertise. Take help from this discussion to find the best light for product photography.