25 May How Big Is an 8×10 Photo in Inches, CM, Pixels & DPI Explained
An 8×10 photo is a classic standard size used in photography, but its actual dimensions change depending on how you measure it, whether in inches, centimeters, pixels, or DPI. For photographers and editors, knowing these conversions is crucial to avoid pixelation, cropping errors, or poor print quality.
In this guide, you’ll learn exactly how big an 8×10 photo is in different units and how to prepare it for both digital use and high-quality printing.
What Is an 8×10 Photo Size?
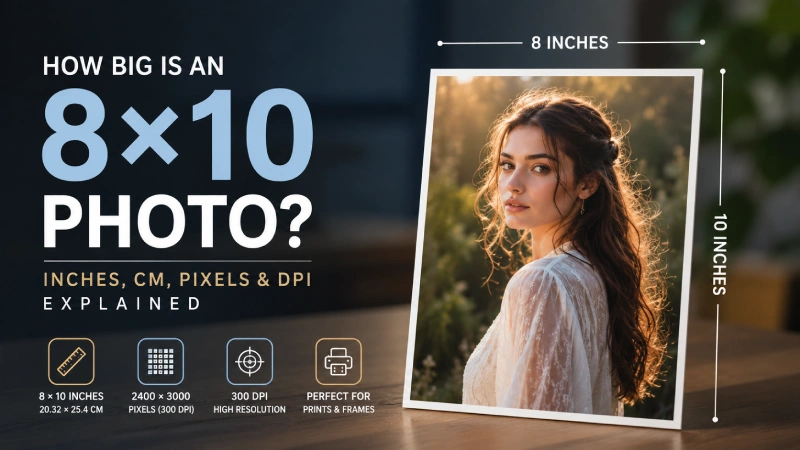
An 8×10 photo size means the photograph measures 8 inches wide by 10 inches high (or 20.32 cm by 25.4 cm). Before heading into in-depth details, let’s take a look at the 8×10 photo size conversion table below:
| Measurement Unit | Width x Height |
|---|---|
|
Inches (in) |
8 x 10 |
|
Centimeters (cm) |
20.32 x 25.4 |
|
Millimeters (mm) |
203..2 x 254 |
|
Feet (ft) |
0.67 x 0.83 |
How Big Is an 8×10 Photo in Different Units?
An 8×10 photo is a standard print size widely used for portraits, wall displays, studio photography, and framed prints. Understanding its dimensions in different measurement units helps you prepare images accurately for printing and framing.
8×10 Photo Size in Inches
An 8×10 photo measures exactly 8 inches wide by 10 inches high (for vertical or portrait orientation) and has a 4:5 aspect ratio.
For example, an (8 x 10) print is slightly smaller than a standard piece of A4 paper (8.27 x 11.69 inches), making it a great compact size for wall arrangements.
8×10 Photo Size in Centimeters (CM)
An 8×10-inch photo measures exactly (20.32 x 25.4) centimeters (or 203.2 x 254 millimeters).
A 20.32 × 25.4 cm print is roughly similar to the size of a medium notebook cover or a compact wall frame commonly used for portrait displays. This size provides photographers enough room to display sharp details, clothing textures, and balanced compositions.
8×10 Photo Size in Millimeters (MM)
An 8×10 photo equals 203.2 × 254 mm. Millimeters are particularly helpful for precise print specifications, custom framing, and print shop measurements, where exact dimensions matter.
A 203.2 × 254 mm print is comparable to the dimensions used in professional mounting boards, frame mats, or print-trimming guides that photographers and print labs frequently handle.
8×10 Photo Size in Feet
In feet, an 8×10 photo measures approximately: 0.67 × 0.83 feet. Although photographers rarely use feet for small prints, it can help visualize how the print fits into larger display arrangements.
However, an 8×10 photo is a little smaller than 1 square foot, making it a practical size for gallery walls, shelf displays, office decor, or grouped photo arrangements. For event photographers and portrait studios, this size offers strong visibility without requiring large wall space.
How Big Is an 8×10 Photo in Pixels?
For a high-quality physical print, an 8×10 photo should be 2400×3000 pixels. However, the exact pixel size depends entirely on your resolution (DPI/PPI), which is discussed below:
Pro Tip: If you’re designing or exporting a file to print, always stick to the 300 DPI standard to avoid pixelation.
Pixel Dimensions at 72 DPI (Web Use)
At 72 DPI, an 8×10 photo requires: 576×720 pixels. This resolution is mainly used for websites, social media previews, blog images, and digital viewing.
Pixel Dimensions at 180 DPI
At 180 DPI, an 8×10 photo requires: 1440×1800 pixels.
This resolution offers moderate print quality and works well for casual photo prints viewed from a distance. It is often acceptable for everyday printing needs, but may lack fine detail in professional photography work.
Pixel Dimensions at 240 DPI
At 240 DPI, an 8×10 photo requires: 1920×2400 pixels.
240 DPI provides sharper detail and better color reproduction than lower resolutions. Many photographers consider this a strong balance between image quality and file size.
Pixel Dimensions at 300 DPI
At 300 DPI, an 8×10 photo requires: 2400×3000 pixels.
300 DPI is the professional standard for high-quality photo printing. It delivers excellent sharpness, fine detail, and clean color transitions, especially for close viewing distances.
Pixel Dimensions at 600 DPI
At 600 DPI, an 8×10 photo requires: 4800×6000 pixels.
600 DPI produces extremely detailed prints with superior sharpness and tonal accuracy. It is commonly used for premium archival prints, fine art photography, and highly detailed commercial work.
Understanding DPI vs PPI for 8×10 Photos
When preparing an 8×10 photo for printing or digital use, photographers often experience the terms DPI and PPI. Although they are closely related, they are not exactly the same. Understanding the difference helps you get sharper prints, accurate image sizing, and better overall photo quality.
What Is DPI?
DPI stands for Dots Per Inch. It refers to the number of ink dots a printer places within one inch of printed space. DPI is connected to the printer’s physical printing capability rather than the image itself.
In short,
- Smoother gradients
- Sharper printed details
- Better color transitions
- Higher-quality print output
For example, if you print a wedding portrait on a professional photo printer with high DPI settings, skin tones and fine textures such as hair or fabric appear smoother and more detailed.
What Is PPI?
PPI stands for Pixels Per Inch. It measures the number of image pixels contained within one inch of a digital photo. PPI affects the image resolution and determines how sharp the photo appears when printed.
For an 8×10 print, the standard professional resolution is: 2400×3000 pixels.
The higher the PPI:
- The sharper the image appears
- The more detail is preserved
- The better the print quality becomes
Suppose a portrait edited in Lightroom or Photoshop at 300 PPI retains much finer facial detail compared to the same image exported at 72 PPI.
Why DPI Matters for Print Quality
DPI directly affects how clean and professional an 8×10 print looks on paper. Low DPI prints may appear:
- Blurry
- Pixelated
- Soft in detail
- Less color accurate
Higher DPI improves print sharpness, especially for close viewing distances such as framed portraits, studio samples, and gallery prints.
For professional photography, higher print density is important because viewers often examine prints up close. Fine details like eyes, textures, and shadows become much more noticeable.
Best DPI for Different Uses
For most professional 8×10 photo prints, 300 DPI offers the best balance between image quality, file size, and printing performance. Below, we’ve highlighted a table:
| Use Case | Recommended DPI | Quality Level |
|---|---|---|
|
Web images & social media |
72 |
Low-resolution digital use |
|
Casual home printing |
150-180 |
Acceptable everyday quality |
|
Photo books & framed prints |
240 |
High-quality consumer prints |
|
Professional photography prints |
300 |
Industry-standard sharpness |
|
Fine art & archival printing |
600 |
Ultra-detailed premium quality |
What Is the Aspect Ratio of an 8x10 Photo?
The aspect ratio of an 8×10 photo is 4:5.
This means the image is 4 units wide for every 5 units in height, which creates a slightly taller, portrait-oriented frame commonly used in photography.
This ratio is different from most camera sensors, which typically shoot in a 3:2 aspect ratio. Because of this mismatch, images often need slight cropping when converting to an 8×10 print.
However, if you take a photo using a DSLR or smartphone (3:2 ratio), and then print it as 8×10 (4:5 ratio):
- The top or bottom of the image may be trimmed
- Or the sides may be slightly cropped
- The subject may need repositioning before printing
For example, a full-body portrait shot may lose a small portion of headroom or foot space when converted into an 8×10 frame unless it was composed with cropping in mind.
Benefits of 4:5 in photography:
- Works well for portrait photography
- Fits standard frame sizes easily
- Provides a balanced, natural composition
- Looks good on walls and tabletop displays
It is especially popular for studio portraits, headshots, and printed photo albums.
How Big is an 8x10 Photo Size in Pixels for Printing and Web?
The pixel dimensions of an 8×10 photo depend on the resolution (PPI/DPI) used. Lower resolution is used for digital/web display, while higher resolution is required for sharp printing.
For Web
For web use, images are typically optimized for fast loading and screen display rather than print quality. The standard is around 72 PPI.
At 72 PPI, an 8×10 photo becomes: 576×720 pixels at 72 PPI.
Real-life use cases for photographers:
- Website portfolios
- Online galleries
- Social media uploads (compressed versions)
- Blog images
- Client previews
At this size, the image looks fine on screens but is not suitable for printing because fine details are lost.
For Printing
For high-quality printing, the industry standard is 300 PPI, which preserves sharp detail and professional clarity.
At 300 PPI, an 8×10 photo becomes: 2400×3000 pixels at 300 PPI.
Real-life use cases for photographers:
- Professional studio prints
- Wedding and portrait albums
- Framed wall prints
- Client delivery prints
- Portfolio submissions
This resolution ensures crisp edges, accurate skin tones, and fine detail even when viewed closely.
Why Is the 8×10 Photo Size So Popular?
The 8×10 photo size is popular because it sits in a “sweet spot” between portability and visual impact. It is large enough to showcase detail clearly and small enough to comfortably display on a desk or shelf without taking up too much space.
Other key benefits are:
- Perfect Balance Between Size and Detail: An 8×10 print is large enough to highlight facial features, textures, and composition details without overwhelming the viewer. It’s ideal for portraits where clarity matters, but you don’t need a large wall-format print.
- Fits Standard Frames and Albums: One of the biggest reasons for its popularity is compatibility. 8×10 is a standard frame size available in almost every photo shop, online store, and print lab.
- Easy to Print and Cost-Effective: Compared to larger prints like 11×14 or 16×20, 8×10 prints are more affordable while still looking professional. Print labs widely support this size, which keeps production fast and consistent.
- Ideal for Portrait Photography: The 4:5 aspect ratio of 8×10 works naturally for portraits, especially headshots and upper-body framing. It complements human proportions well and avoids excessive empty space.
- Versatility: Whether used for individual headshots, family portraits, or artistic prints, the 8×10 size translates beautifully to living room wall collages or simple desk displays.
Common Uses of 8×10 Photos
The 8×10 photo size is one of the most versatile print formats in photography. It is widely used across personal, professional, and commercial applications because it offers a balanced combination of detail, framing compatibility, and display appeal.
Portrait Photography
8×10 is a classic choice for portrait photography because it highlights facial details and composition without being too large or too small. For example, studio photographers often deliver 8×10 portrait prints to clients for framing or portfolio use, especially for formal head-and-shoulder shots.
Family Photos
Family portraits are commonly printed in 8×10 size for albums, frames, and home displays. For example, a family studio session often results in several 8×10 prints that parents frame and place in living rooms or hallways.
Wedding Prints
Wedding photography packages frequently include 8×10 prints for key moments like couple portraits and ceremony highlights. For example, couples often select their favorite wedding image in 8×10 format for bedside tables or guest display frames.
Professional Headshots
Corporate professionals, actors, and freelancers use 8×10 prints for resumes, portfolios, and casting submissions. For example, an actor may submit an 8×10 headshot to casting agencies for auditions or promotional use.
Wall Art & Home Decoration
8×10 photos are popular for interior decoration because they are easy to frame and arrange in gallery walls. For example, homeowners often create a photo wall using multiple 8×10 prints of travel memories or family moments.
Gallery Displays
Photographers use 8×10 prints for exhibitions, sample displays, and portfolio showcases. For example, a photography exhibition may include framed 8×10 prints arranged in a grid layout to tell a visual story.
Product Photography
E-commerce and commercial photographers sometimes print 8×10 images for client presentations or physical catalogs. For example, a product shoot for jewelry or fashion items may be printed in 8×10 for client review before final marketing use.
Awards & Certificates
8×10 size is commonly used for certificates, recognition prints, and award photos. For example, organizations often print achievement certificates or commemorative photos in 8×10 frames for official presentation.
Personalized Gifts
Custom 8×10 photo prints are widely used as personalized gifts for special occasions. For example, a couple might gift an 8×10 framed engagement photo for anniversaries or birthdays.
School & Office Displays
Schools and offices use 8×10 prints for recognition boards, event highlights, and staff displays. For example, a school may display 8×10 student award photos on a notice board or hallway wall.
8×10 vs Other Popular Photo Sizes
The 8×10 photo size is often compared with other standard print sizes to help photographers choose the right format for framing, presentation, and client delivery. Each size serves a different purpose depending on detail level, viewing distance, and display style.
4×6 vs 8×10
The 4×6 photo is a small, everyday print size commonly used for albums and casual photo collections, while 8×10 offers a more professional, display-ready format.
Key difference:
- 4×6 is compact and budget-friendly
- 8×10 provides better detail visibility and framing impact
Real-life example:
A 4×6 print is perfect for a vacation album, while an 8×10 print is better suited for framing a favorite portrait from that trip.
5×7 vs 8×10
5×7 sits between 4×6 and 8×10 in size, offering a slightly larger display than 4×6 but still more compact than 8×10.
Key difference:
- 5×7 is ideal for small frames and desk displays
- 8×10 offers more visual presence and professional appeal
Real-life example:
A 5×7 photo might sit on a bedside table, while an 8×10 version of the same image is better suited for a living room wall.
11×14 vs 8×10
11×14 is a noticeably larger print size, often used for statement wall art and professional display pieces.
Key difference:
- 8×10 is more portable and versatile
- 11×14 is more impactful and decorative
Real-life example:
An 8×10 portrait works well in a desk frame, while an 11×14 version is often used as a centerpiece in a gallery wall or studio display.
16×20 vs 8×10
16×20 is a large-format print size designed for bold visual impact, commonly used in exhibitions and large wall décor.
Key difference:
- 8×10 is ideal for personal and small-frame use
- 16×20 is designed for high-impact wall displays
Real-life example:
A wedding couple may display an 8×10 photo on a side table, while choosing a 16×20 print as a centerpiece above their bed or sofa.
Quick summary:
- 4×6: Casual, album-friendly prints
- 5×7: Small decorative frames
- 8×10: Standard professional portrait size
- 11×14: Medium-large wall display
- 16×20: Large statement artwork
Comparison Table of Standard Photo Sizes
The standard photo sizes range from 4×6 (the most common) to poster size 16×20. Also, there are several aspect ratios.
Below, we’ve shared a clear comparison of the most commonly used photo print sizes to help you choose the right format for printing, framing, and presentation.
| Photo Size | Aspect Ratio | Best Use Cases | Visual Impact |
|---|---|---|---|
|
4×6 |
2:3 |
Albums, casual prints, and everyday memories |
Low |
|
5×7 |
5:7 |
Small frames, bedside tables, and gifts |
Low–Medium |
|
8×10 |
4:5 |
Portraits, studio prints, and wall framing |
Medium |
|
11×14 |
11:14 |
Wall art, professional displays, and decor pieces |
High |
|
16×20 |
4:5 |
Statement prints, exhibitions, and large wall art |
Very High |
Real-Life Photographer Insight:
- 4×6: Best for bulk printing after events like weddings or travel shoots
- 5×7: Ideal for client thank-you prints or small personal gifts
- 8×10: Most balanced professional portrait size for framing and delivery
- 11×14: Used when photographers want images to stand out on walls
- 16×20: Chosen for hero shots, exhibitions, and premium client showcases
Best Resolution and File Format for 8×10 Printing
To get sharp, professional-quality 8×10 prints, both resolution and file format matter. Even a well-shot image can look poor if it’s exported incorrectly or printed with the wrong settings.
Recommended Print Resolution
For high-quality 8×10 prints, the industry standard is 2400×3000 pixels at 300 PPI.
This resolution ensures:
- Crisp fine details
- Smooth color transitions
- No visible pixelation when viewed closely
Real-life example for photographers:
A wedding portrait printed at 300 PPI will preserve facial details, like hair texture, skin tone, and fabric patterns, much better than lower resolutions.
Best Export Settings
For exporting images intended for 8×10 printing, follow these general settings:
- Resolution: 300 PPI
- Color mode: RGB (for most labs) or CMYK (if required)
- Sharpening: Light output sharpening for print
- File size: Keep high quality, avoid heavy compression
- Dimensions: 2400 × 3000 pixels
Real-life example:
Before sending images to a print lab, photographers often export a print-ready version separate from web or social media files.
JPEG vs PNG vs TIFF
| Format | Best use | Pros | Cons |
|---|---|---|---|
|
JPEG |
Standard printing & delivery |
Small file size, widely supported |
Some compression loss |
|
PNG |
Digital use & graphics |
Lossless quality, good for transparency |
Large file size, not ideal for print labs |
|
TIFF |
Professional printing & archives |
Highest quality, lossless |
Very large files |
Best Paper Types
The paper you choose affects color, texture, and overall print feel:
- Glossy: Vibrant colors, sharp detail, reflective finish
- Matte: Soft look, no glare, professional portrait feel
- Luster/Satin: Balanced finish with slight texture and reduced glare
- Fine Art Paper: Premium texture for gallery-quality prints
Color Profiles
Color management ensures what you see on screen matches the printed result:
- sRGB: Most common, safe for online labs and general printing
- Adobe RGB: Wider color range, preferred for professional editing
- CMYK: Used in some commercial printing workflows
Common Printing Mistakes to Avoid
When printing photos—especially standard sizes like 8×10—small mistakes in preparation can lead to blurry, cropped, or color-incorrect results. Avoiding these issues helps ensure your prints look sharp, professional, and true to your original image.
- Using Low-Resolution Images: One of the most common mistakes is printing images that don’t have enough resolution. Low-resolution files often appear pixelated or soft when enlarged.
- Ignoring Aspect Ratio Cropping: Each print size has a specific aspect ratio. The 8×10 uses 4:5, while most cameras shoot in 3:2. Not adjusting for this leads to unwanted cropping.
- Over-Compressing JPEG Files: Heavy compression reduces file quality, causing visible artifacts, banding, and loss of detail in prints.
- Incorrect Color Profile Usage: Using the wrong color profile can result in prints that look dull, too dark, or overly saturated.
- Not Calibrating Brightness and Contrast: Screens are often brighter than printed output. If you don’t adjust your image before printing, the final result may look darker than expected.
- Upscaling Small Images Too Much: Enlarging a small image beyond its native resolution reduces sharpness and introduces noise.
- Skipping Test Prints: Not checking a sample print can lead to wasted money and disappointing results.
- Using Wrong Print Settings or Paper Type: Choosing incorrect paper or printer settings can affect texture, contrast, and overall print quality.
How to Frame an 8×10 Photo Properly
Framing an 8×10 photo correctly is not just about placing it in a frame—it’s about preserving composition, preventing damage, and enhancing presentation. A well-framed print can elevate a simple photograph into a professional display piece.
1. Choose the Right Frame Size:
Always start with a frame specifically designed for 8×10 prints. This ensures a snug fit without excessive cropping or movement inside the frame. For example, an 8×10 portrait placed in a properly sized frame will sit evenly without shifting, making it ideal for wall décor or desk display.
2. Use a Mat Board (Optional but Recommended):
A mat board adds spacing between the photo and the glass, improving visual appeal and protecting the print from moisture or sticking.
- Enhances presentation
- Prevents direct contact with glass
- Creates a gallery-style look
For example, a wedding portrait framed with a white mat looks more premium and draws attention to the subject’s face.
3. Check Image Alignment Before Closing the Frame:
Make sure the photo is centered and straight before sealing the frame. Even a slight tilt can affect the overall presentation. For example, a crooked alignment in an 8×10 frame is very noticeable when placed on a clean wall or gallery grid.
4. Use High-Quality Glass or Acrylic:
The front cover protects your photo from dust, scratches, and fading. Choose between:
- Clear glass: Traditional, sharp clarity
- UV-protected glass: Prevents fading over time
- Acrylic: Lightweight and shatter-resistant
For example, frames with UV glass help preserve family portraits displayed near windows or bright lighting.
5. Handle the Print Carefully:
Always handle prints with clean, dry hands or gloves to avoid fingerprints and smudges. For example, even a small fingerprint on a glossy 8×10 portrait becomes visible once placed under glass.
6. Match Frame Style with Photo Purpose:
The frame design should match the mood of the photograph:
- Black or metallic frames → professional portraits
- Wooden frames → family or warm lifestyle photos
- Minimal white frames → modern, clean aesthetic
For example, a corporate headshot looks more professional in a sleek black frame compared to a decorative wooden style.
7. Consider Wall Placement and Lighting:
Where you place your framed 8×10 photo affects its visibility and impact.
- Avoid direct sunlight to prevent fading
- Use soft lighting for gallery walls
- Maintain consistent spacing between multiple frames
For example, a series of 8×10 prints arranged in a hallway looks more cohesive when evenly spaced and properly lit.
8. Seal and Secure the Back Properly:
Ensure the backing is tightly sealed to prevent dust, moisture, or shifting inside the frame. For example, loose backing can cause the photo to move over time, leading to misalignment or wrinkles.
Tips for Getting the Best Quality 8×10 Prints
Getting a sharp, professional-looking 8×10 print depends on more than just taking a good photo. Image quality, editing choices, and printing settings all work together to determine the final result.
1. Start with a High-Resolution Image
Always begin with a properly sized, high-resolution file. For best results, an 8×10 print should be prepared at 2400×3000 pixels at 300 PPI.
For example, a portrait shot on a modern DSLR or smartphone in high resolution will retain facial detail and texture, while a low-resolution social media image will appear blurry when printed.
2. Shoot in Proper Lighting
Good lighting preserves detail, color accuracy, and reduces noise in the final print.
- Use natural daylight when possible
- Avoid harsh shadows and overexposure
- Use soft studio lighting for portraits
For example, a softly lit indoor portrait produces smoother skin tones compared to a dimly lit image that may appear grainy when printed.
3. Crop for the 4:5 Aspect Ratio Early
8×10 prints use a 4:5 aspect ratio, so cropping should be done during editing—not after printing. For example, framing your subject with extra space during shooting helps avoid cutting off important parts like heads or limbs when converting to 8×10.
4. Use Proper Export Settings
Before sending your file to print, use these settings:
- Resolution: 300 PPI
- Format: High-quality JPEG or TIFF
- Color mode: sRGB (most labs)
- No heavy compression
For example, exporting a clean, print-ready file ensures consistent color and sharpness across different print labs.
5. Choose the Right Paper Type
Paper choice affects tone, texture, and final appearance:
- Glossy: Bright and vibrant colors
- Matte: Soft, glare-free finish
- Luster/Satin: Balanced professional look
- Fine art paper: Premium gallery quality
For example, wedding portraits often look best on luster paper because it reduces glare while keeping skin tones natural.
6. Calibrate Brightness and Contrast
Screens are usually brighter than printed output, so slight adjustments are necessary before printing. For example, a properly exposed image on your monitor may print slightly darker if brightness is not adjusted before export.
7. Avoid Over-Editing
Excessive sharpening, saturation, or contrast can make prints look unnatural. For example, over-sharpened portraits may show harsh edges and unnatural skin textures when printed.
8. Keep the Image in the Correct Color Profile
Most online print labs prefer sRGB, which ensures consistent color reproduction. For example, using the wrong profile may cause a sunset photo to appear dull or washed out after printing.
FAQs
Can I convert an 8x10 to other ratios?
Yes, you can. But for this, you will either need to crop the image or add borders/padding to prevent distortion.
Is 8x10 a standard photo size?
Yes, 8x10 is one of the most standard photo sizes available. It features a classic 4:5 aspect ratio and is the largest of the common “snapshot” sizes. Also, it is popular for framing on walls or desks.
Is 8x10 the same size as A4 paper?
No, an 8x10 (20.32 x 25.4 cm) is smaller than A4 (21 x 29.7 cm) and has a more squarish proportion.
Final Thoughts
The 8×10 photo size remains a go-to choice for photographers because it offers the perfect balance between detail and display impact. Knowing its pixel dimensions and DPI requirements ensures print-ready quality. Whether for wall art, headshots, or albums, it consistently produces clean, professional-looking photographic results.