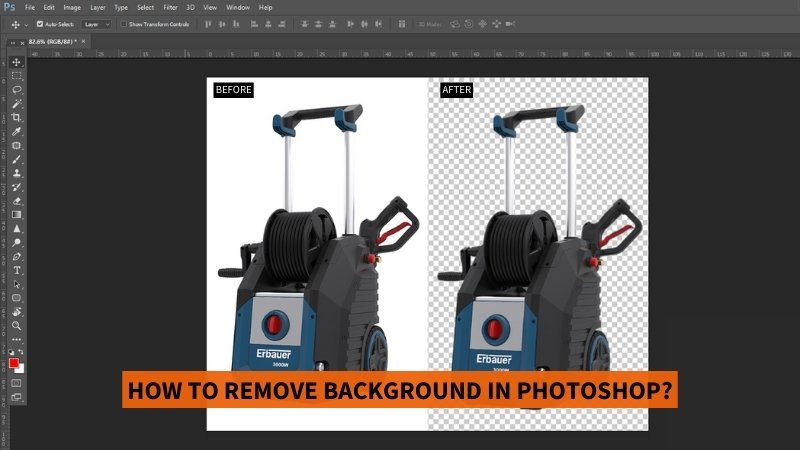
How To Remove Background In Photoshop: 5 Best Options

Photoshop screen showing "BEFORE" and "AFTER" images of a pressure washer with its background removed, with text HOW TO REMOVE BACKGROUND IN PHOTOSHOP?

How To Remove Background In Photoshop: 5 Best Options

There are numerous apps and websites available that offer the automatic background removal feature. AI vs Manual which one do you think gives you the best results?

Obviously, the manual one! Whether you want to replace your background with a white one or use the subject for other purposes, removing background has become a necessity these days. Although automated background removal can save you a lot of time, you can get higher-quality images if you edit them yourself in Photoshop. That too in a very short period of time!

Want to know how to remove background in Photoshop? Today, we’ll walk you through 5 easy ways to remove backgrounds in Photoshop with step-by-step guidelines.

Let’s get started.

Different Types Of Tools To Remove Background In Photoshop

There are several background removal techniques in Photoshop. The following are detailed guidelines on how to remove background in Photoshop using 5 popular tools.

Magic Wand Tool

Our first background removal technique is using the magic wand tool. This is a selection tool in Photoshop. When you use this tool to select an area, it will automatically select other areas that have a similar color and tone. This tool works great for simple shapes and backgrounds, especially when there is a strong contrast between the background and foreground.  It’s worth mentioning that, this tool is not suitable for removing background where the foreground element has sharp edges.

How to Remove Background in Photoshop Using Magic Wand Tool?

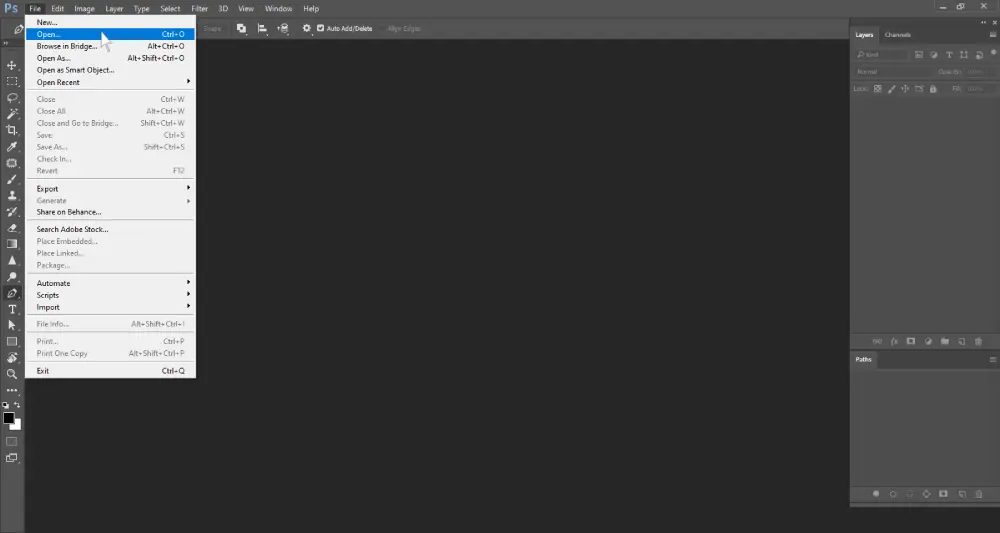
Step 1: Open your image file in Photoshop. Go to ‘File’ in the top menu and select ‘Open’.

Screenshot of Adobe Photoshop with the Magic Wand Tool selected, showing the tool options bar at the top and the tool highlighted in the toolbar on the left side of the interface

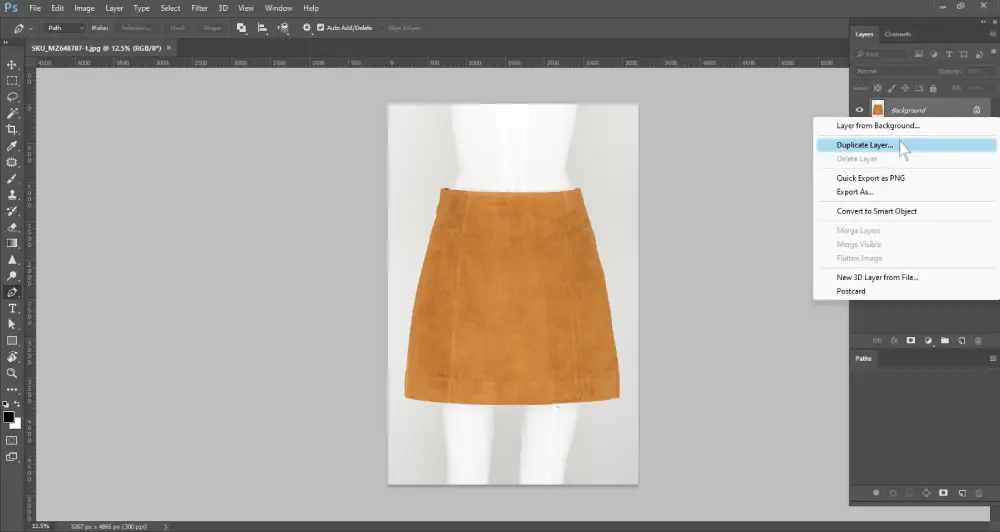
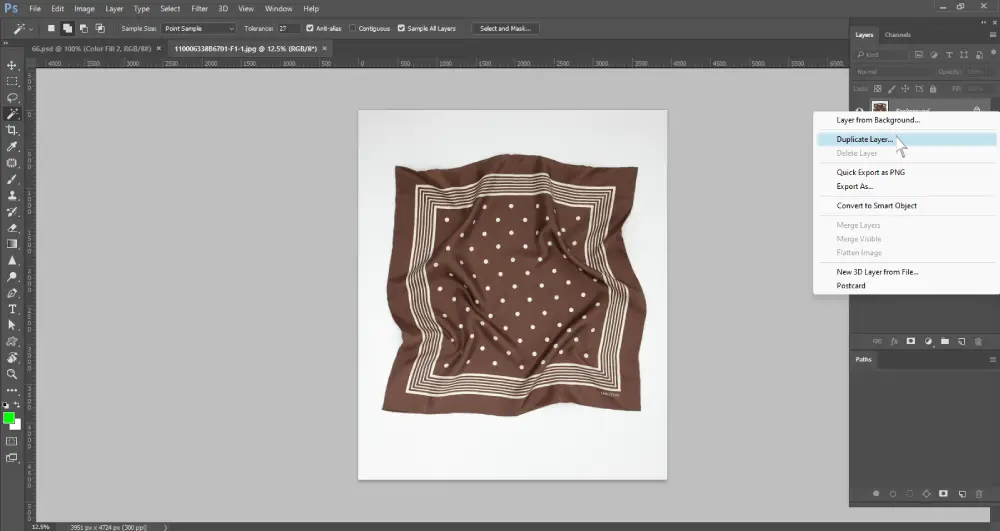
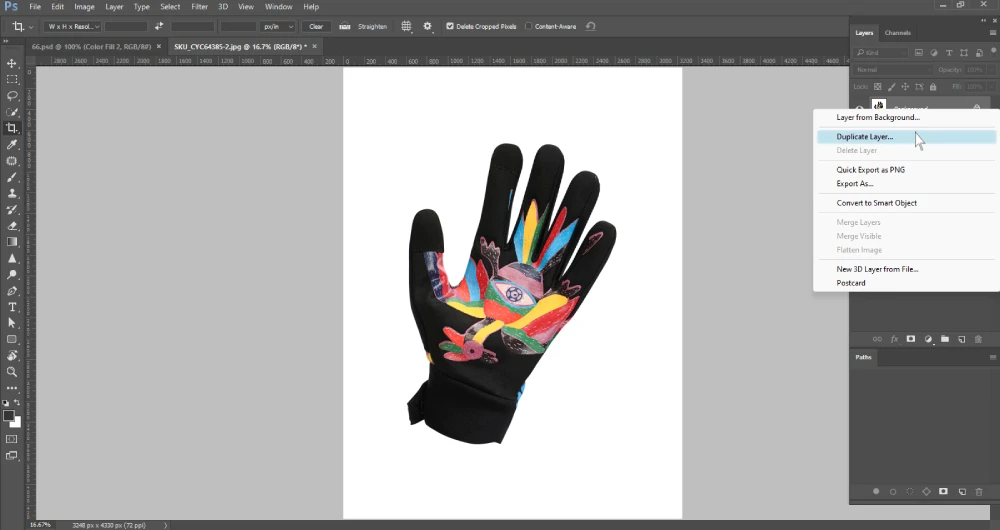
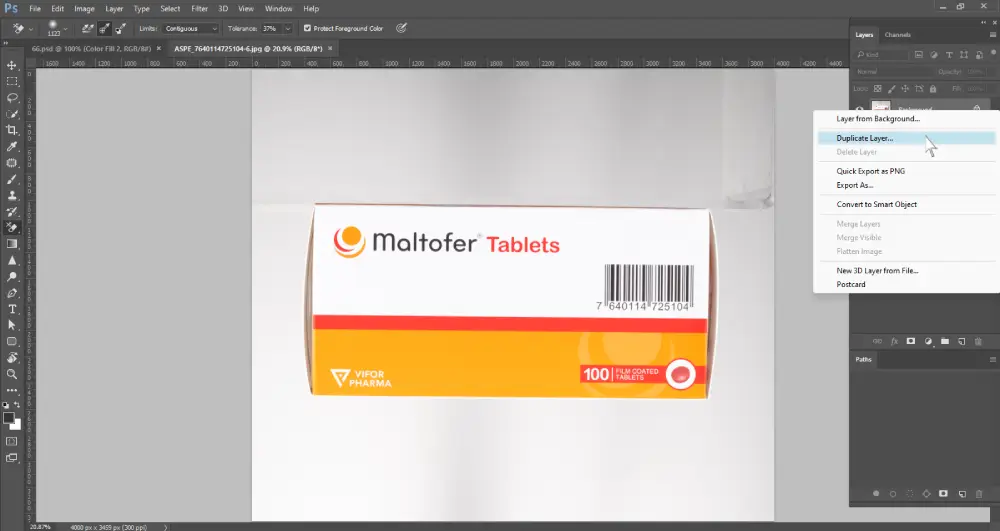
Step 2: Click ‘Background’ layer and drag it to the ‘Create a new layer’ icon. It will create a duplicate version of your image. Click the layer visibility icon of the background layer to make this layer invisible. 

Screenshot of Adobe Photoshop showing the Magic Wand Tool in use, with a portion of an image selected using the tool

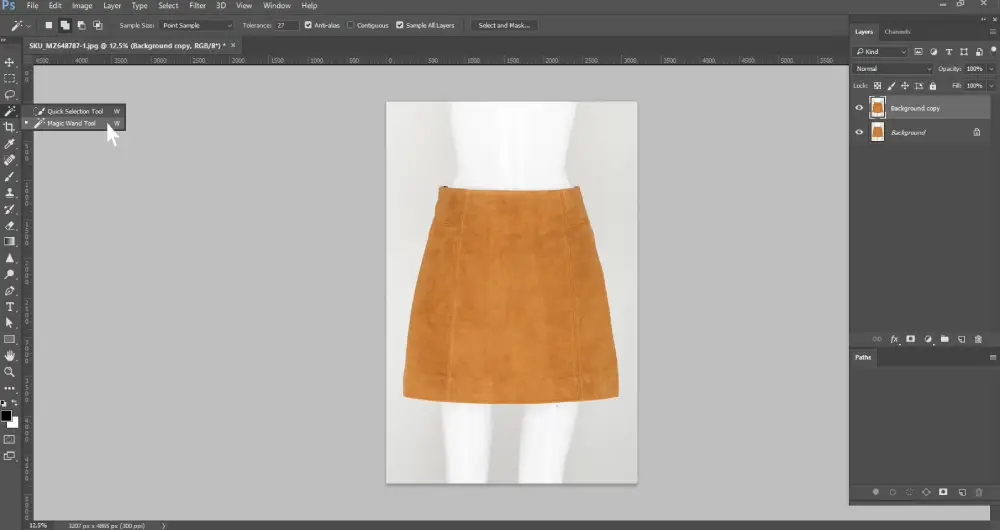
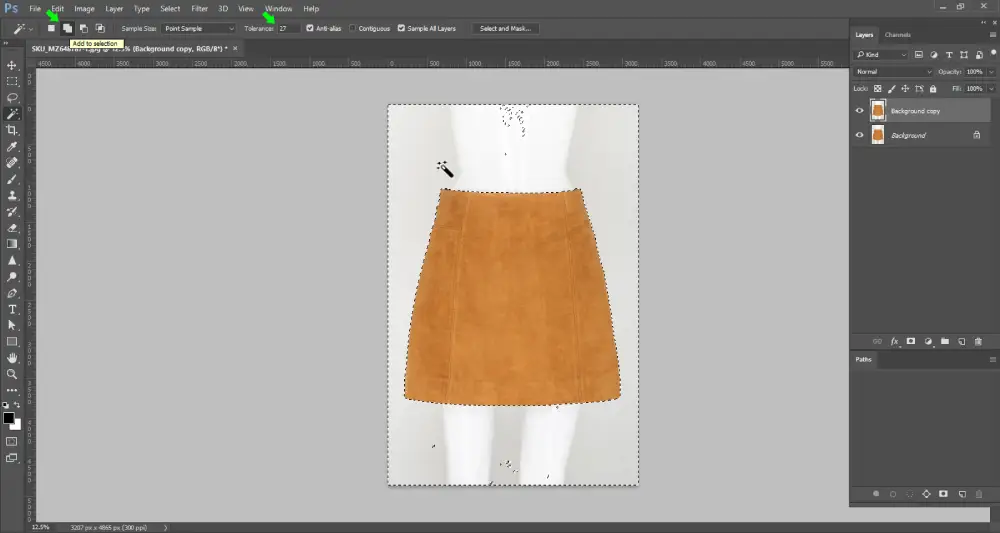
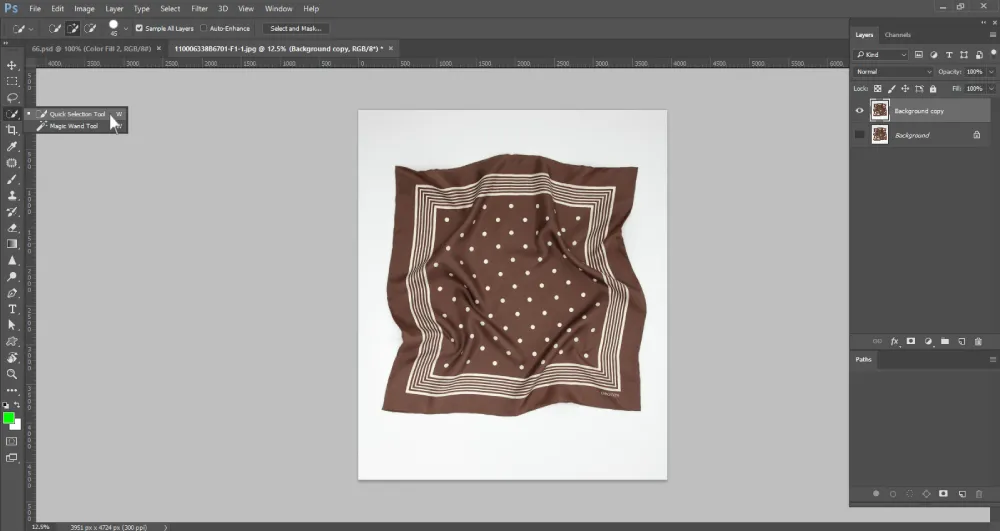
Step 3: Go to the ‘tools panel’ located on the left side (Photoshop default workspace).  Right-click on the fourth icon to expand the tool submenu. Then select the ‘Magic Wand Tool’.

Screenshot of Adobe Photoshop showing the application of the Magic Wand Tool

Step 4: Now click the background you want to remove. If the tool selected the background partially, go to the top menu and adjust the ‘Tolerance’ setting. Change the tolerance value and select the background. You may have to do it multiple times until the tool selects the entire background. 

You can choose an area manually if the tool is unable to select it. Go to the magic wand tool in the top menu and click ‘Add to selection’. Zoom in and click to select the areas precisely.

Screenshot of Adobe Photoshop showing the Magic Wand Tool in use. A selected area is highlighted with a dashed outline, indicating the portion of the image currently active for editing or masking

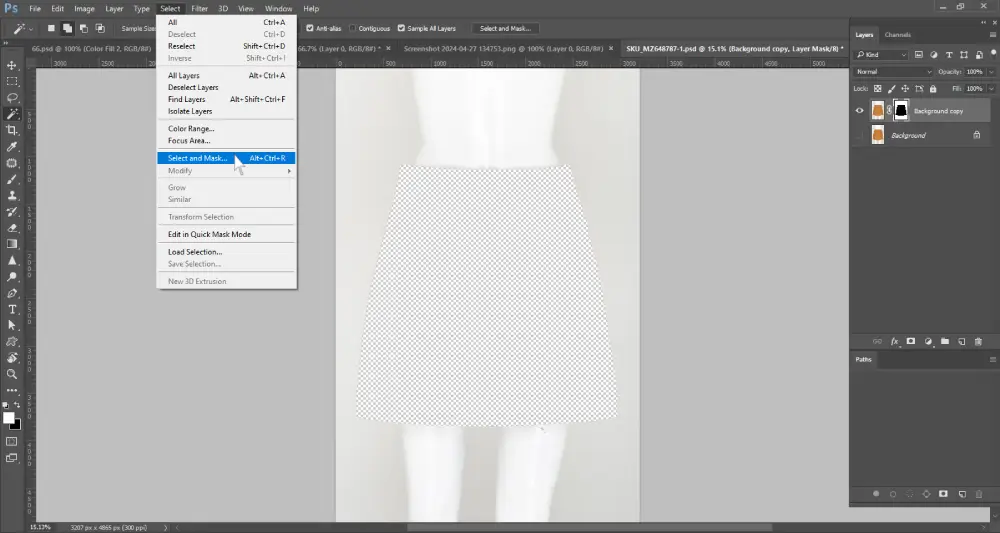
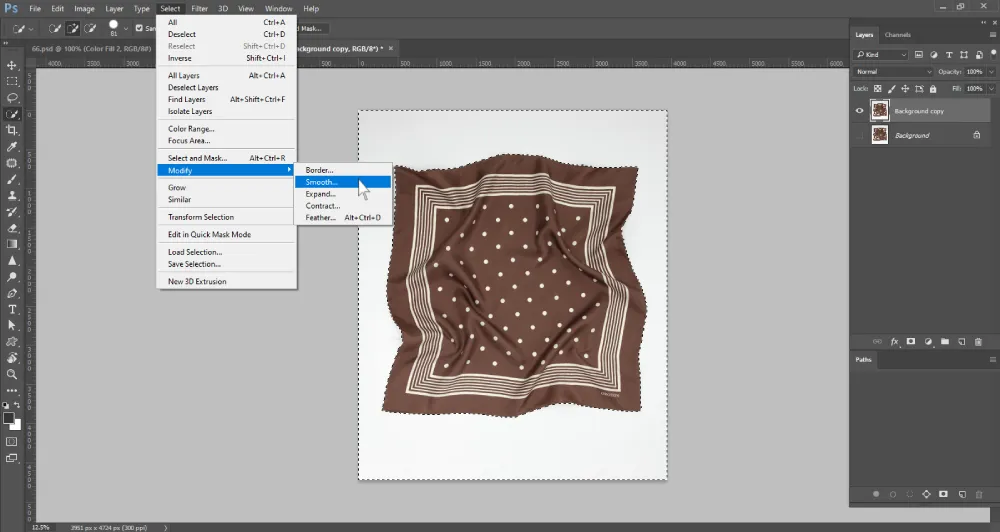
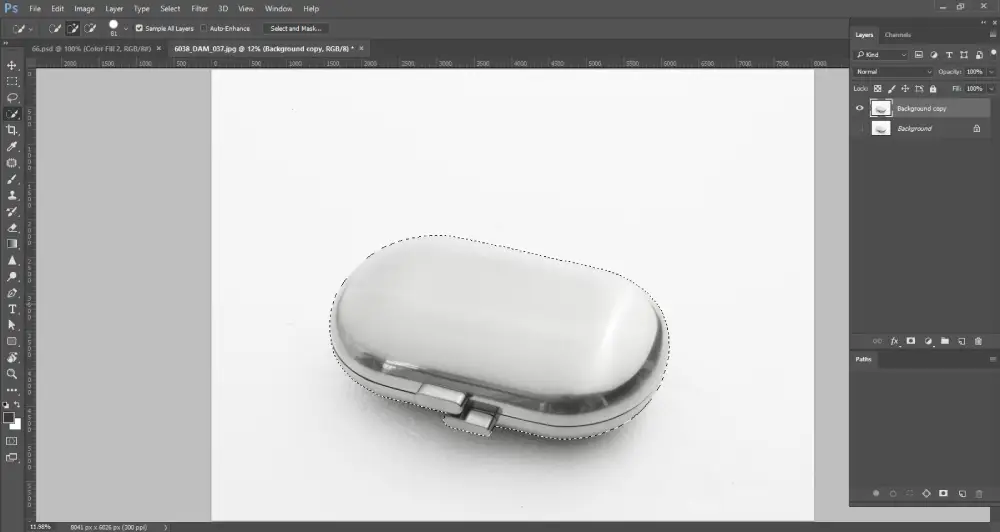
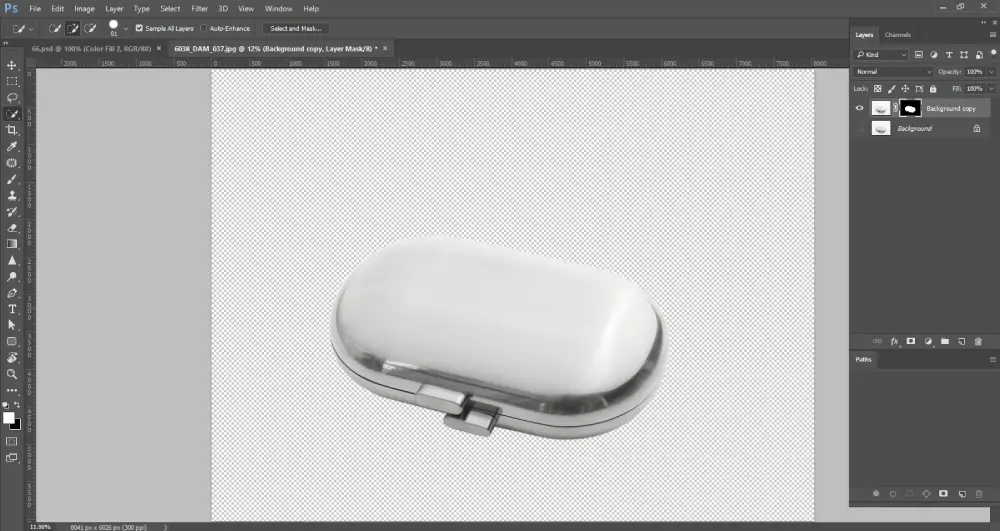
Step 5: From the top menu bar, click on the ‘Select’ drop-down menu. Then click on ‘Select and Mask’. Your image will have two areas. The checkered white portion is the removed portion. 

Screenshot of Adobe Photoshop with the “Select and Mask” option highlighted under the “Select” menu

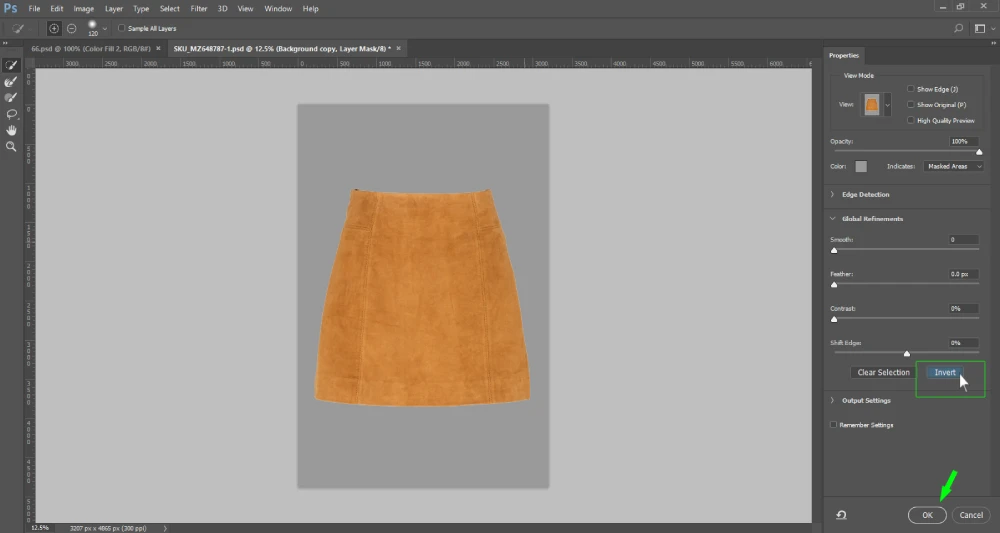
Step 6: If your foreground gets removed or masked because of the selection, go to the right menu. Scroll down and click on ‘Invert’. 

Screenshot of Adobe Photoshop showing the “Select and Mask” workspace. An orange skirt is centered on a gray background

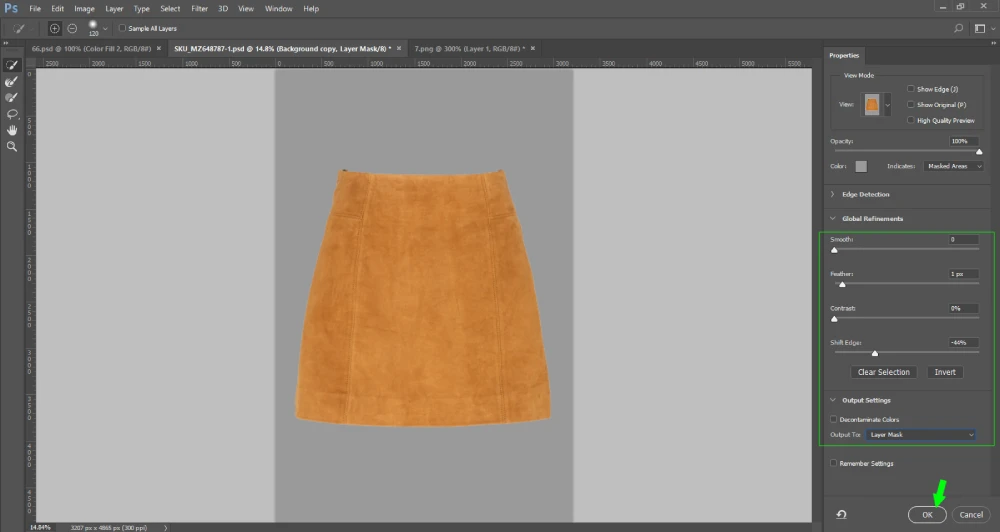
Step 7: If the edges still have the background color, you can fix it. In the right menu, under the ‘Global refinement’ option, adjust the ‘shift edge’ and ‘Feather’ values for a clean edge. Then scroll down, click ‘Output’, select ‘Layer Mask’, and click the ‘ok’ button. 

Screenshot of Adobe Photoshop’s “Select and Mask” workspace with an orange skirt centered on a gray background

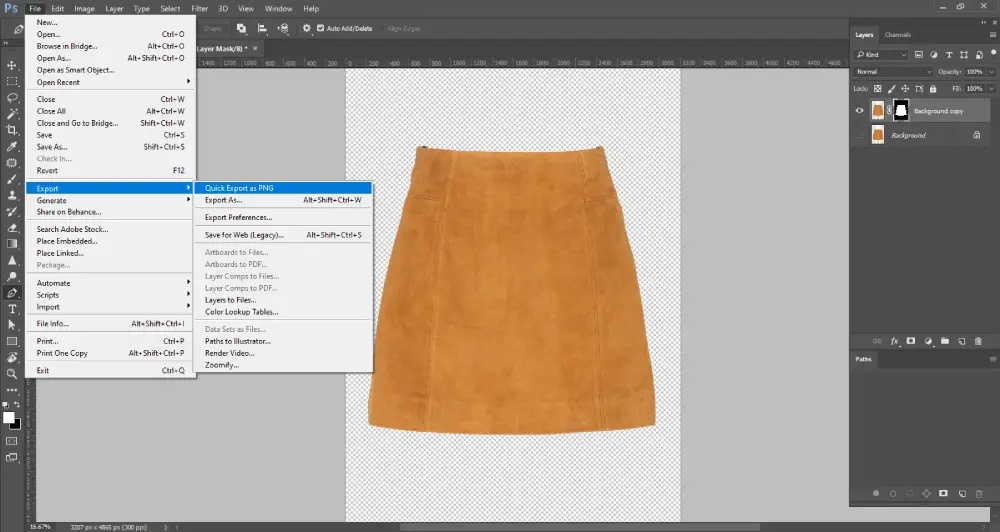
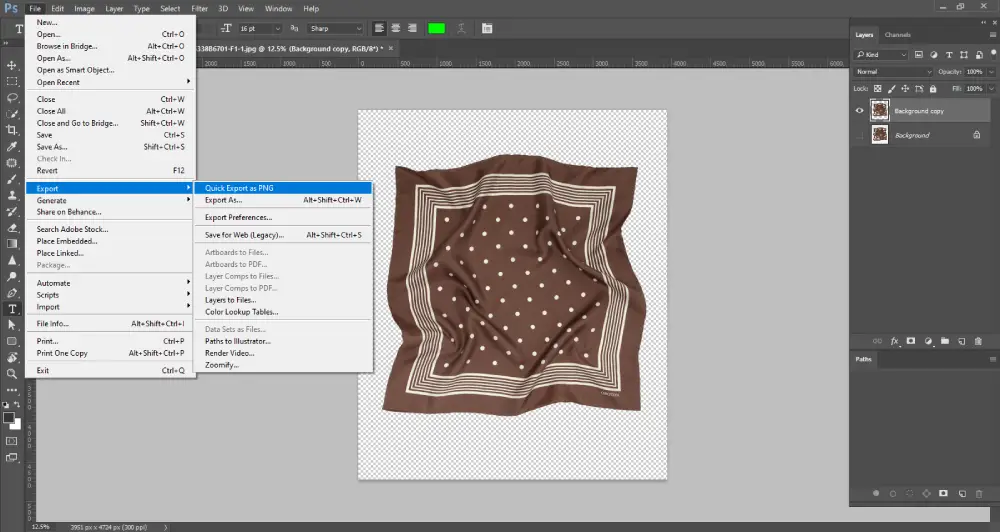
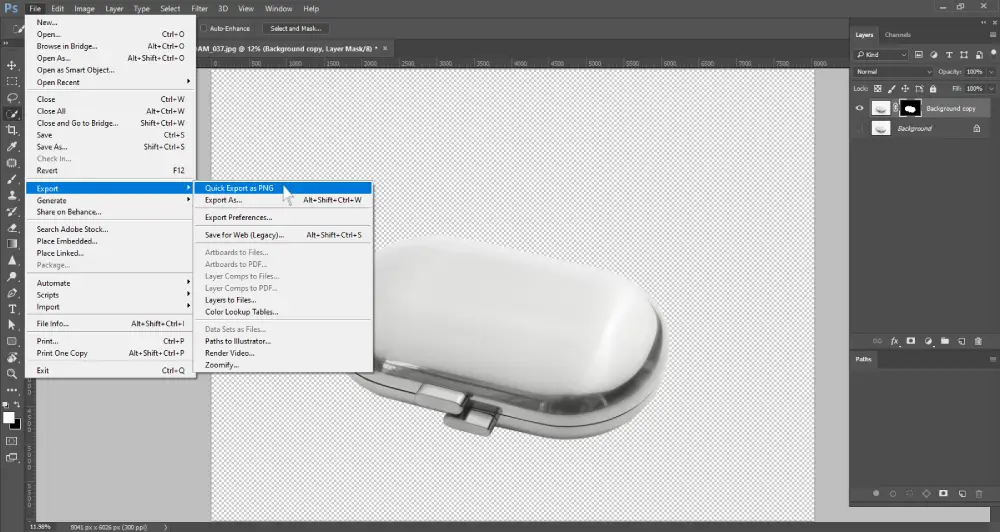
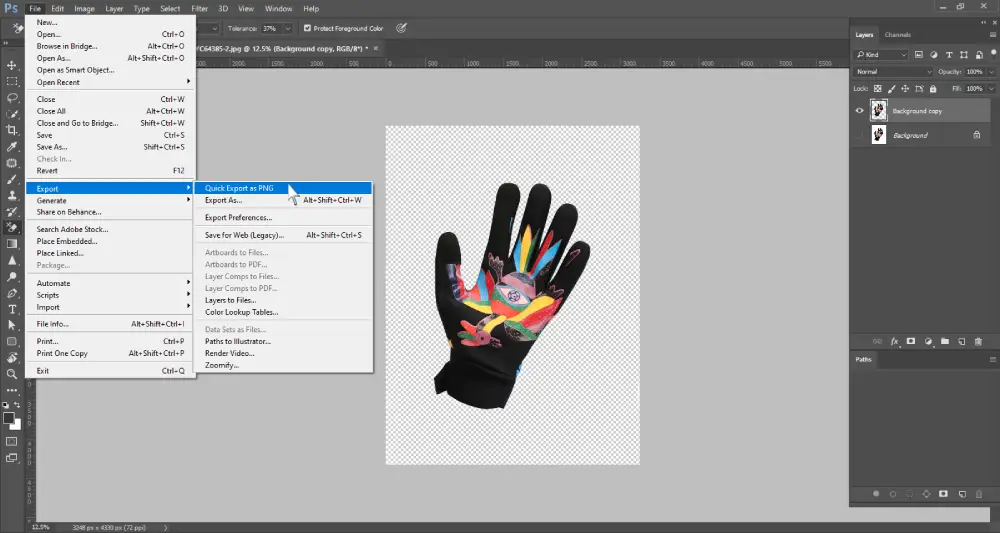
Step 8: Now, to save the image, go to file, click ‘Export’, select ‘Export As’. Set the format and click on ‘Export’ to save it. 

Screenshot of Adobe Photoshop with an orange skirt image centered on a transparent background. The “File” menu is open, and the “Export” submenu is expanded, highlighting the “Quick Export as PNG” option in blue. The Layers panel on the right shows a masked layer titled "Background copy" above the original background layer

Quick Selection Tool

The quick selection tool is another selection tool in Photoshop that can be used to cut out background. This tool can identify pixels containing similar colors. So when you select an area using this tool, it selects the other areas too, like the magic wand tool. This tool is best for removing background from images that have clear edges and high contrast between the subject and background.

How to Remove Background in Photoshop Using Quick Selection Tool?

Step 1: Open the file in Photoshop 

The left toolbar highlights the "Quick Selection Tool," and the top bar displays settings like brush size and selection mode. The selected skirt area is surrounded by marching ants, indicating an active selection

Step 2: Create a duplicate layer as mentioned in the previous technique.

Screenshot of Adobe Photoshop showing a brown polka-dotted scarf on a white background

Step 3: Right-click the fourth icon in the ‘tool panel’ and select the quick selection tool.

Screenshot of Adobe Photoshop showing a brown polka-dotted scarf on a white background. The Quick Selection Tool is being selected from the toolbar on the left side, with the tool options dropdown expanded to also reveal the Magic Wand Tool. The Layers panel on the right shows two layers: "Background copy" and "Background."

Step 4: Left-click on the background areas you want to remove. Zoom in to select the areas precisely. If the tool has selected areas that you don’t want to remove, then you have to press the Alt key while clicking the areas to deselect them.

Screenshot of Adobe Photoshop showing a brown polka-dotted scarf with a white background. The background area around the scarf is selected using the Quick Selection Tool

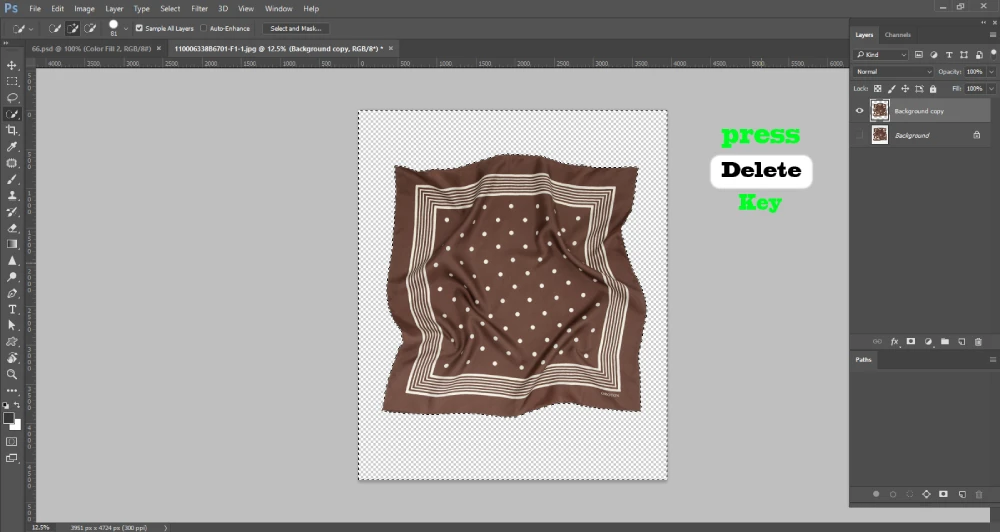
Step 5: To make the edges smooth, go to the top menu and click ‘Select’. Then click on ‘Modify’ and then select the option ‘Smooth’. Adjust the ‘Sample radius; value to see which one works best for your image.

Screenshot of Adobe Photoshop with a brown polka-dotted scarf on a white background. A selection surrounds the background area, and the top menu shows the "Select" dropdown expanded

Step 6: After you have softened the edges, press the ‘Delete’ key from your keyboard.

Screenshot of Adobe Photoshop showing a brown polka-dotted scarf with the background removed, leaving a transparent checkerboard area. The selection marquee still surrounds the scarf. On the right, the "Layers" panel displays two layers: "Background copy" and a locked "Background." Bright green and white text on the image instructs to "press Delete Key."

Step 7: Now that your background is removed, go to ‘File’ and click ‘Export’ to save the image.

Screenshot of Adobe Photoshop with the "File" menu open and the "Export" submenu highlighted. The option "Quick Export as PNG" is selected, indicating the user is about to export the image

Lasso Tool

The lasso tool is one of the ideal tools to remove image background having moderate complexity. This tool gives you the option to create a freehand selection. You can drag the mouse pointer to create the outline of your desired selection. Using the lasso tool will give you the feeling of drawing with a pencil or pen.

There are 3 types of lasso tools:

  • Lasso Tool: It allows free drawing for selection
  • Polygonal Lasso tool: This tool draws the selection in straight lines 
  • Magnetic lasso tool: It can identify the edges. So selection sticks to the edges automatically

How to Remove Background in Photoshop Using Lasso Tool?

Step 1: Open the image file 

Screenshot of Adobe Photoshop showing the Lasso Tool selected from the toolbar on the left. The canvas displays a brown polka-dotted scarf on a white background. The Layers panel on the right shows a single locked Background layer

Step 2: Create a duplicate layer

A screenshot of Photoshop shows a metallic, oval-shaped object, possibly a pill case, on a white background. A contextual menu is open, with the "Duplicate Layer..." option highlighted. The layers panel is visible on the right

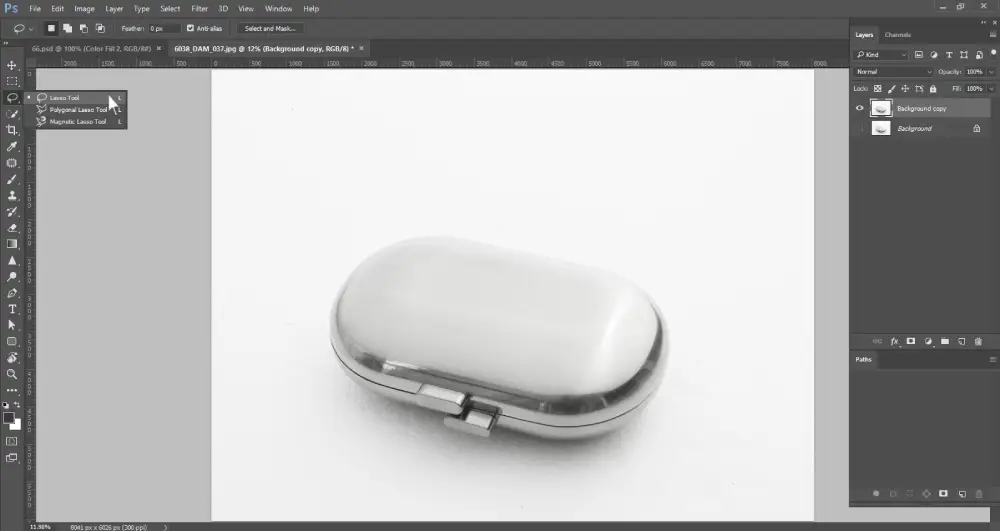
Step 3: Right-click the third icon from the ‘Tool panel’ and select the Lasso tool.

A Photoshop screenshot shows a silver, oval-shaped object, possibly a pill case, against a white background. A dropdown menu on the left toolbar displays "Lasso Tool," "Polygonal Lasso Tool," and "Magnetic Lasso Tool," with "Lasso Tool" currently selected. The layers panel on the right shows "Background copy" and "Background" layers

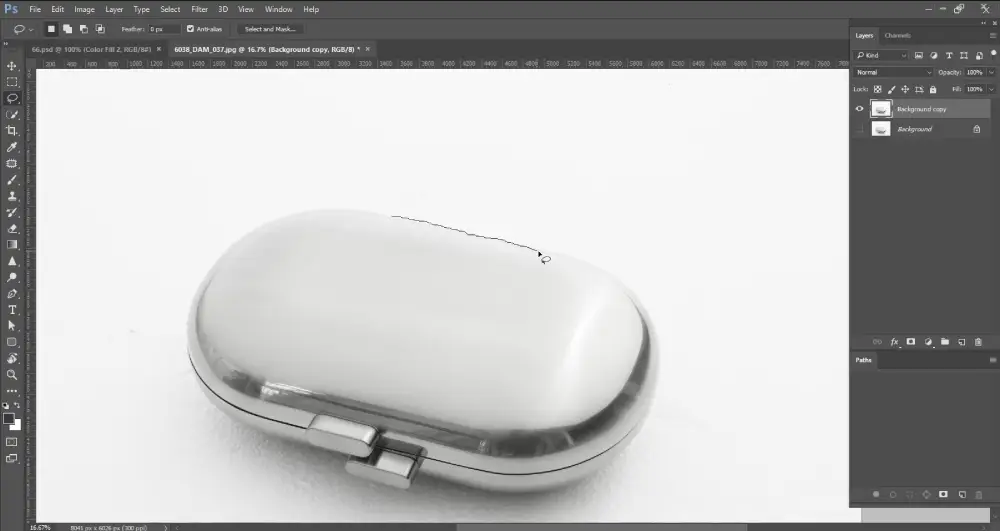
Step 4: Drag the mouse cursor along the edges of your subject to draw the outline. Follow around the edges and zoom in if required.

A screenshot from Photoshop shows a metallic, oval-shaped object, possibly a pill case, on a white background. A jagged, dotted line (characteristic of the Lasso Tool) is being drawn over the top surface of the object, indicating an active selection process. The layers panel on the right shows "Background copy" and "Background" layers

Connect the anchor point to the beginning point to complete the selection. 

If your selection contains areas that you don’t want to cut off, press the Atl key and draw a new selection around those edges to cancel out the previous selection.

A Photoshop screenshot displays a metallic, oval-shaped object, possibly a pill case, on a white background. A dotted selection outline (marching ants) perfectly traces the perimeter of the object, indicating it has been fully selected using a lasso tool. The layers panel on the right shows "Background copy" and "Background" layers

Step 5: Keep your selection active and then click on the ‘Layer Mask’ icon from the right-side panel to cut off the background. 

A Photoshop screenshot displays a metallic, oval-shaped object, possibly a pill case, on a white background, enclosed by a dotted selection outline. The cursor hovers over the "Add layer mask" icon at the bottom of the layers panel, which is highlighted. The layers panel shows "Background copy" and "Background" layers
A Photoshop screenshot shows a metallic, oval-shaped object, possibly a pill case, isolated on a transparent background, indicated by the grey and white checkerboard pattern. The layers panel on the right shows "Background copy" with an attached layer mask, and "Background" underneath. The layer mask thumbnail is visible next to the "Background copy" layer

Step 6: Go to ‘File’ and select ‘Export’ to save the image in your preferred file format.

A Photoshop screenshot displays a metallic, oval-shaped object, possibly a pill case, isolated on a transparent background. A dropdown menu is open from the "File" menu, with "Export" highlighted. A sub-menu to the right of "Export" is also open, with "Quick Export as PNG" highlighted. The layers panel on the right shows the object on a "Background copy" layer with a layer mask.

Background Eraser Tool

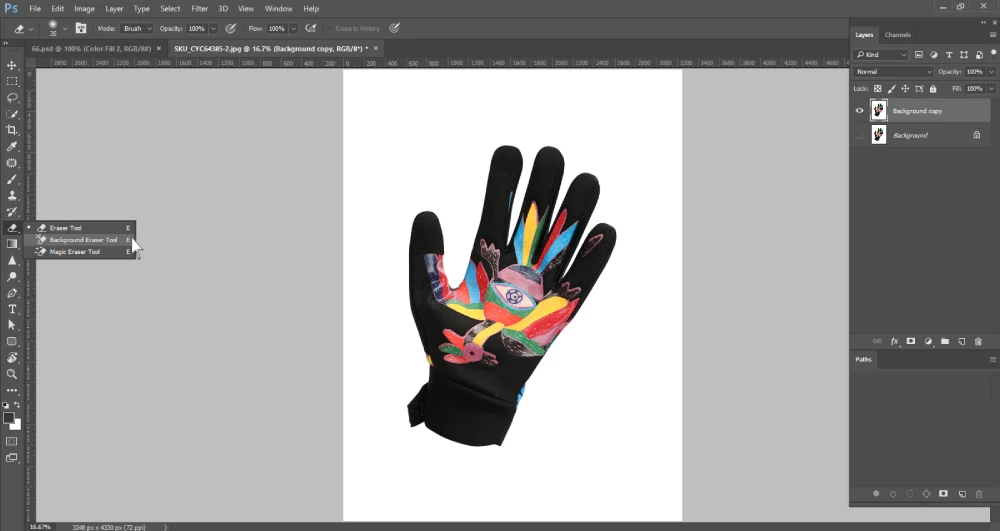
The background eraser tool is one of the best tools to remove background from picture.  You can use this tool to erase the background permanently. Using this tool is easy. All you need to do is paint over the background and it will be gone, just like how we use erasers on paper. Another good side of this tool is that it does a great job when your background contains multiple colors. 

How to Erase Background in Photoshop with Background Eraser Tool

Step 1: Open the image in Photoshop

A Photoshop screenshot shows a dark grey workspace. The "File" menu is open, with the "Open..." option highlighted and its keyboard shortcut "Ctrl+O" displayed next to it

Step 2: Make a duplicate layer

A Photoshop screenshot displays a vibrant black and colorful cycling glove on a white background. A contextual menu on the right, originating from the Layers panel, is open with "Duplicate Layer..." highlighted. The layers panel shows a single "Background" layer

Step 3: Right-click the ‘Eraser’ icon in the ‘Tool panel’ and select the ‘Background Eraser Tool’. 

A Photoshop screenshot displays a black cycling glove with a colorful, artistic design on the palm, set against a white background. A dropdown menu from the toolbar on the left shows "Eraser Tool," "Background Eraser Tool," and "Magic Eraser Tool," with the "Background Eraser Tool" highlighted. The layers panel on the right contains "Background copy" and "Background" layers.

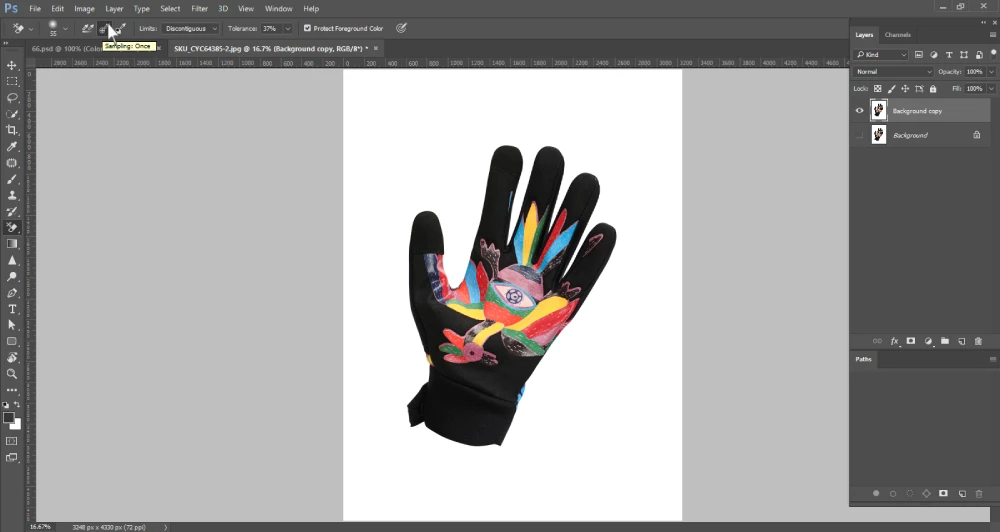
Step 4: Choose the sampling option. Go to the options bar below the top menu bar. Select ‘Continuous’ if your background has multiple colors. Then click and drag over all the colors to include them in the samples. If your background is one specific color select ‘Once’. 

A Photoshop screenshot displays a black cycling glove with a vibrant, colorful design on the palm, against a white background. The cursor is hovering over the "Sampling: Once" option in the top toolbar, which is part of the Background Eraser Tool settings. The layers panel on the right shows "Background copy" and "Background" layers.

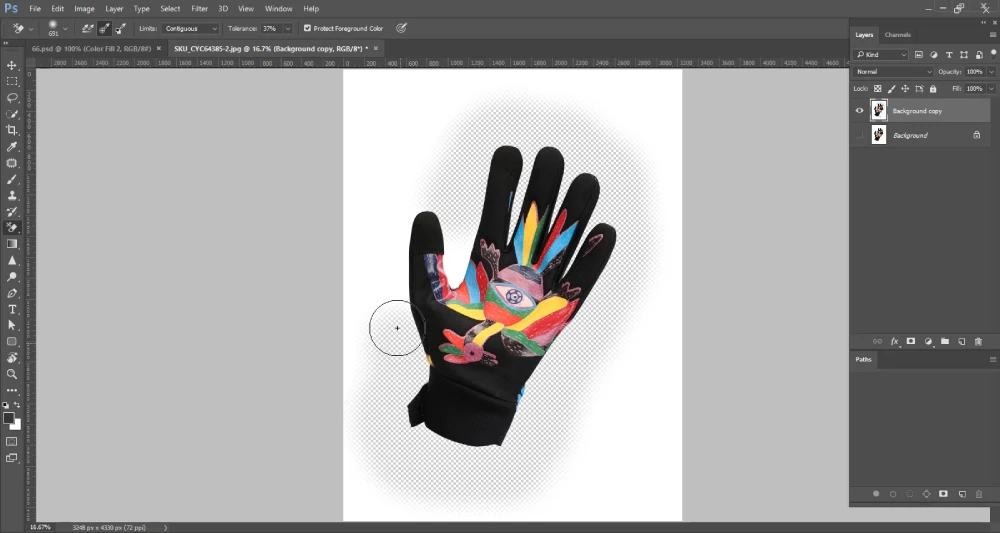
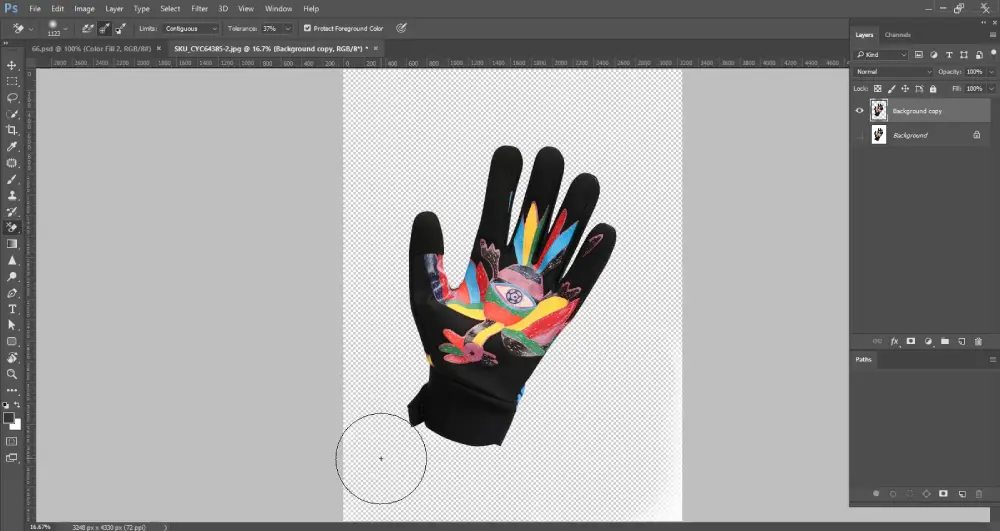
Step 5: Go to the limit settings beside the sampling option. Select ‘Fine edges’ and set the tolerance level. Then adjust the brush size and paint over your background to delete the background pixels.

A Photoshop screenshot shows a black cycling glove with a colorful design on the palm, partially isolated on a transparent background indicated by a checkerboard pattern. A circular brush cursor, characteristic of the Background Eraser Tool, is positioned near the wrist area of the glove, suggesting the background is being actively removed. The layers panel on the right displays "Background copy" and "Background" layers
A Photoshop screenshot displays a black cycling glove with a vibrant, colorful design on the palm, now largely isolated on a transparent background, indicated by a checkerboard pattern. A circular brush cursor, from the Background Eraser Tool, is positioned near the bottom left of the glove, suggesting continued background removal. The layers panel on the right shows "Background copy" and "Background" layers

Step 6: Now you can save the photo.

A Photoshop screenshot displays a black cycling glove with a vibrant, colorful design on the palm, now fully isolated on a transparent background, indicated by a checkerboard pattern. A dropdown menu is open from the "File" menu, with "Export" highlighted. A sub-menu to the right of "Export" is also open, with "Quick Export as PNG" highlighted. The layers panel on the right shows "Background copy" and "Background" layers

Pen Tool

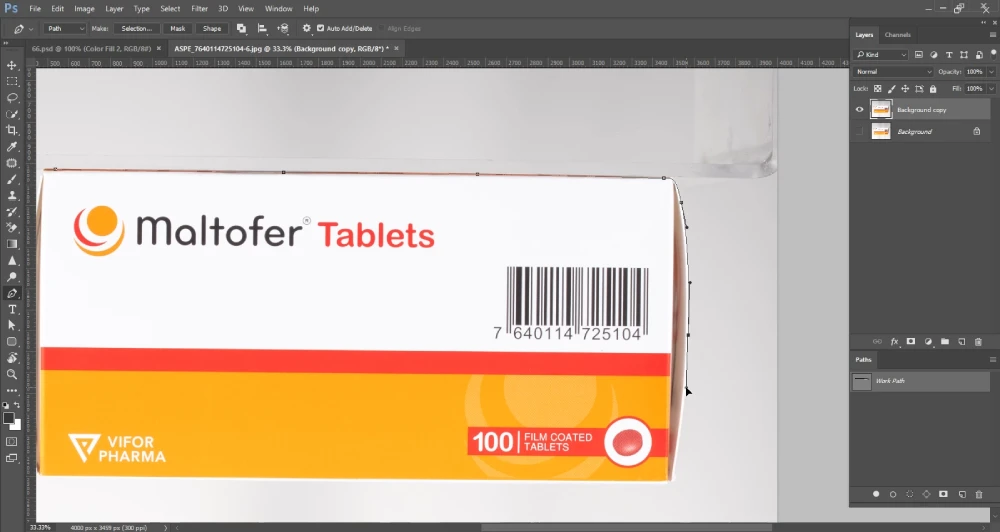
The pen tool is the most versatile selection tool in Photoshop. You can use this tool to create precise selections, paths, and shapes around the subject to remove the background from an image. Whether your subject has a smooth or complex edge, such as hair, fur, etc., this tool is the best option for high-quality images. Professional graphic designers and outsourcing companies use this tool for background removal services.

How to Remove Background in Photoshop Using The Pen Tool

Step 1: Open the image file

A Photoshop screenshot shows a dark grey workspace. The "File" menu is open, with the "Open..." option highlighted and its keyboard shortcut "Ctrl+O" displayed next to it

Step 2: Make a duplicate layer

A Photoshop screenshot displays a white and orange box of "Maltofer Tablets" on a white background. A contextual menu on the right, originating from the Layers panel, is open with "Duplicate Layer..." highlighted. The layers panel shows a single "Background" layer

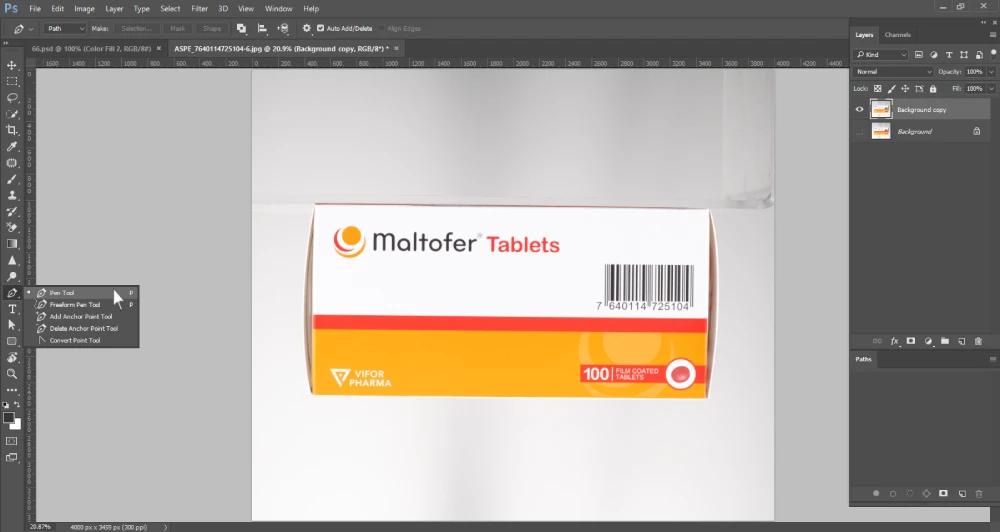
Step 3: Right-click the pen icon in the ‘Tool panel’ and select ‘Pen tool’.

A Photoshop screenshot displays a white and orange box of "Maltofer Tablets" on a white background. A dropdown menu from the toolbar on the left shows "Pen Tool," "Freeform Pen Tool," "Add Anchor Point Tool," "Delete Anchor Point Tool," and "Convert Point Tool," with "Pen Tool" highlighted. The layers panel on the right shows "Background copy" and "Background" layers

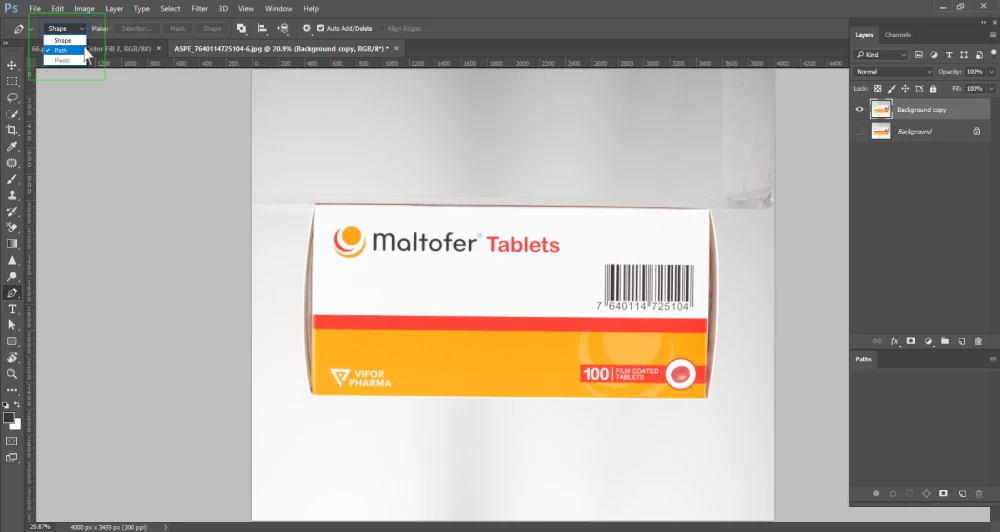
Step 4: Go to the tool mode below the top menu bar and select ‘Path’. 

A Photoshop screenshot displays a white and orange box of "Maltofer Tablets" on a white background. A dropdown menu is open from the "Pen Tool" options bar at the top, showing "Shape," "Path," and "Pixels," with "Path" highlighted. The layers panel on the right shows "Background copy" and "Background" layers

Step 5: Now create anchor points around the edges of your subject. For a straight line, left-click on a point and then again left-click another point. For a curved line, the process is similar. You need to hold down the second left-click and move your cursor. 

A Photoshop screenshot shows a close-up of a white and orange box of "Maltofer Tablets" with a barcode. A path is being drawn around the top and right edges of the box using the Pen Tool, indicated by anchor points and bezier curves. The "Paths" panel on the right shows "Work Path" listed, and the layers panel shows "Background copy" and "Background" layers

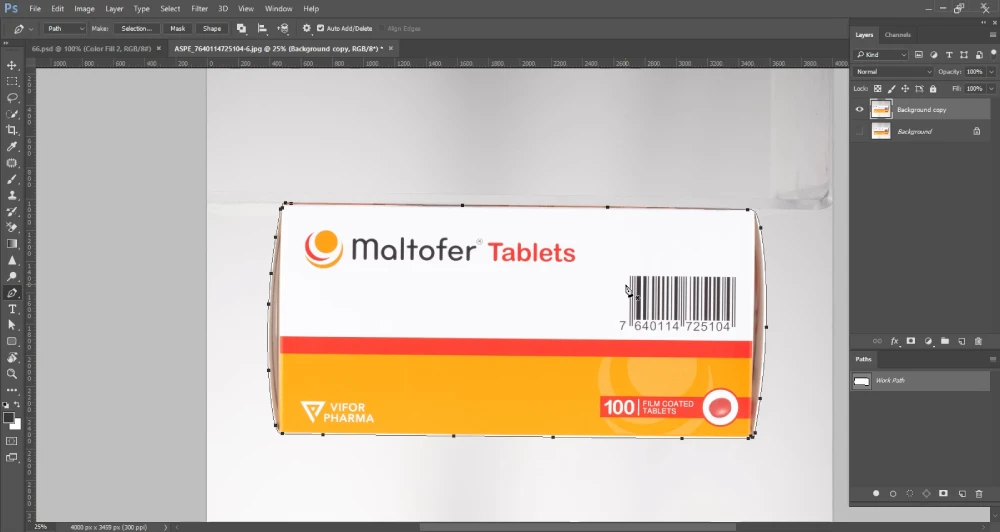
Make sure you click the first anchor point after creating the last anchor point. It will complete your selection process.

A Photoshop screenshot displays a white and orange box of "Maltofer Tablets" with a barcode, now fully enclosed by a path created with the Pen Tool. The path is visible as a thin line tracing the contours of the box, with anchor points at its corners. The "Paths" panel on the right shows "Work Path" listed, and the layers panel shows "Background copy" and "Background" layers

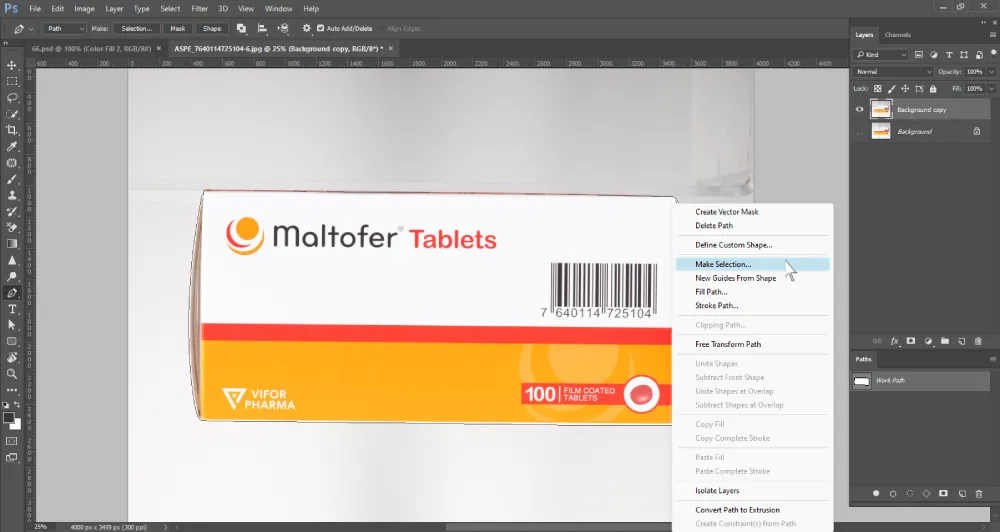
Step 6: ‘Right-click’ on your mouse and click ‘Make Selection’ to create your selection. You can also do it by pressing the keys Ctrl+Enter. 

A Photoshop screenshot displays a white and orange box of "Maltofer Tablets" with a barcode, fully enclosed by a path. A contextual menu is open to the right of the image, with "Make Selection..." highlighted. This menu offers various options for working with paths. The "Paths" panel on the right shows "Work Path" listed, and the layers panel shows "Background copy" and "Background" layers

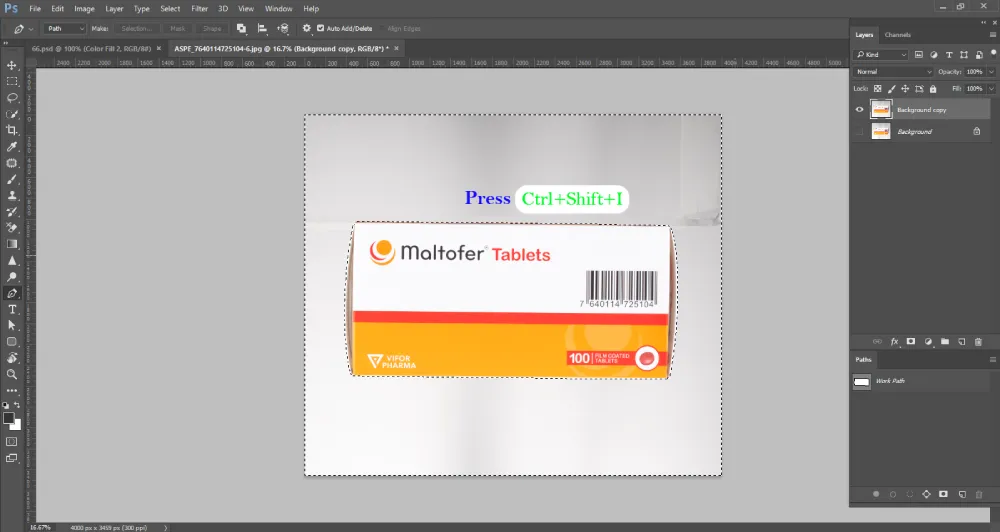
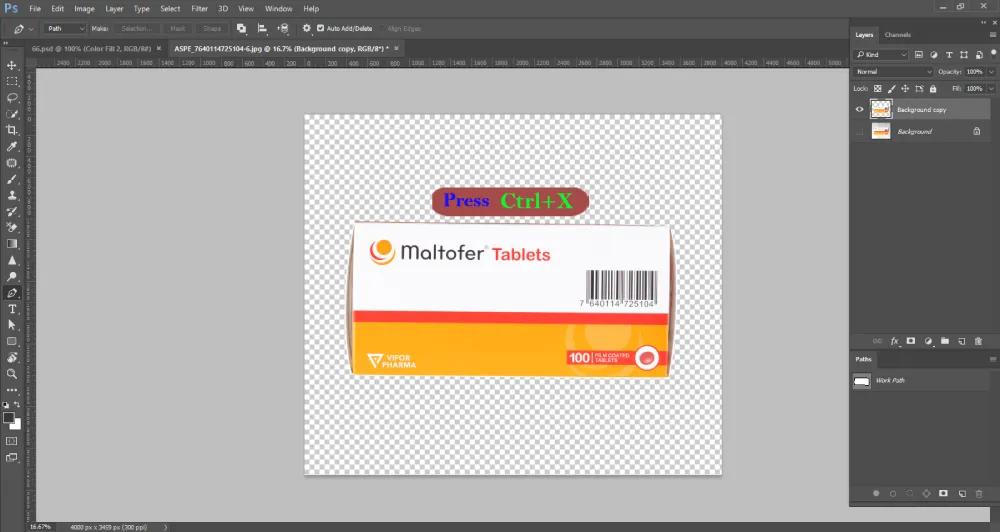
Step 7: You have to reverse the selection, or else your subject will be removed. For that, you have to press Ctrl+Shift+I.

A Photoshop screenshot displays a white and orange box of "Maltofer Tablets" with a barcode, now enclosed by a dotted selection outline (marching ants). An instruction "Press Ctrl+Shift+I" is overlaid in blue and green text above the box. The "Paths" panel on the right shows "Work Path" listed, and the layers panel shows "Background copy" and "Background" layers

You can see that the selection is visible around the edges of the background. Now, press Ctrl+X to cut out the background.

A Photoshop screenshot displays a white and orange box of "Maltofer Tablets" with a barcode, now isolated on a transparent background (indicated by the checkerboard pattern). An instruction "Press Ctrl+X" is overlaid in red and green text above the box. The "Paths" panel on the right shows "Work Path" listed, and the layers panel shows "Background copy" and "Background" layers.

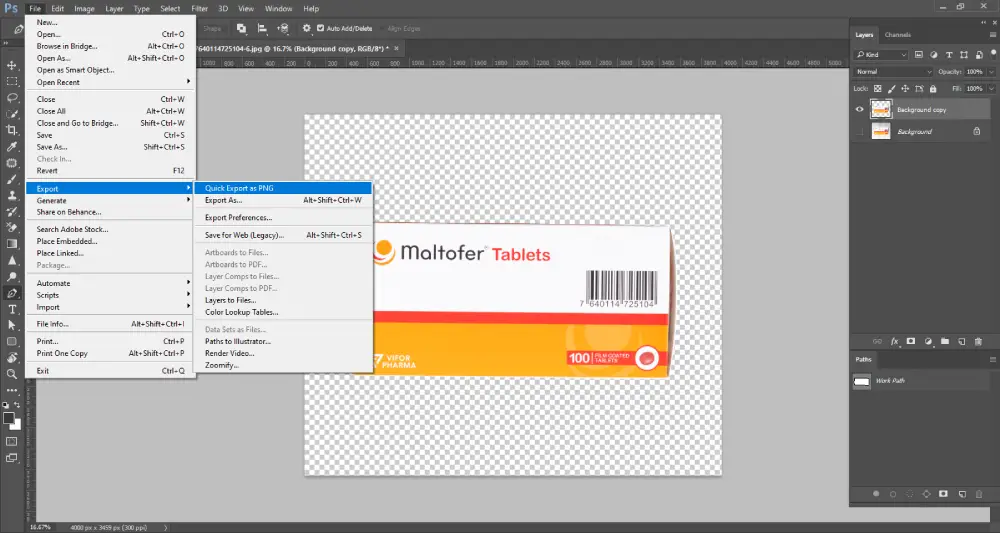
Step 8: Go to ‘Export’ and save the image.

A Photoshop screenshot displays a white and orange box of "Maltofer Tablets" with a barcode, isolated on a transparent background. A dropdown menu is open from the "File" menu, with "Export" highlighted. A sub-menu to the right of "Export" is also open, with "Quick Export as PNG" highlighted. The "Paths" panel on the right shows "Work Path" listed, and the layers panel shows "Background copy" and "Background" layers

Frequently Asked Questions(FAQ)

What tools can I use to remove the background in Photoshop?

Photoshop offers multiple tools to remove background. For example, magic wand tool, background eraser tool, quick selection tool, lasso tool, pen tool, layer mask, AI-powered automatic background remover, and so on.  For smooth edges, you can use any of these tools. However, for precise cut-outs of complex edges, pen tool is the best one.

Which tool is best for removing backgrounds in Photoshop?

The best tool for removing background depends on the complexity of the edges of your subject. If you want to remove background from a building with straight edges, then the polygonal lasso tool or quick selection tool can be your perfect tool. But, if your subject is a dog or human, editing the fur and hair needs precise selections. In this case, a pen tool will be your ideal tool.

Conclusion

We have reached the end of our discussion. Hopefully this guide has helped you learn various background removal techniques. Now that you have an idea about how these methods work, try these tools to see which works best for you. 

Luisa Bell
maskingaid.bell@gmail.com

Luisa Bell is a skilled content planner and writer who has worked in photography and e-commerce content for over six years. With a passion for writing interesting stories, she is great at giving audiences information that sticks with them. Luisa is a great addition to the Masking Aid team because she is dedicated to her work and strives for excellence.