
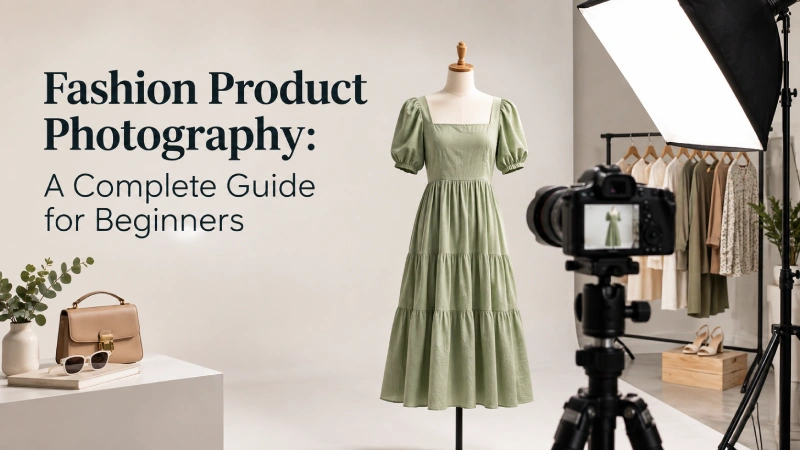
19 Sep Fashion Product Photography: A Complete Guide for Beginners
Great fashion photography should do more than make a product look attractive; it should help shoppers understand what they are buying. Fashion product photography can show a garment’s color, texture, construction, shape, fit, and distinctive details when customers cannot examine it in person.
For photographers and ecommerce brands, achieving this requires a balance between accurate product representation and appealing visual presentation. Different products may also require different approaches, from flat lays and ghost mannequin images to on-model and lifestyle photography. This complete guide explains how to plan and shoot e-commerce-friendly fashion product photos.
What is Fashion Product Photography?
Fashion product photography is the process of photographing clothing, jewelry, and other fashion products in a way that clearly communicates their appearance, fit, color, material, texture, construction, and details to potential buyers.
Unlike fashion editorial photography, whose goal is to communicate a brand’s aesthetic or tell a visual story, fashion product photography is product-focused. Its job is to help shoppers understand what they are actually buying.
Research from SSRN in 2025 showcased that style-focused product imagery shapes online purchase decisions.
Fashion Product Photography vs. Editorial Fashion Photography
Fashion product photography focuses on clearly displaying the features of a garment or accessory to drive sales. Editorial fashion photography uses clothing to tell a cinematic, concept-driven story.
Below, we’ve shared key differences between these two photography genres:
| Aspect | Fashion Product Photography | Editorial Fashion Product Photography |
|---|---|---|
|
Primary goal |
Show exact colors, maintain clarity, and details for e-commerce selling |
Evoke an emotion, build brand identity, or explore a theme |
|
Setting & background |
Clean, plain, or solid white |
Embrace dramatic, multi-source directional lighting, heady shadows, and artistic compositions |
|
Styling & posing |
Keeps the garment front and center with standard, clear model poses |
Bold, high-concept hair, dramatic makeup, and expressive or unconventional posing |
|
Usage |
E-commerce product pages, digital catalogs, and direct ads. |
Magazine spreads, concept lookbooks, and high-end brand campaigns |
Why is Fashion Product Photography Important for E-Commerce?
Fashion product photography is important for e-commerce because it serves as the primary way customers evaluate, understand, and trust clothing and accessories they cannot touch or try on in person.
Builds Customer Trust
High-quality, accurate product images make an online store appear more credible and reduce uncertainty about what shoppers will receive. In a 2025 Syndigo study, 85% of shoppers valued high-quality product content more than brand recognition.
Shows Product Details Clearly
Detailed images reveal fabric texture, stitching, patterns, hardware, finishes, and construction that shoppers cannot physically inspect online. A 2025 Salsify study found 77% of shoppers considered product images and videos extremely important when deciding to complete a purchase.
Helps Customers Understand Fit and Appearance
On-model, full-length, side, and detail images help shoppers judge proportion, silhouette, drape, styling, and overall appearance before buying. This is especially important for fashion, where fit and sizing are major sources of online purchase. It also reduces e-commerce return rates.
Strengthens Brand Identity
Consistent photography through lighting, composition, backgrounds, styling, and editing creates a high-quality visual across product pages, campaigns, marketplaces, and social channels. Research published in 2026 also found that image background and foreground composition can influence product perception and willingness to pay
Improves the Online Shopping Experience
Multiple, clear, and contextually useful images give shoppers more information without requiring physical product inspection. In 2025, 65% of shoppers claimed that rich content such as lifestyle photography, video, and 360° images had persuaded them to make an unplanned purchase, up from 52%.
Can Help Reduce Product Returns
Accurate photography can set more realistic expectations about color, fit, proportions, texture, and appearance, reducing product mismatches. This matters because an estimated 19.3% of online sales were returned in 2025, with apparel and footwear typically experiencing higher return rates.
Supports Sales and Conversions
Product imagery directly supports purchase decisions by making products easier to evaluate. A 2025 study of clothing ecommerce images found that greater visual accuracy can facilitate purchase decisions, particularly once a product enters a shopper’s consideration set.
Types of Fashion Product Photography
Fashion brands use different photography styles depending on the product, selling channel, brand aesthetic, and information shoppers need before purchasing. The most common formats include:
Flat Lay Photography
Products are arranged and photographed from directly above on a flat surface. It works particularly well for clothing, accessories, and coordinated outfits, providing a clean way to show the product’s overall shape, color, and styling.
Ghost Mannequin / Invisible Mannequin Photography
Photograph the garment on a mannequin, then digitally remove it in post-production. This creates a three-dimensional, model-like presentation while keeping attention on the garment’s shape, structure, and fit.
Model Photography
Fashion products are photographed while being worn by a model. It helps shoppers understand fit, proportions, drape, styling, and how the product looks on a person, making it particularly useful for apparel and footwear.
Hanger Photography
Garments are photographed hanging from a hanger or clothing rack, usually against a clean background. It is a simple, cost-effective format for showing the overall design and silhouette without using a model or mannequin.
Lifestyle Fashion Product Photography
Products are photographed in a realistic environment or situation rather than an isolated studio setup. It shows how, where, or when a product might be used, helping shoppers connect the product with a particular lifestyle. A footwear brand might photograph sneakers on a model walking through a city rather than showing only an isolated product shot.
Detail / Close-Up Photography
Close-up images focus on specific product characteristics such as fabric texture, stitching, patterns, buttons, zippers, embroidery, jewelry settings, or material finishes. They provide information that may be difficult to see in a standard product shot. A denim brand may include a close-up of its stitching and fabric texture alongside the main product image.
Editorial-Inspired Product Photography
This combines product-focused photography with editorial fashion elements, such as creative composition, distinctive locations, dramatic lighting, styling, or visual storytelling. The product remains identifiable while the imagery creates a stronger fashion-led brand experience. A luxury handbag photographed in a carefully styled architectural setting can create a stronger visual impression while still clearly showcasing the bag.
How to Prepare Fashion Products Before a Photoshoot
To prepare fashion products before a photoshoot, follow the processes from our fashion product photography guide for beginners:
- Clean and inspect: Remove dust, stains, loose threads, and labels that should not appear.
- Steam or iron: Remove wrinkles and creases from clothing.
- Style the product: Arrange collars, sleeves, zippers, buttons, and folds naturally.
- Prepare accessories: Clean jewelry, shoes, bags, and hardware.
- Check colors: Ensure the product matches its actual color under the planned lighting.
- Create a shot list: Decide required angles, close-ups, model shots, flat lays, or ghost mannequin images.
Essential Equipment for Fashion Product Photography
Essential equipment for fashion product photography includes:
- Camera: Mirrorless or DSLR cameras provide high-resolution images, manual settings control, and RAW image capability (e.g., greater control over exposure, color, and detail).
- Lens: A standard or short-telephoto lens, such as 50mm or 85mm, delivers sharp, distortion-free images that accurately represent the products.
- Tripod: A sturdy tripod ensures steady framing and consistent angles across an entire product catalog.
- Lighting Equipment: Continuous lights or studio strobes, paired with softboxes, umbrellas, and reflectors, provide controlled and even illumination.
- Backdrops: White, gray, or neutral backgrounds keep attention on the product and simplify post-production.
- Mannequin or Dress Form: Helps display clothing shape, structure, and fit without requiring a live model.
- Styling Tools: Steamers, clips, pins, lint rollers, garment tape, and clamps help prepare and position products.
- Editing Software: Tools such as Adobe Photoshop and Adobe Lightroom help with color correction, retouching, cropping, masking, and final image preparation.
How to Plan a Fashion Product Photoshoot
Planning a fashion product photoshoot requires setting a clear creative direction, organizing a detailed shot list, and booking the right talent and location ahead of time. Below, we’ve discussed detailed fashion product photography tips with in-depth steps:
Step 1: Create a Mood Board
Start by collecting reference images from Canva or Pinterest that show the desired style, lighting, composition, background, poses, and color treatment. Use these references to establish a consistent visual direction.
For beginners, a simple mood board can include 5–10 examples from competitors, fashion brands, or photography platforms. Keep the final board practical enough to reproduce with your available equipment.
Step 2: Prepare the Products
Inspect every item before the shoot. Remove dust, stains, tags, loose threads, and packaging marks, then steam or iron clothing to eliminate wrinkles. Check buttons, zippers, collars, sleeves, and accessories.
For studio photography, prepare products in the exact condition you want them to appear in the final images. Group products by category or color to make the shoot more efficient.
Step 3: Create a Shot List
Decide exactly which images you need before taking the first photograph. A basic fashion product shot list can include front, back, side, angled, detail, and on-model views. Add close-ups for important features such as fabric texture, stitching, prints, buttons, or hardware. Mark priority shots so essential images are never missed.
Step 4: Choose the Location and Setup
Select a location with enough space for your camera, product, lights, and background. You can start with a simple studio photography setup using a neutral backdrop, tripod, and one or two soft light sources.
Position the product consistently and test the lighting before the actual shoot. Check shadows, reflections, exposure, white balance, and background cleanliness before photographing the full collection.
Fashion Product Photography Lighting Setup for Beginners
Lighting determines how accurately a fashion product’s color, texture, shape, and details appear in photographs. For beginners, the goal is not complicated equipment but soft, even, and consistent light.
Natural Light Setup
Place the product near a large window with indirect daylight. Avoid direct sunlight, which can create harsh shadows and excessive contrast. Use a white foam board or reflector opposite the window to bounce light back onto darker areas. Keep the camera, product, and window position consistent throughout the shoot. This is an inexpensive starting point for beginners.
Basic One-Light Setup
Place a softbox or diffused light approximately 45° from the product and slightly above it. Position a reflector on the opposite side to soften shadows. Keep the light large and relatively close to create softer illumination. Take test shots and adjust the light distance and angle until the product is evenly exposed.
Simple Two-Light Setup
Place the main light at approximately 45° to the product and use the second light on the opposite side at lower intensity as a fill light. This reduces unwanted shadows while retaining enough depth to show folds, texture, and shape. Keep both lights at consistent positions and power settings when photographing an entire collection.
How to Avoid Common Lighting Problems
You can avoid common home lighting problems by layering multiple light sources, matching color temperatures, and planning your layout before installation.
Key lighting mistakes and how to avoid them are as follows:
- Relying on a single light source: Using only one central overhead light makes a room feel flat and dark. Fix this by combining ambient (overall), task (functional), and accent (decorative) lighting in every room.
- Ignoring dimmer switches: Fixed brightness limits a room’s mood and functionality. Install dimmers on all major light layers so you can easily adjust intensity.
- Mixing wrong color temperatures: Mismatched Kelvin (K) temperatures create a disjointed or clinical space. Use warm white (2700K–3000K) for living areas and bedrooms, and neutral to cool white (3500K–5000K) for kitchens and workspaces. Read more design tips from The Edit.
- Choosing incorrect fixture scale: Fixtures that are too small lack impact, while oversized ones dominate the room. Mock up the dimensions using cardboard before buying.
- Failing to plan layouts early: Guessing fixture placements mid-renovation leads to bad shadows and glare. Create a complete lighting and switching plan before hanging drywall or doing final wiring.
Camera Settings and Shooting Techniques
Fashion product photography does not require complicated camera settings. Start with consistent settings, take test shots, and adjust only when the image needs correction.
- Aperture: Use around f/8–f/11 for product shots to keep most of the garment or product sharp. Use a wider aperture when you intentionally want a softer background.
- ISO: Keep ISO as low as practical, usually ISO 100–200, to minimize digital noise and preserve fine fabric details.
- Shutter Speed: With a tripod and stationary products, use a slower shutter speed if necessary. When photographing models or handheld, use a faster speed to prevent motion blur.
- White Balance: Set white balance consistently so product colors remain accurate across the entire collection. A custom or gray-card reference is preferable when color accuracy is critical.
- Focus: Focus on the most important product area and check the image at high magnification to ensure key details are sharp.
Shooting Techniques
- Use consistent camera height: Keep the camera at the same height and distance for similar products to maintain a uniform catalog appearance.
- Keep framing consistent: Maintain similar product size, positioning, and margins in every frame.
- Capture multiple angles: Photograph front, back, side, and three-quarter views when they help shoppers understand the product.
- Photograph important details: Capture fabric texture, stitching, patterns, buttons, zippers, labels, and other distinctive features.
- Leave appropriate space: Avoid cropping important product areas while leaving enough room for later cropping and ecommerce layouts.
- Check images while shooting: Review focus, exposure, color, shadows, reflections, and unwanted wrinkles before moving to the next product.
Creative Fashion Product Photography Ideas
Renowned fashion houses balance clear product presentation with high-concept visual storytelling. Top 10 common & branded fashion product photography ideas are as follows:
1. On-Model Studio Photography
Photograph the product on a model against a clean studio background. It shows fit, silhouette, proportions, and styling while keeping attention on the garment. Brands such as ASOS and Zara use this approach extensively across e-commerce.
2. Lifestyle Photography
Place the model and product in a realistic environment, such as a street, café, beach, or workplace, to show how the fashion item fits into everyday life. This works well for campaigns, social media, and hero images.
3. Ghost Mannequin Photography
Photograph the garment on a mannequin and remove the mannequin during editing, creating an invisible-body effect. It preserves the garment’s three-dimensional shape while keeping the image product-focused. ASOS and Zara are commonly cited examples of brands using this format.
4. Flat Lay Photography
Arrange clothing or accessories on a flat surface and photograph them from directly above. Flat lays are simple, scalable, and effective for showing color, patterns, and product details, making them popular for ecommerce and social content.
5. Detail or Macro Photography
Move closer to capture fabric texture, stitching, embroidery, buttons, zippers, prints, jewelry settings, and other craftsmanship. These images help shoppers evaluate quality that may not be visible in a standard product shot.
6. Multiple-Angle Photography
Show the product from front, back, side, and three-quarter angles. This is especially useful for jackets, dresses, footwear, bags, and structured garments where one view cannot communicate the complete design.
7. Minimalist White-Background Photography
Use a clean white or neutral background with controlled studio lighting. This creates a consistent catalog appearance and keeps attention on the product. It is particularly useful for ecommerce product pages and large fashion catalogs.
8. Styled Flat Lay
Combine the main fashion product with carefully selected accessories or props, such as shoes, sunglasses, jewelry, or a bag, to create a coordinated outfit story. Keep props secondary so they don’t compete with the product.
9. Movement Photography
Capture the model walking, turning, sitting, or moving naturally. Movement reveals how fabric drapes, stretches, flows, or responds to the body, useful for dresses, skirts, coats, activewear, and flowing fabrics.
10. Editorial-Inspired Product Photography
Combine controlled product presentation with creative lighting, composition, styling, or location. It gives premium products more visual personality while still keeping the item identifiable. This approach is particularly useful for seasonal launches, hero campaigns, and lookbooks; leading fashion brands often combine editorial imagery with cleaner ecommerce photography.
Editing and Retouching Fashion Product Photos
Polishing your fashion product photography in post-production bridges the gap between a raw camera shot and a high-converting commercial asset.
Basic Editing: The Essential Foundation
Basic editing corrects global image values to ensure your apparel looks clean, balanced, and uniform across your entire storefront.
- Exposure: Adjusting the global brightness levels to ensure the image is neither underexposed (too dark) nor overexposed (blown-out highlights).
- Contrast: Modifying the variance between light and dark tones to give the garment depth, preventing the fabric from looking flat or washed out.
- White balance: Neutralizing color casts caused by studio lighting or natural shifts so that white backdrops and trims appear truly neutral.
- Color correction: Fine-tuning specific color channels so the digital image perfectly matches the real-world fabric, reducing product return rates caused by inaccurate online displays.
- Cropping: Trimming the outer edges of the frame to position the garment centered and balanced according to your site’s specific aspect ratio (e.g., 1:1 square or 4:5 vertical).
- Straightening: Aligning the horizon line, vertical studio grids, or model stance to eliminate distracting slants and ensure absolute alignment across your grid listing.
Advanced Retouching: Commercial Enhancements
Advanced retouching transforms clean frames into flawless, high-end listing assets by correcting structural flaws and manipulating visual depth.
- Ghost mannequin editing: Combining multiple shots of a garment worn on a modular mannequin, then digitally removing the form to create a hollow, 3D “floating” effect that showcases internal linings and tags.
- Background removal: Extracting the product from its original setting using precise clipping paths or masks, then dropping it onto a pure white or transparent background to isolate the item.
- Shadow enhancement: Digitally restoring or adding soft drop, reflection, or ground shadows underneath the product to prevent it from looking unnaturally detached from the screen.
- Detail enhancement: Sharpening specific high-value areas like intricate stitching, premium hardware (zippers, buttons), and unique fabric weaves to highlight manufacturing quality.
- Skin & clothing retouching (for live models): Cleaning up distracting temporary elements by smoothing out heavy fabric creases, removing stray threads, and correcting minor skin blemishes, flyaway hairs, or sensor dust without making the scene look overly artificial.
Common Fashion Product Photography Mistakes to Avoid
To capture professional apparel photos that convert browsers into buyers, you must avoid several critical production and technical pitfalls.
Here is how to fix the most common fashion product photography mistakes:
- Poor lighting: Harsh shadows or weak light mask textures and details. Fix this by using a large softbox or shooting near a large window with diffused natural light to create soft, even highlights.
- Wrinkled or unprepared clothing: Minor creases look incredibly sloppy on camera and take hours to fix in post-processing. Fix this by using a professional garment steamer on set and keeping lint rollers handy.
- Distracting backgrounds: Busy or textured backdrops pull focus away from the clothing line. Fix this by using a seamless white, light grey, or neutral paper backdrop for clean, professional results.
- Incorrect colors: Mismatched garment colors lead to high return rates. Fix this by setting a custom white balance using a grey card and shooting in a color-accurate workspace rather than relying on auto-white balance.
- Too few product angles: Customers cannot touch the fabric, so hiding the back, sides, or interior limits their confidence. Fix this by capturing at least five standard views: front, back, profile, detail/closeup, and a lifestyle or movement shot.
- Excessive editing: Aggressive liquify tools, extreme skin smoothing, or heavy filters make the product look fake. Fix this by keeping retouching minimal, focusing only on removing temporary blemishes, dust, or stray threads.
- Inconsistent photography: Shifting framing, cropping, or lighting styles across a collection creates an unprofessional storefront. Fix this by locking down your tripod height, camera settings, and lighting positions to create a repeatable template.
- Overusing props: Cluttered scenes distract from the item you are trying to sell. Fix this by keeping the focus entirely on the apparel, using props only for occasional lifestyle editorials rather than clean e-commerce listings.
- Ignoring product details: Skipping close-ups on zippers, stitching, tags, and fabric texture leaves buyers guessing about quality. Fix this by switching to a macro lens or moving closer to highlight premium hardware and craftsmanship.
- Uploading oversized image files: High-resolution camera files slow down your website speed, hurting your search rankings and conversion rates. Fix this by compressing images to web-optimized formats (like WebP or JPEG) while matching the exact pixel dimensions required by your e-commerce platform.
How to Optimize Fashion Product Photos for E-Commerce
To optimize fashion photos for e-commerce, follow expert tips:
- Descriptive image file names
Search engines cannot read images, so generic file names like DCIM0023.jpg waste valuable SEO real estate. Change file names to a clean, hyphen-separated format before uploading (e.g., womens-silk-buttondown-shirt-emerald-green.jpg).
- Useful alt text
Alt text provides context for screen readers and search engine crawlers when an image or e-commerce photography fails to load. Write descriptive alt text that focuses on the garment’s cut, color, and fabric without keyword stuffing (e.g., alt=”Model wearing a green silk button-down long-sleeve shirt paired with white trousers”).
- Image compression
Visual clarity is vital, but raw exports are far too heavy for the web. Run all exported graphics through a lossy compression tool (like TinyJPG or Optimizilla) to shave off up to 70% of the file size without any noticeable loss in visible quality.
- Appropriate dimensions
Uploading a massive 4000-pixel image when the container on your site displays it at 1200 pixels forces the browser to scale it down, wasting bandwidth. Export your files at the exact maximum pixel width recommended by your e-commerce platform (typically between 1200px and 2000px on the longest side to support clean zoom functions).
- JPG/WebP where appropriate
Heavy, uncompressed formats like PNG or TIFF will cripple your user experience. Use WebP for the best modern compression-to-quality ratio, or high-quality JPG (saved at 70–80% quality) as a universally supported alternative.
- Page speed
Large, unoptimized images are the number one cause of slow e-commerce sites, which directly triggers high bounce rates. Monitor your site speed using tools like Google PageSpeed Insights to ensure your media catalog loads in under two seconds.
- Multiple product images
A single fashion product photography visual thumbnail is not enough to sell apparel online. Publish a gallery of 4 to 6 optimized files per item, including the front view, back view, side profile, close-up details, and a styled lifestyle shot to answer customer questions visually.
- Mobile-friendly presentation
Over half of all digital retail traffic happens on smartphones, where slow loading and bad layouts instantly kill sales. Ensure your gallery utilizes responsive design, enabling users to smoothly swipe through thumbnails, vertical stacks, or pinch-to-zoom modules on smaller mobile screens.
FAQs
How many photos should you take for each fashion product?
Aim to take up to 20 to 30 raw shots for each fashion product. But you should deliver 5 to 7 high-quality photos for a standard e-commerce catalog.
What is the best camera for fashion product photography?
The best camera for fashion product photography overall is the Sony Alpha 7 IV. It is popular for its 33MP full-frame sensor, exceptional color accuracy for fabrics, flawless eye-tracking autofocus for models, and robust USB-C studio tethering.
How much does a professional fashion product photographer charge?
A professional fashion product photographer typically charges between $150 and $1,500+ per image or commands a day rate between $1,000 and $5,000+.
When should you outsource fashion product photo editing?
Photographers should outsource fashion product photo editing when repetitive post-production tasks start consuming more time than shooting or when high-volume e-commerce catalogs exceed their daily capacity.
What is the best way to photograph reflective fashion products like jewelry and accessories?
The best way to photograph reflective fashion products like jewelry and accessories is to use large diffusion panels, continuous soft lighting, and a tripod-mounted macro or 50mm lens.
Conclusion
You don’t need an expensive studio to create effective fashion product photography. Start with the right preparation, simple lighting, consistent settings, and clear composition. As your skills improve, experiment with models, lifestyle scenes, creative angles, and professional editing to develop a stronger visual style.
