

- June 20, 2023
- by Isaac Travis
- Tips
Doing photography in the right way will make your jewelry shine and sparkle. Whether it’s rings, necklaces, earrings, and bracelets learning about the technique is crucial. Today we are going to talk about the tricks and tips on photographing different types of jewelry.
Following professional standards in setting up the set, jewelry and camera is the most important part. If you learn how to present your jewelry in front of a camera, half of the task is done. Afterword, editing the photos will do the job for you. Let’s learn about the whole process in detail.
Different Types Of Jewelry Photography Equipment
Here’s a detailed explanation on the equipment you will need to photograph different types of Jewelry.
Camera
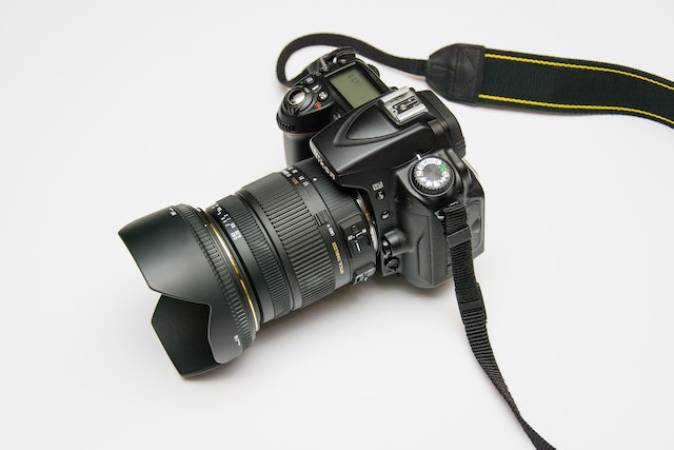
A camera is a digital device that captures visual moments by recording images and videos. The device consists of a light proof box and a photosensitive plate and various necessary components. These components work together to capture the light and convert it into a digital representation. It is mainly used for various purposes like photography, videography, cinematography, and many more.
The camera is a crucial component in jewelry photography to capture good quality images of jewelry pieces. It can alter some settings such as iso, brightness, shutter speed, ISO, and focus according to related situations. High-quality cameras allow an appealing and clearer picture of jewelry to display.
Tripod
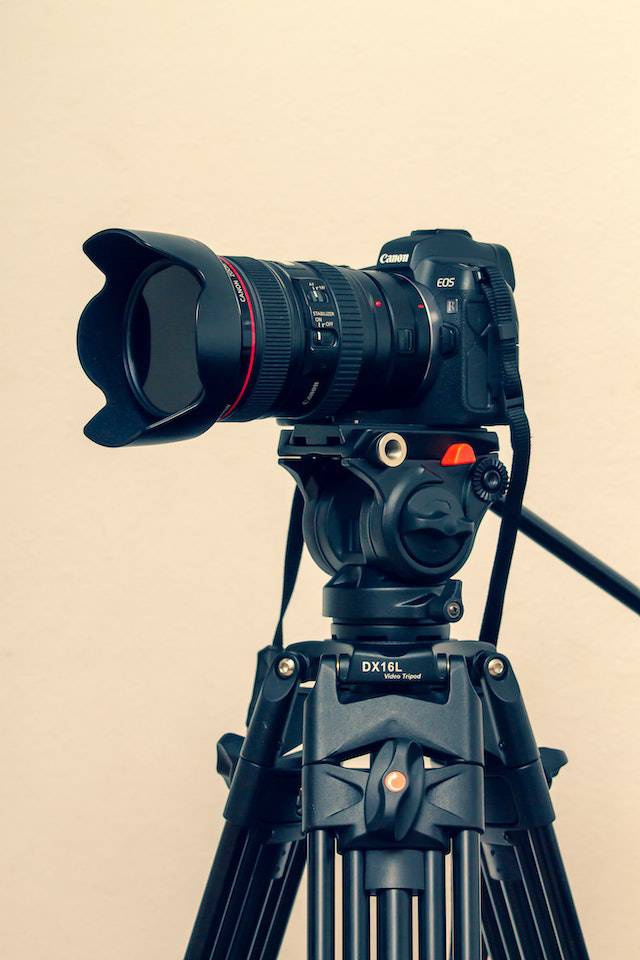
A tripod is a three-legged accessory in the photography world. It provides support and stability to cameras and other photography equipment. The device consists of flexible legs which are extendable according to the height and angle of the camera. The central columns are connected to the legs which allows additional height adjustment.
A tripod is a necessary piece of jewelry photography. The stability of the camera can eliminate camera shakes or blurry images and result in a sharp image. Thus it keeps the camera steady during long exposure which allows it to capture intricate details of jewelry. That’s how you can replicate the same setup for subsequent photo sessions.
Table

A table is a four-legged piece of furniture consisting of a flat horizontal surface. It is used for many purposes like dining, displaying anything, or photography. The piece of furniture is also very helpful for jewelry photography.
A jewelry photographer often chooses a table for various reasons. The table has always been selected according to the size, color, material, or texture of the jewelry. The flat structure makes the table a background material. Any plain colored surface, fabric, or reflective material can be kept on the table to make a good background. Thus it sets the stage for overall composition to make an aesthetically pleasing jewelry image.
Foam Boards
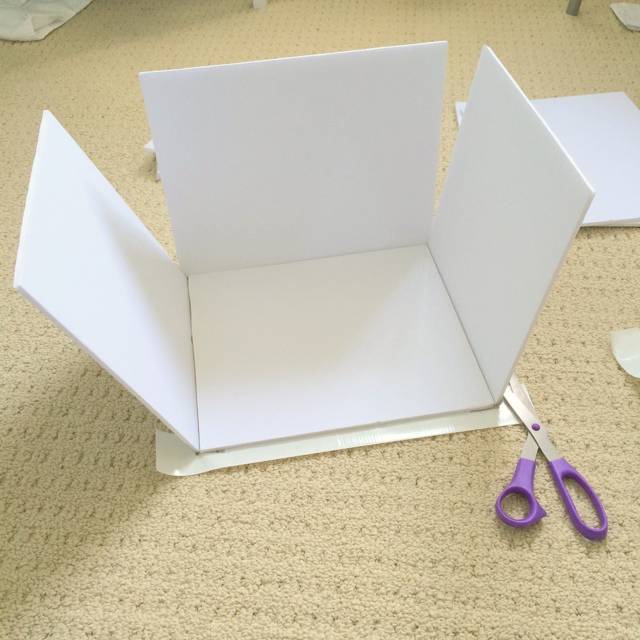
Foam board is a lightweight and versatile material. It is also known as a core board or foam panel. It consists of a rigid foam core which is placed like a sandwich between two layers. The foam is made of plastic or paper. On the other hand, foam boards are made of polystyrene.
Foam boards are widely used in jewelry photography for many beneficial reasons. First of all, it provides a smooth and glossy surface that acts as a reflective background. The reflection is important to highlight any specific area of a jewelry piece. Thus you can also manage the brightness and lighting composition through it.
How To Photograph Jewelry?
1. Set Up Your Table
As the jewelry will be placed on the table, setting up the table should be the first step. Setting the table according to jewelry and environment can make you achieve an appealing picture.
First of all, clean the table. Use a wet soft cloth to eliminate dust from the surface. Then choose the background according to jewelry color, size, and materials. Any plain-colored fabric, reflective material, or natural wood can be used. Now set the table near a window or suitable place to get natural light. If you want to use artificial light then set the table near light boxes.
2. Position Your Lighting
Positioning lights is a very important part of product photography, especially in jewelry. The light arrangement can either make your jewelry piece more beautiful and appealing or dull.
First, set the key light. The position is at the side of the jewelry at a 45-degree angle. It allows you to create depth and highlights detail more. Now use fill light to balance the overall lighting and fill shadows. Position it on the opposite side of the key light in a bit lower place. Lastly, set a backlight on the back of the jewelry to create more depth.
3. Prepare Your Jewelry
Preparing the jewelry before styling is necessary. A problematic piece can hide and distract its beauty and make trust issues for your customer.
First of all, cleaning the jewelry piece is a must. Removing any distracting things like dirt, fingerprints or smudges can affect the appearance. Use a fine cloth to wipe off. Then use a jewelry polishing agent on the metal surface and gemstones. It helps to remove any residue smudge and a glossy vibe. Then find any defect like damage, loose stone, broken or claps. Ensure all parts are well enough to be in the picture.
4. Style Your Jewelry
Styling your jewelry rightly is an important aspect to showcase the beauty of the jewelry piece. Thus you can achieve more attraction through it.
Before styling, make sure that the pieces are clean, polished, and free from any impurities. Think about the concept of massage you convey through jewelry. Then choose complementary elements like accessories, background elements, and props. These elements can complement or enhance jewelry. Make sure to balance between jewelry and symmetry. Pay attention to the composition so that size, shape, and colors can create enough balance. If you are taking multiple pieces of jewelry at once, try to make layers to make an interesting combination.
5. Set Your Camera
A camera’s angle, settings, and setup can affect the final result. Following some key steps can ensure a good camera setup for your jewelry.
Choosing the right camera is the first step to make a camera setup. Choose the camera manual controls and post-processing flexibility. Usually, DSLR or mirrorless cameras are preferable for their image quality. Then select a microlens. The lens can capture any fine details and tiny designs of the piece. Choose ISO to the lowest. Set the aperture at f/8 to get a larger depth. Make sure to adjust the white balance to control the humidity of the photo.
6. Take The Photo
After following every step, it’s time to take a picture. Make sure to double-check every step again. Now start clicking from various angles. Then re-style the jewelers in new ways. Try to change their position, and style differently or change the layers. Now keep changing camera settings and light setup. Trying new experiments can help you to get various versions of the same jewelry and find the best one.
7. Retouch And Finalize
After clicking pictures, it’s time to retouch and edit. The editing process is very important to eliminate any impurities and make the picture more attractive and appealing.
First, choose some best pictures which are good enough to upload. Then use masking to remove any cracking or smudges. Then adjust brightness, contrast, exposure, sharpness, and hue. The white balance would be necessary if you have to change to enhance the color of metal and gemstones.
Use a color corrector to eliminate any color-related issues. Thus make sure to adjust some color balance to You could either do it yourself or hire a photo retouching service provider for faster results.
Jewelry Photography Techniques
Below are the jewelry photography techniques you should learn.
How To Photograph Rings?
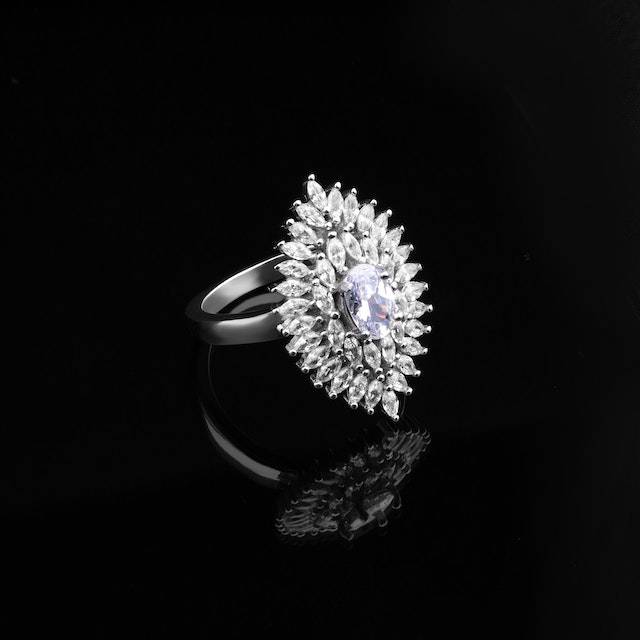
Photographing rings requires some special techniques. Thus, following some key techniques can make you achieve the best ring picture.
First, clean the ring. Use any microfiber and toothpick to remove dirt. Gather necessary equipment like a camera, microlens, tripod, and lighting. You can either place the ring on a table or any hand mannequin. Using a hand mannequin helps to showcase the real beauty and illusion of how it looks on actual hands. Then take various shots to find the best one. Lastly, follow post-processing techniques. Make sure to adjust color, contrast, and saturation and use retouching techniques.
How To Photograph Necklaces?
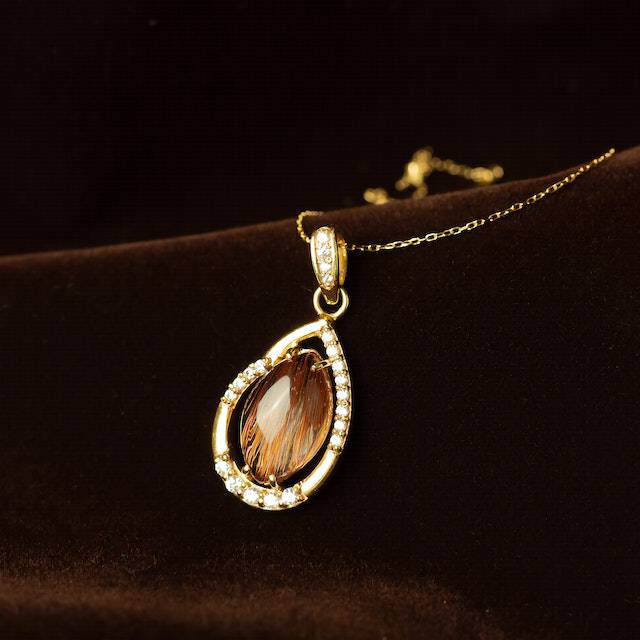
Necklaces are pieces of jewelry worn on the neck. It includes a caching string to hold on to the neck. It has various styles, lengths, and designs to achieve different preferences. Clicking jewelry pieces requires some key techniques.
First, prepare the neckpiece. Clean and polish the piece with polishing agents. Then arrange every necessary piece of equipment. Then set the table with a flowering background. It will help show off the beauty more. Use a neck mannequin to show how it will look on the real neck. Either if the budget is high, you can hire a model. Try to set the camera to 100 to 200 ISO. It will help to add more depth to the picture. Also if you are making any story then try balancing composition between jewelry and cemetery.
How To Photograph Earrings?
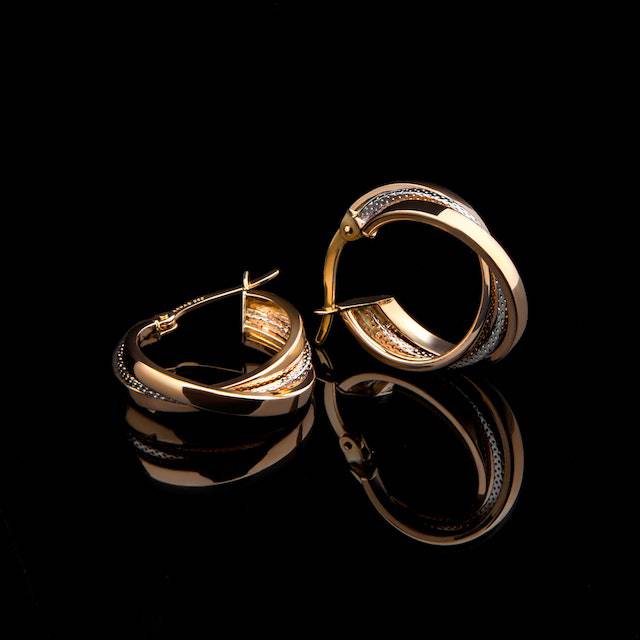
Earrings are the jewelry pieces worn on the ear. The beautiful pieces are attached to the earlobe or other parts of the ear. It can be made with various materials like gold, platinum, or with different types of gemstones.
First, clean the earring carefully. Then use a toothpick to remove dirt from small sides. Then polish with polishing agents. Make sure that the piece is defect free. Then gather all the elements like the camera, tripod, and lights. Set all the equipment according to the steps. They decorate the table wall with decorative elements. Or use an ear mannequin or hand mannequin. It will showcase the beauty in the ear. Take various shots from various angles and styles.
How To Photograph Bracelets?
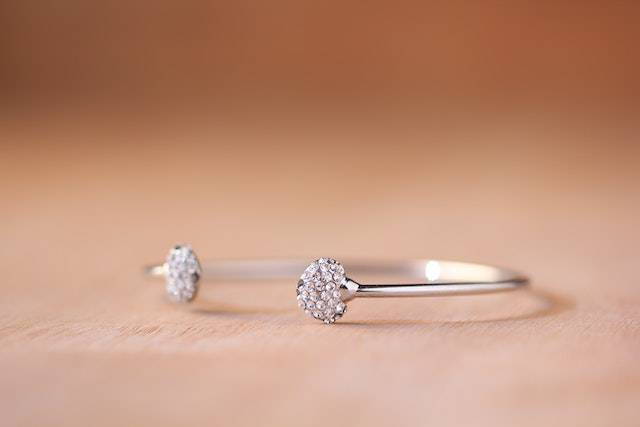
Bracelets are jewelry pieces that are worn on the wrist. It is a decorative accessory that is made from various elements and designs. Clicking the picture of bracelets is very similar.
First, clean and polish the piece. Then gather all the elements. Set the table with plain clothes. Bracelets must focus more on them. Set the lighting and camera then click pictures from various ways. Then get a hand mannequin to set the piece. Try to place various bracelets on the mannequin at the same time. It will look more gorgeous on hand.
Conclusion
Product photography has become a crucial aspect of the e-commerce world. The valuable aspect can help you in the jewelry business also. You can promote your jewelry design and ideas to people through pictures.
Thus it has become a big marketing strategy all over the world. You can be benefited in tons of ways through photography in your jewelry business. Now that’s your responsibility to learn more about it and be benefited.